Build Out: Week 20
Ceiling Trim, Curtains, Bookshelf, etc.

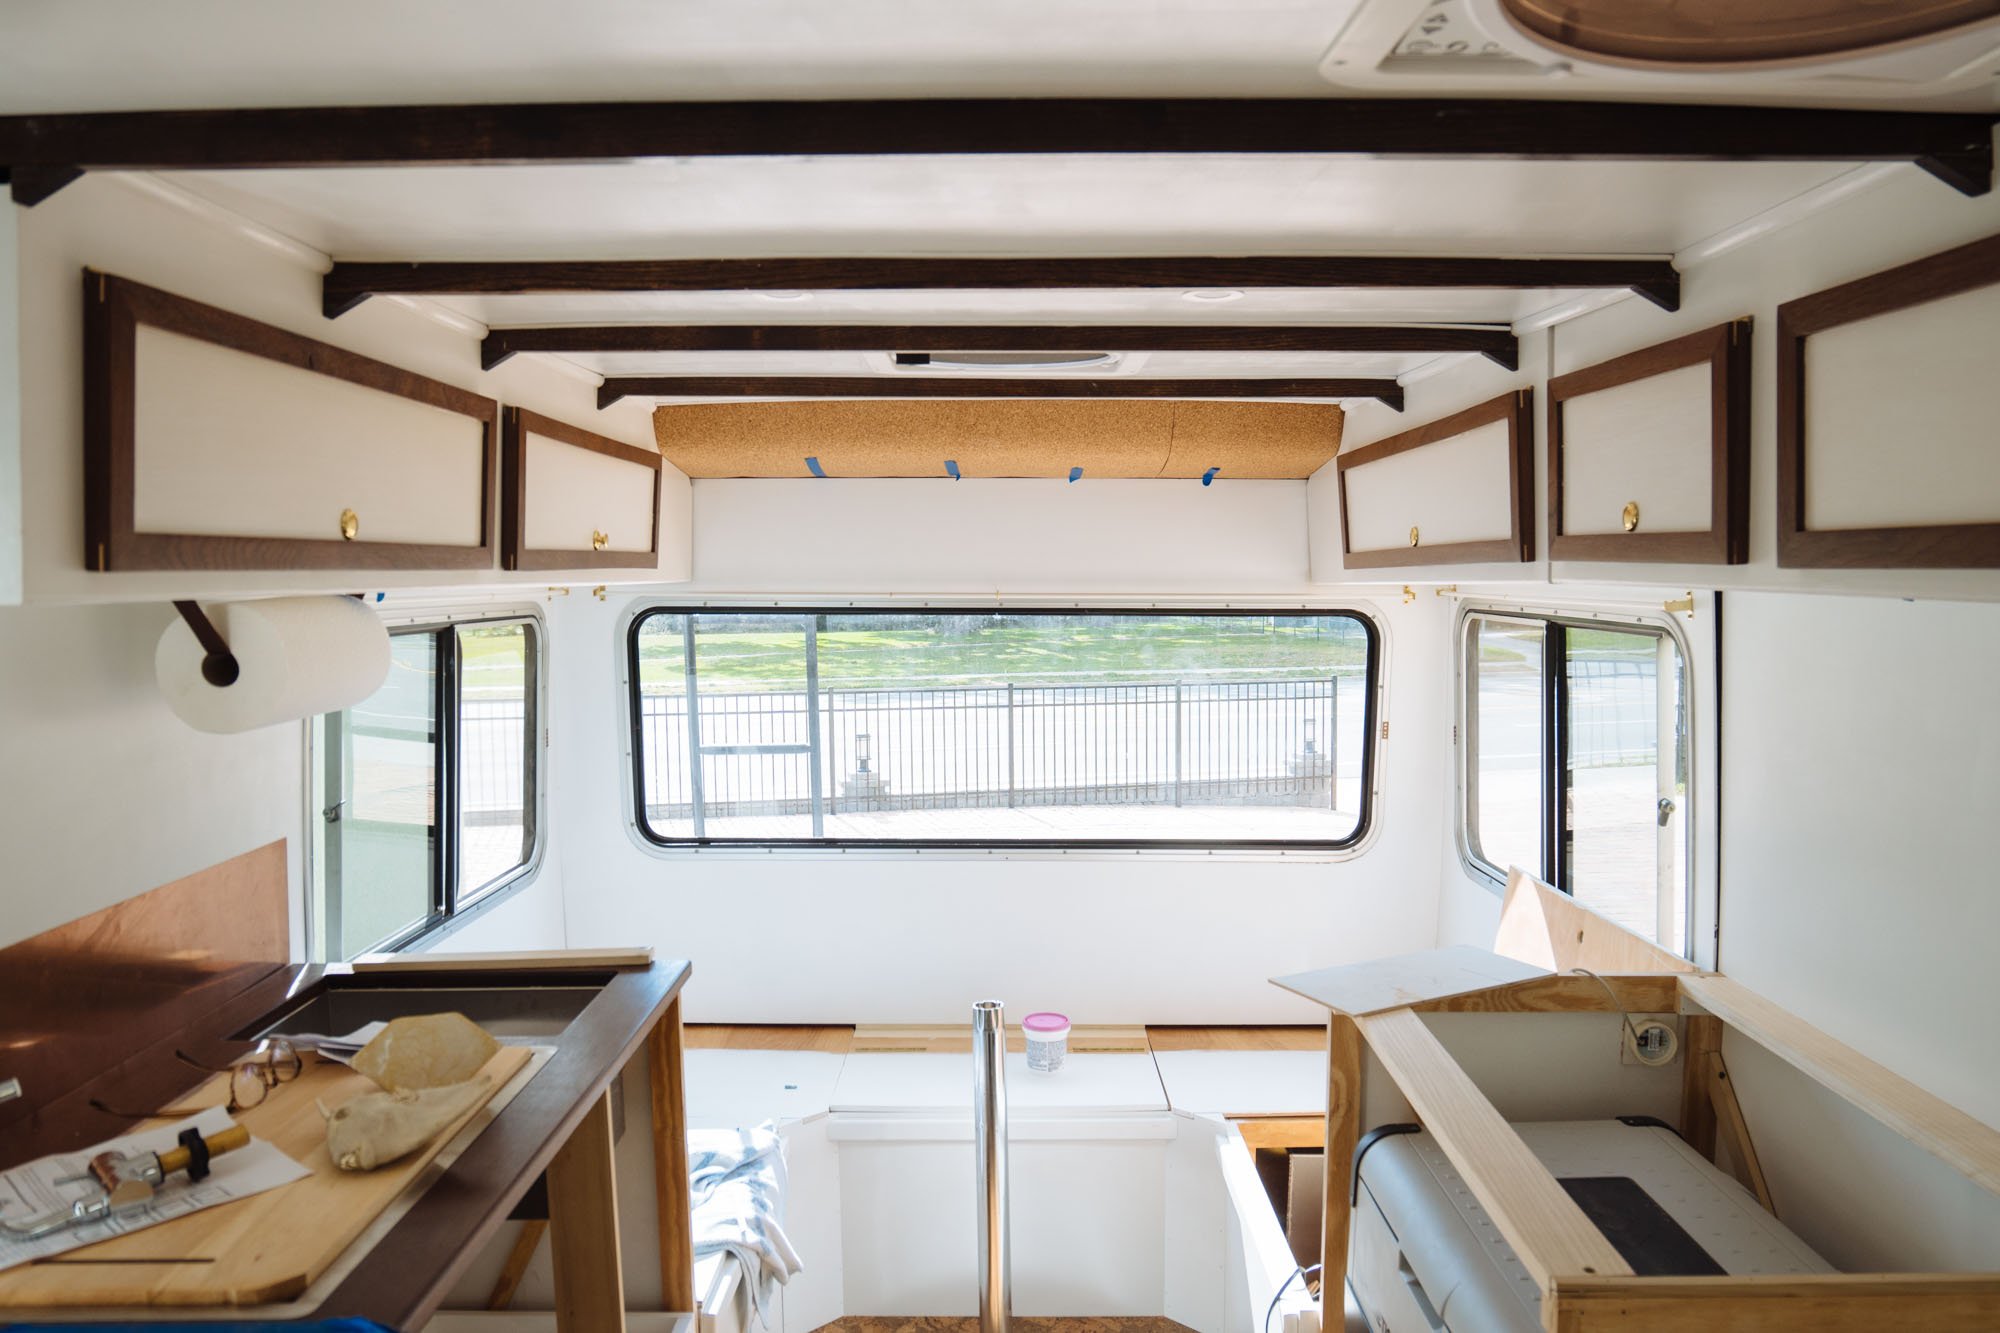
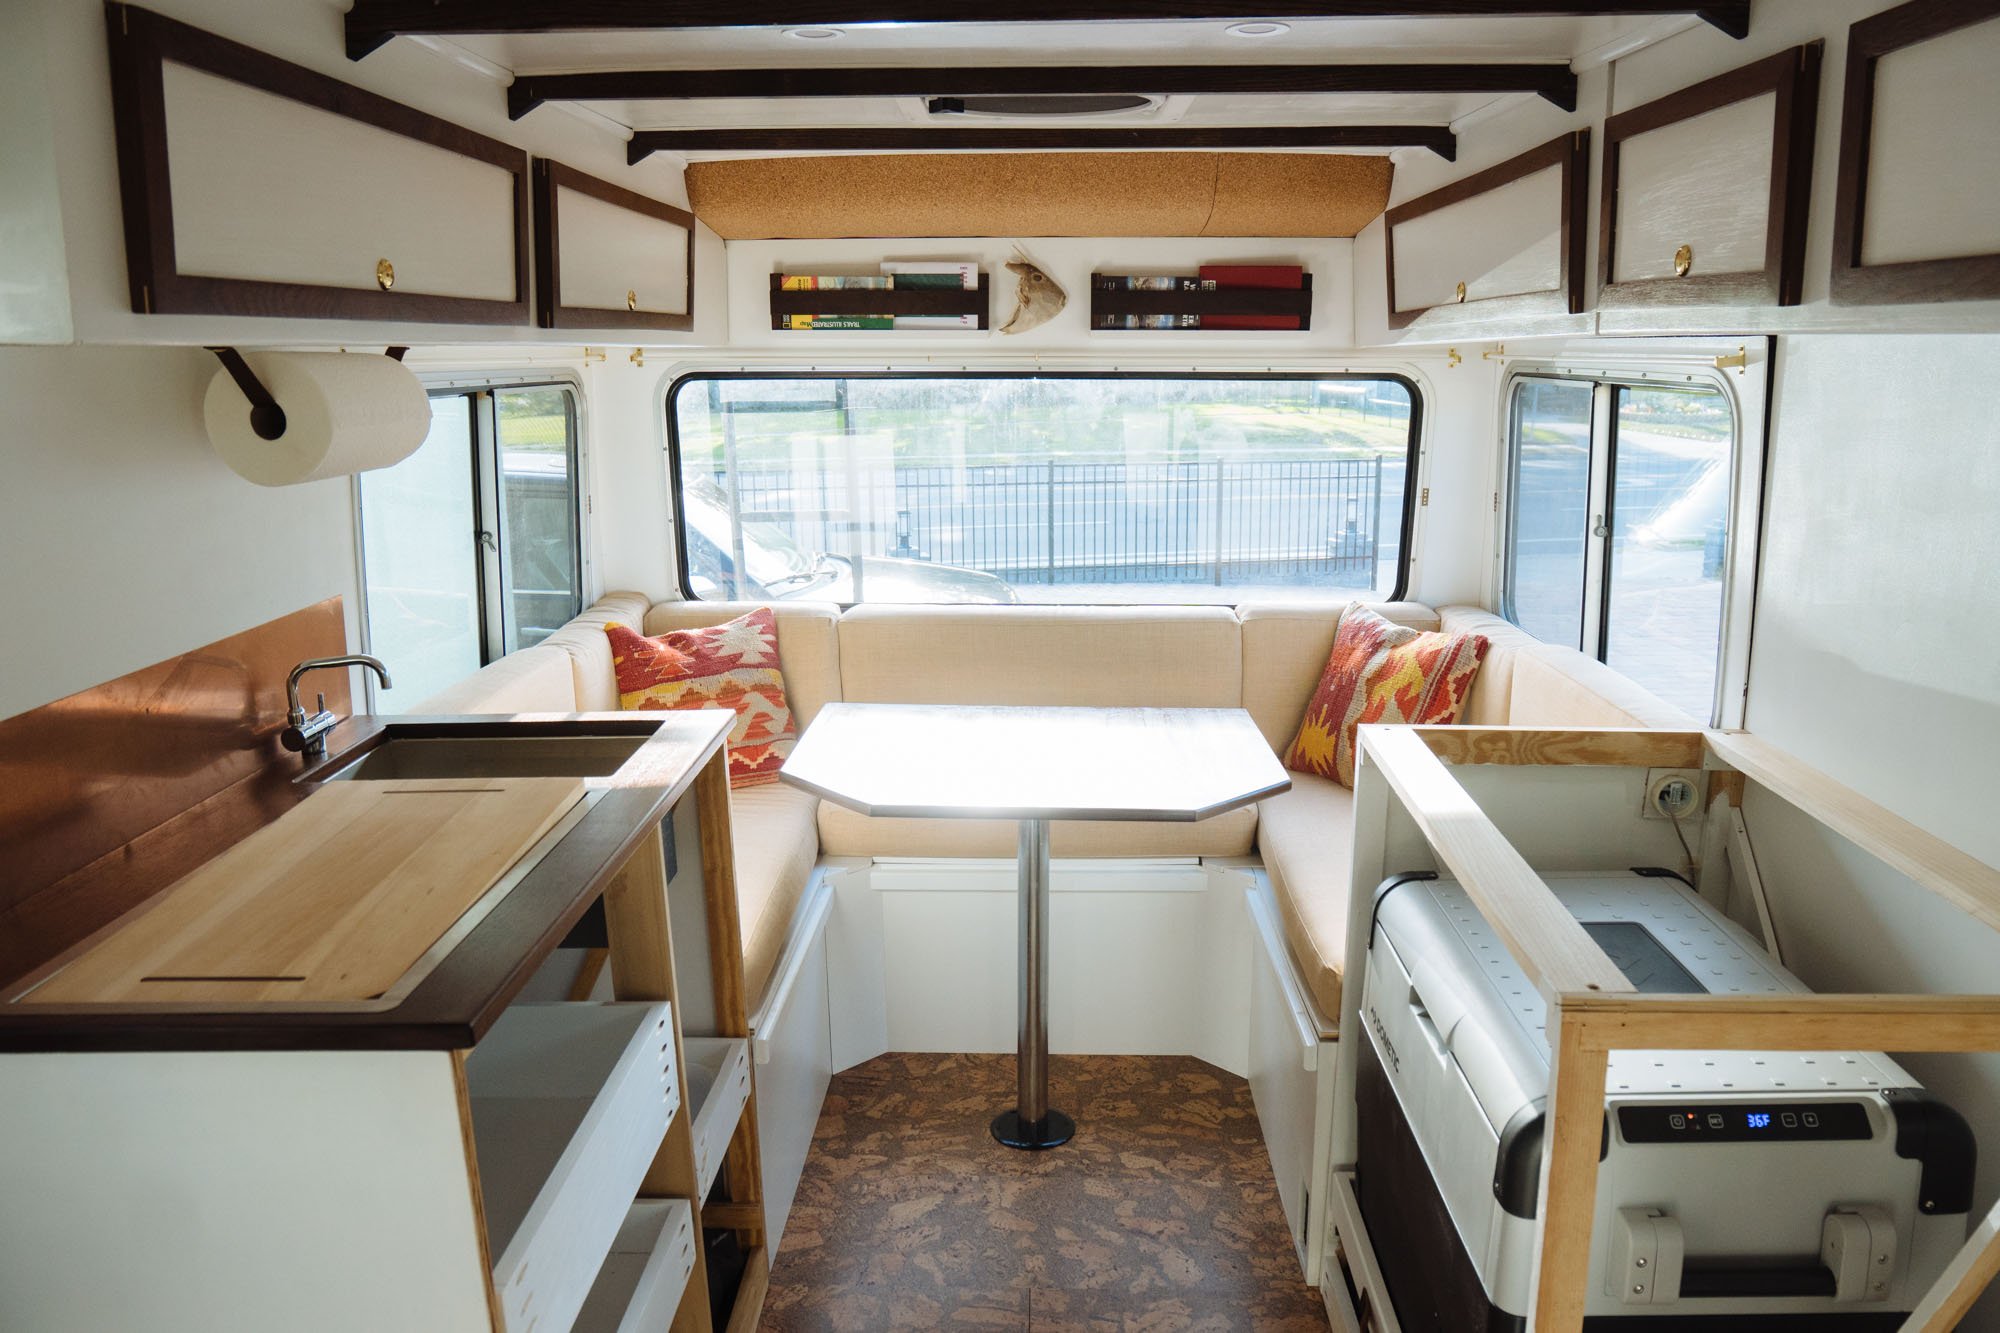
Even though most of our work is being done on the inside of Amelia, we never get bored of this view. To say that we're excited to be done with this build is a huge understatement. This last bit of work that we're trying to churn through is all seemingly so small, but absolutely necessary to arrive at the final product. Such as adding trim pieces to all of our ceiling panels.

I ended up using two different types of trim in Amelia. The quarter round was used to cover gaps between the ceiling and the top cabinets. We went with the quarter round in those areas because they had larger gaps to cover. For everything else I used the little flat rectangular pieces that you see above. Those I made from extra pieces of wood from the ceiling panels.
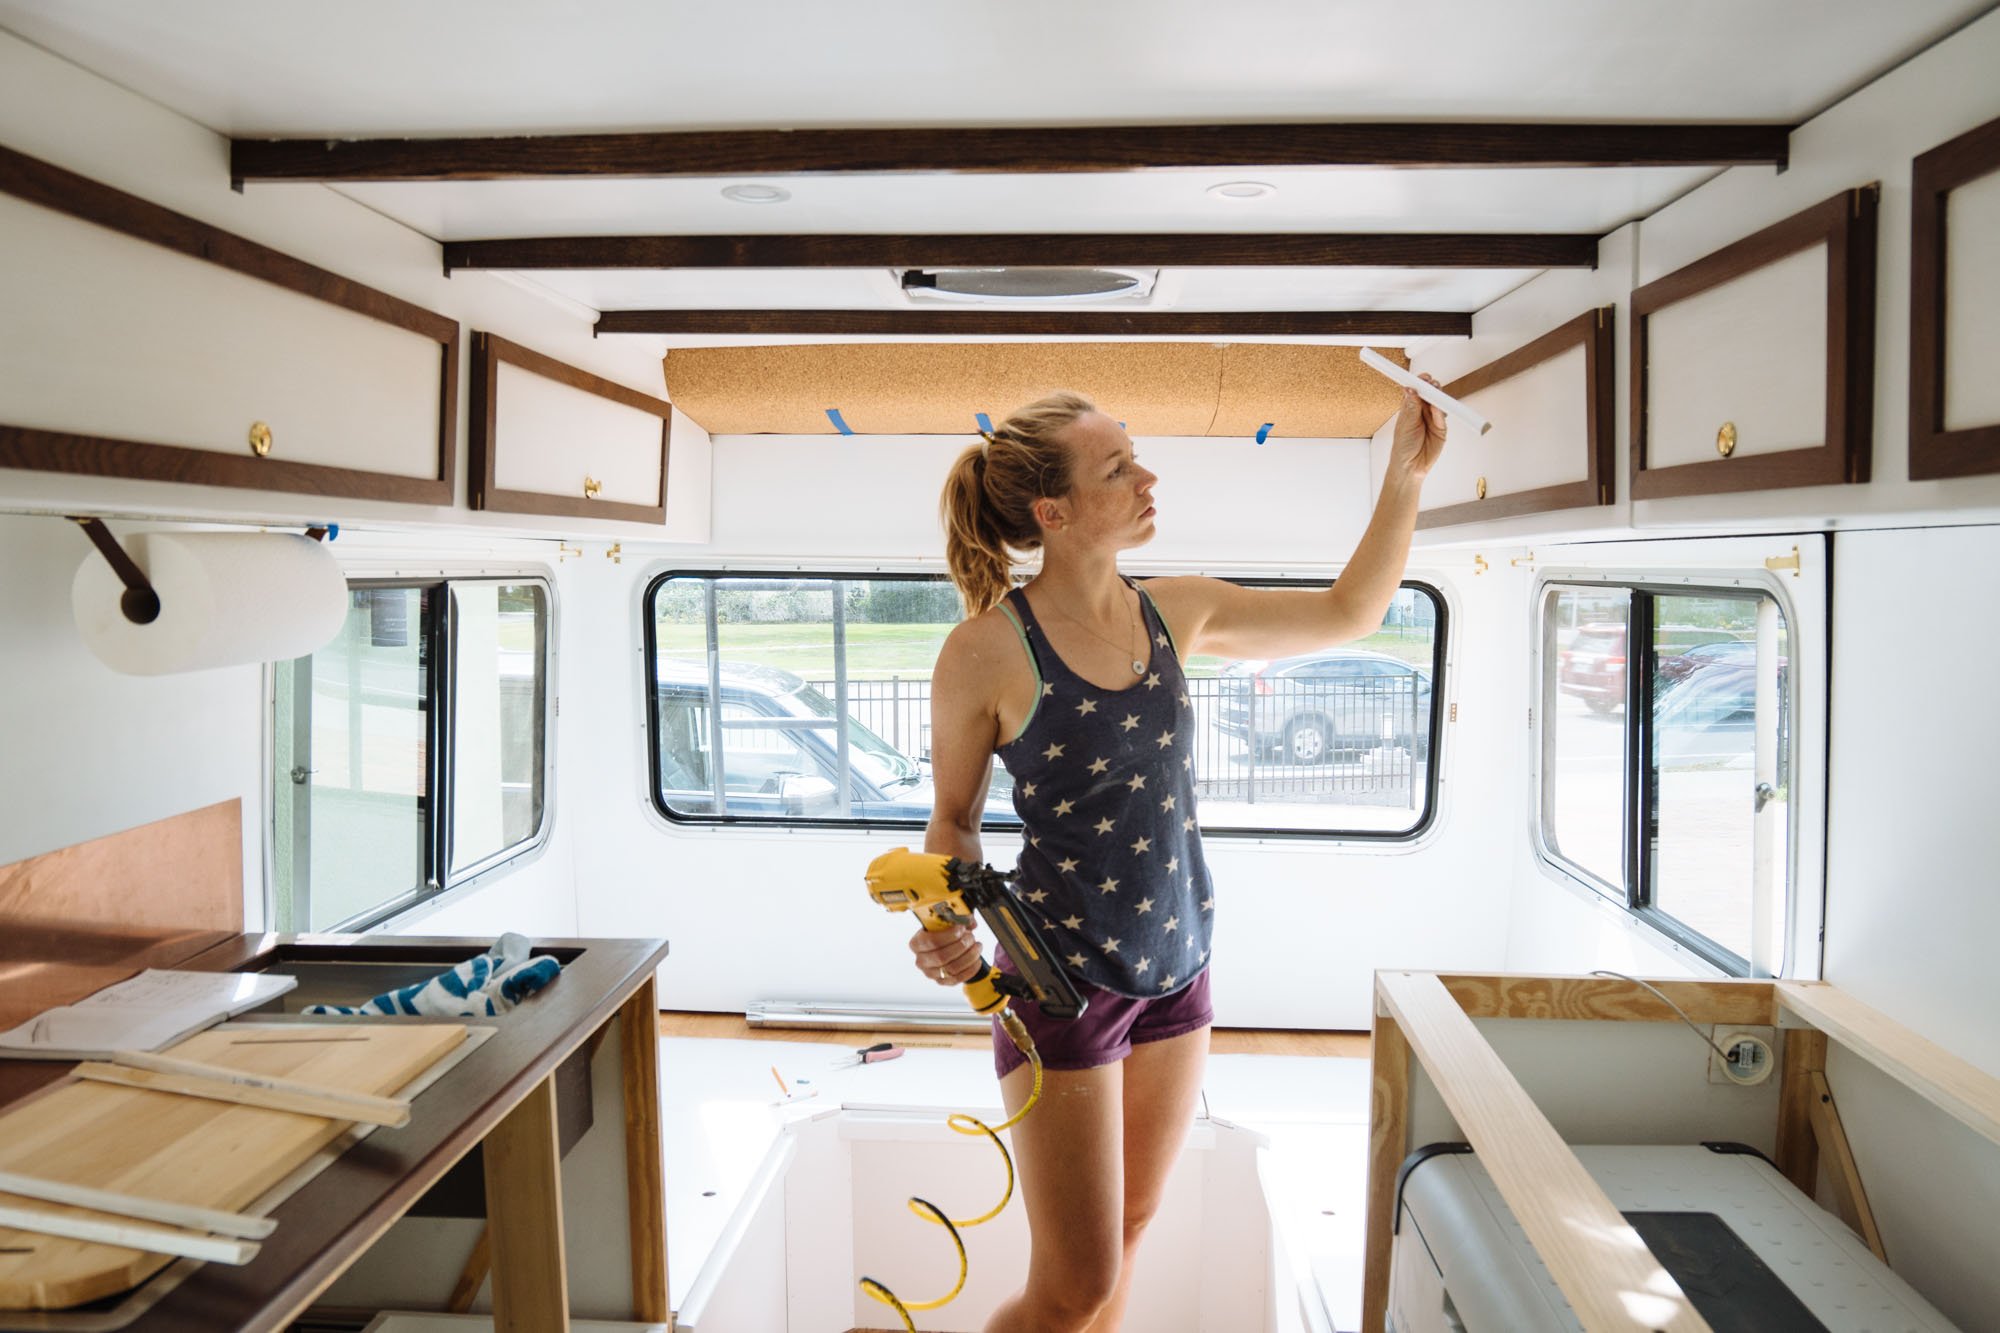
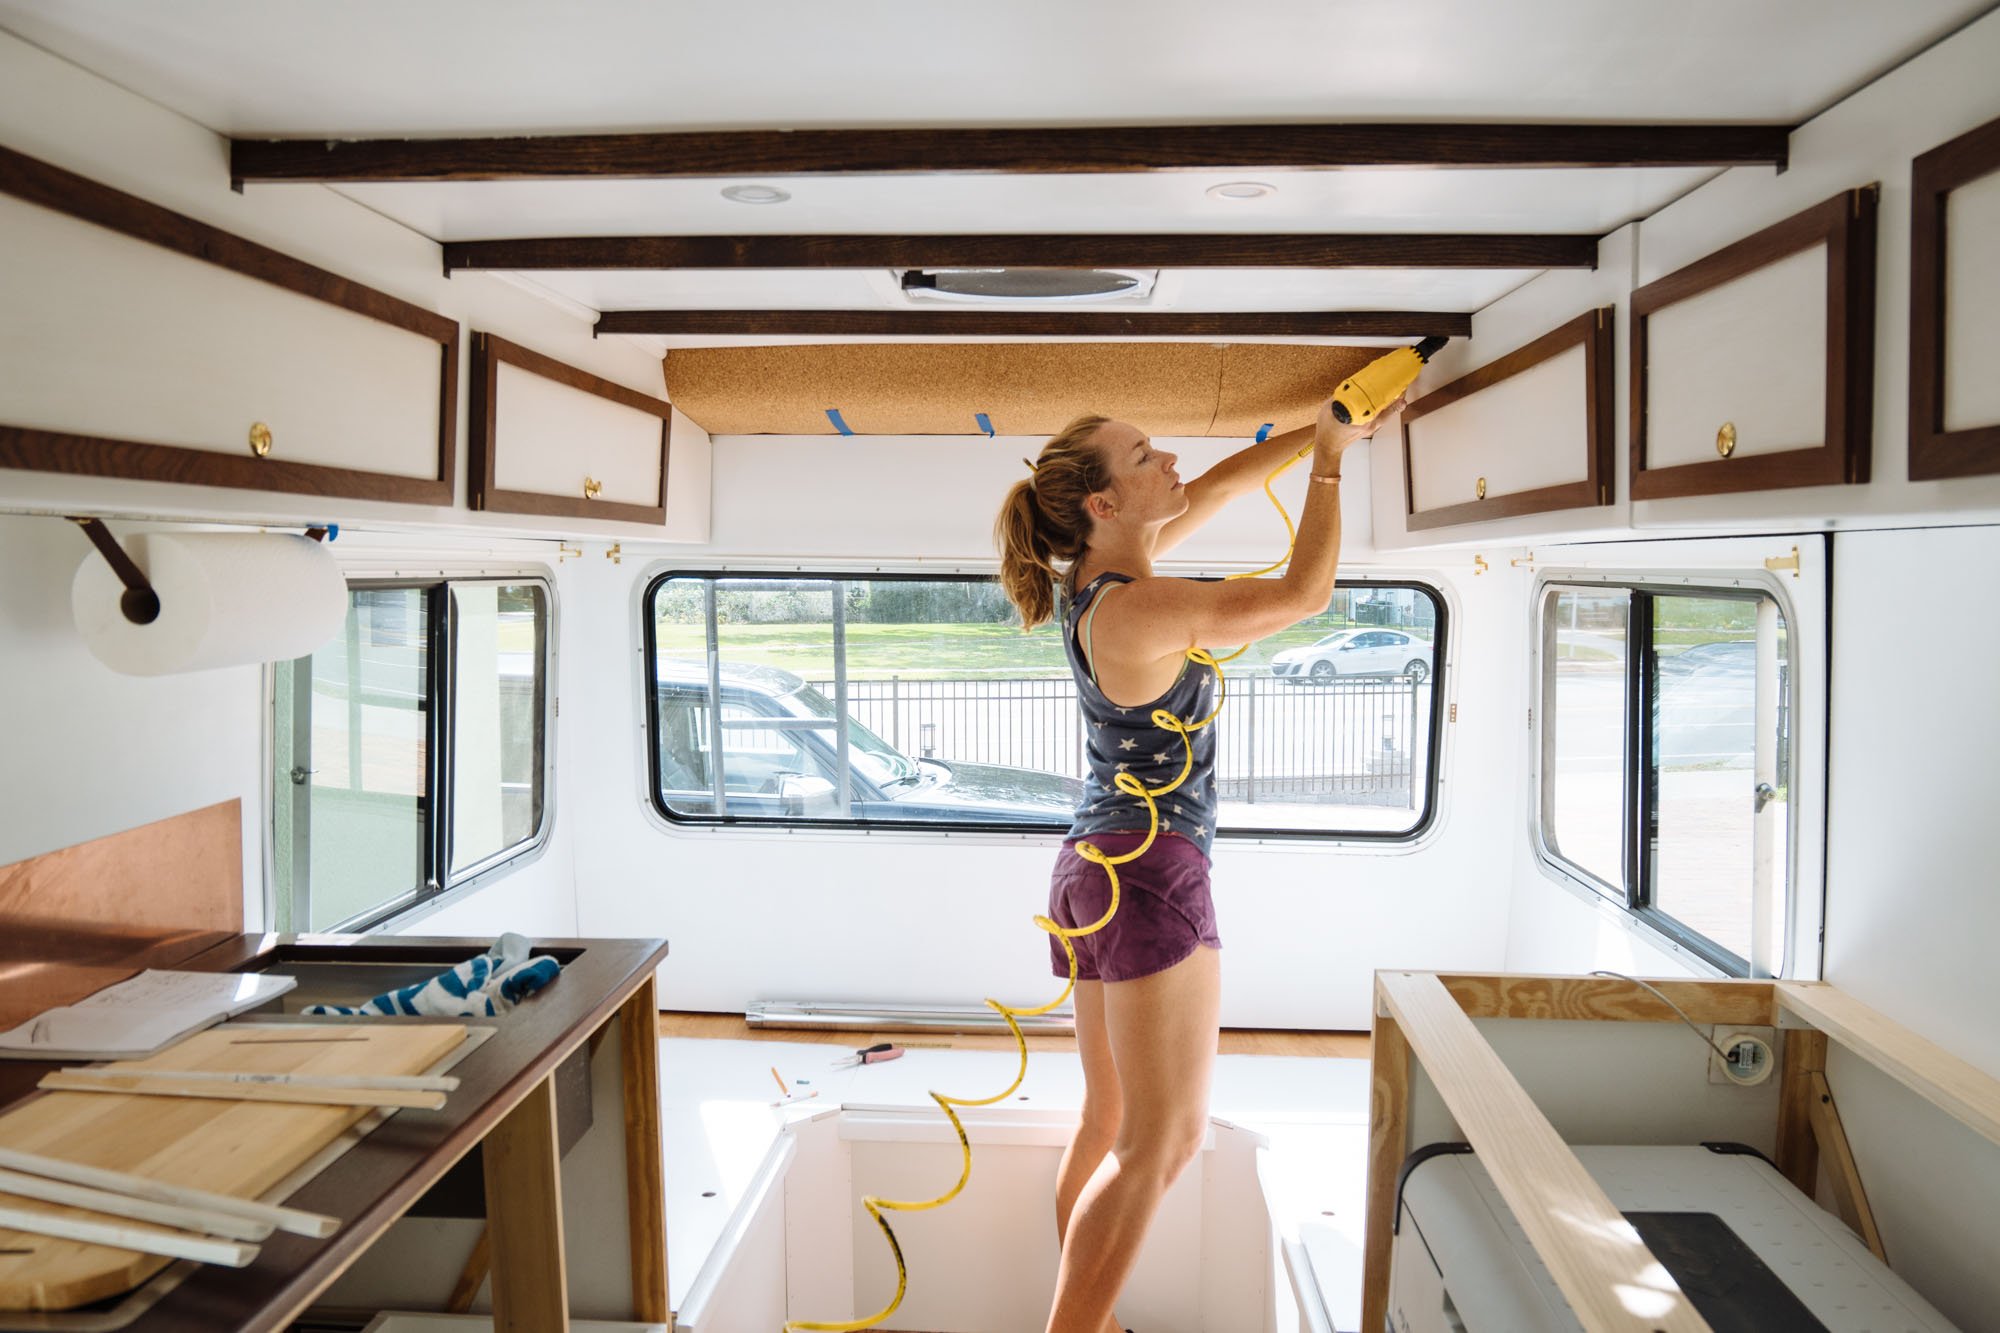

It might not look like much but these little pieces of trim make a huge difference in the over all appearance of "completion" to the inside. After I had all of the white trim installed I directed my focus to the gaps under the cross supports/rafters.

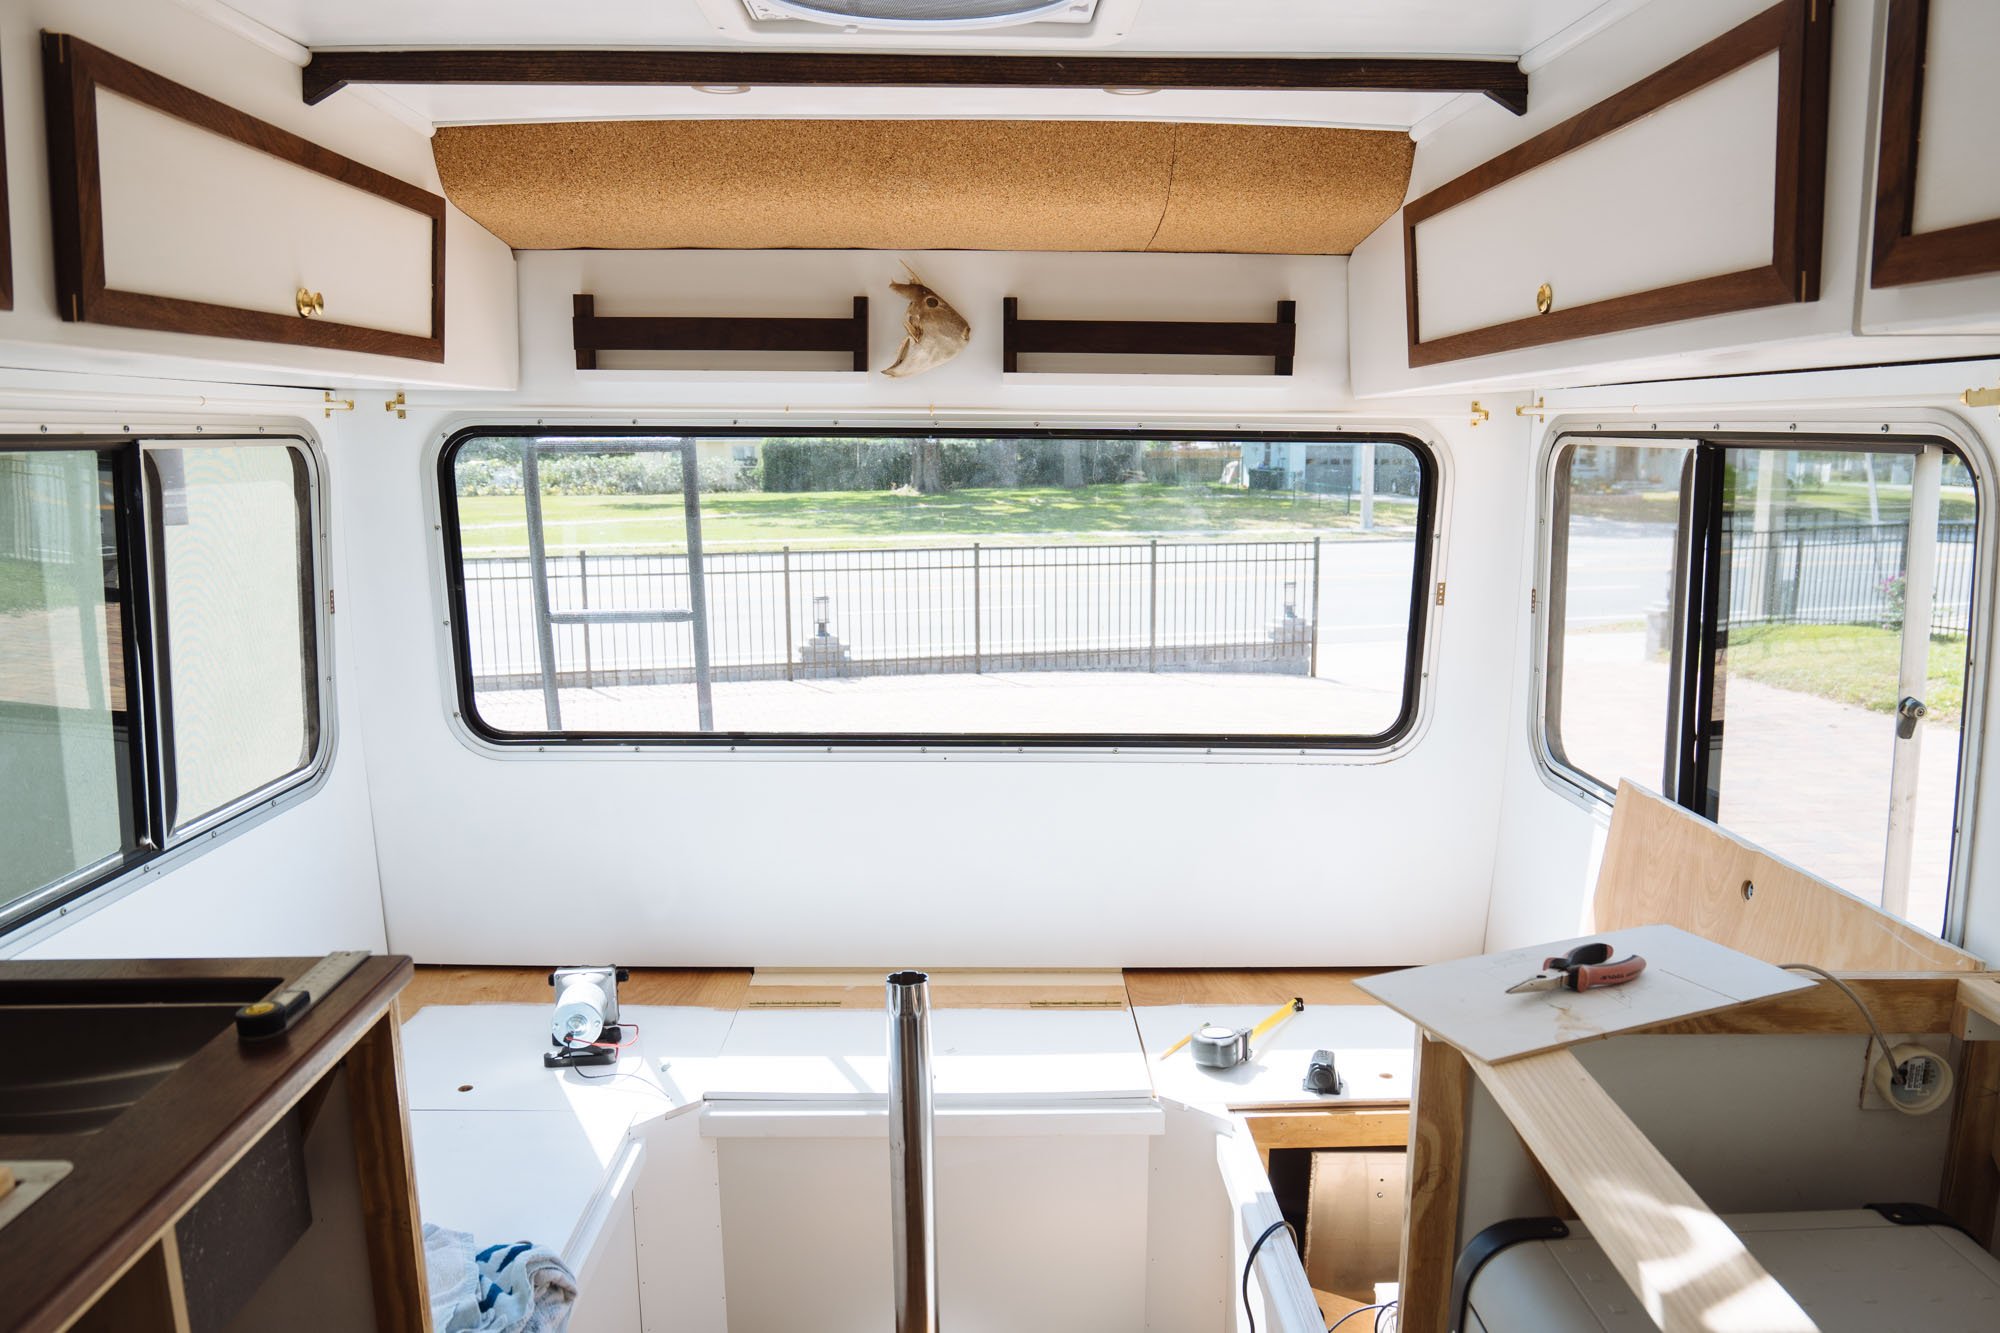
Before I ever really had a chance to think about what I was going to do about those spots, someone on Instagram suggested these little triangles to cover the gaps. That way they'd give the coverage we need while adding some visual interest to the cross supports! I knew immediatly that it was what we needed to do!
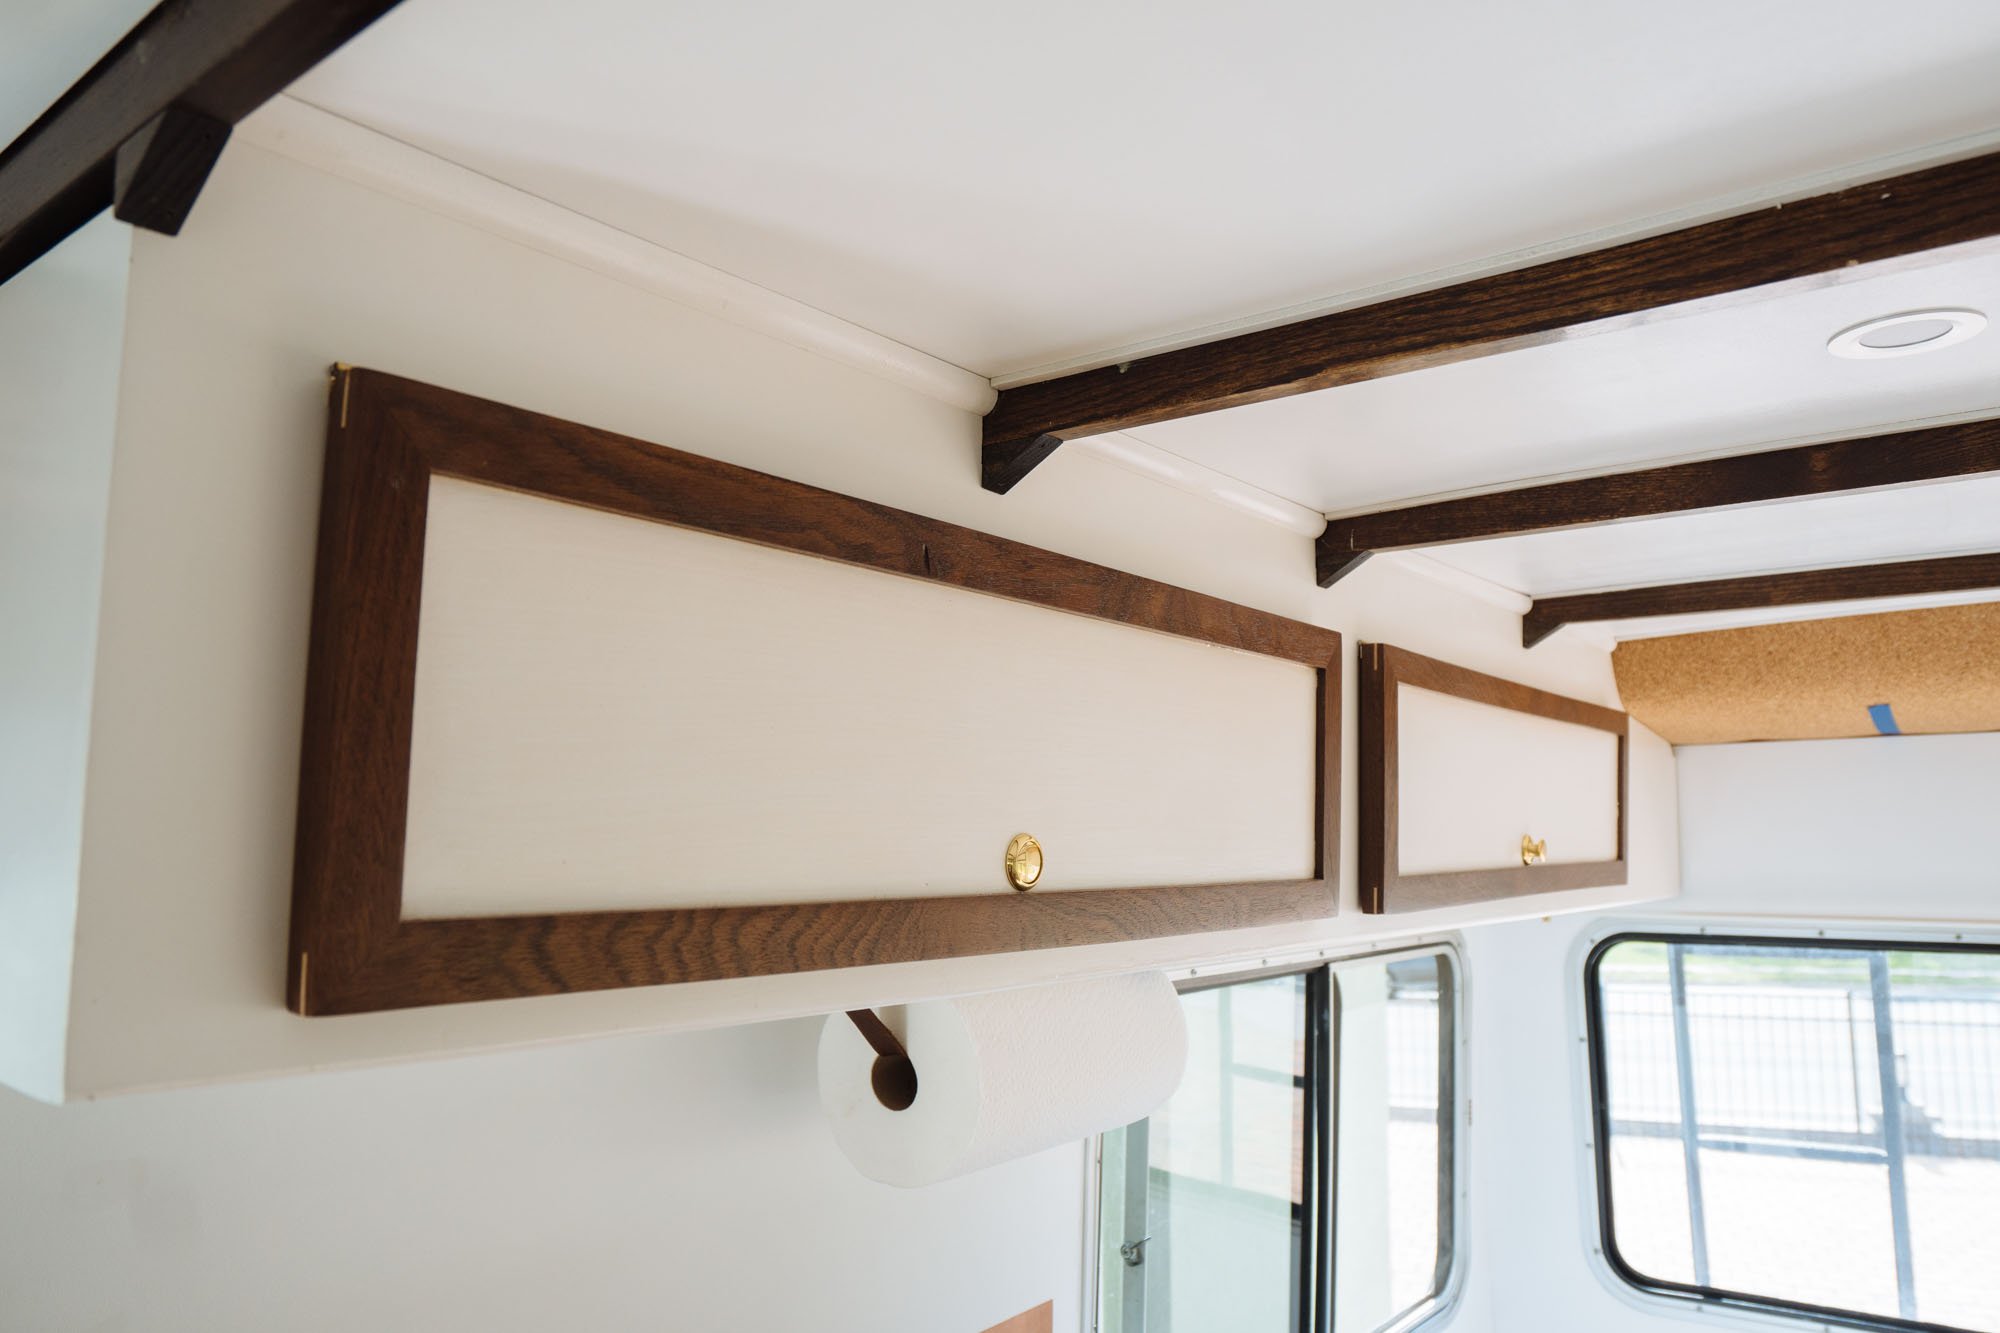
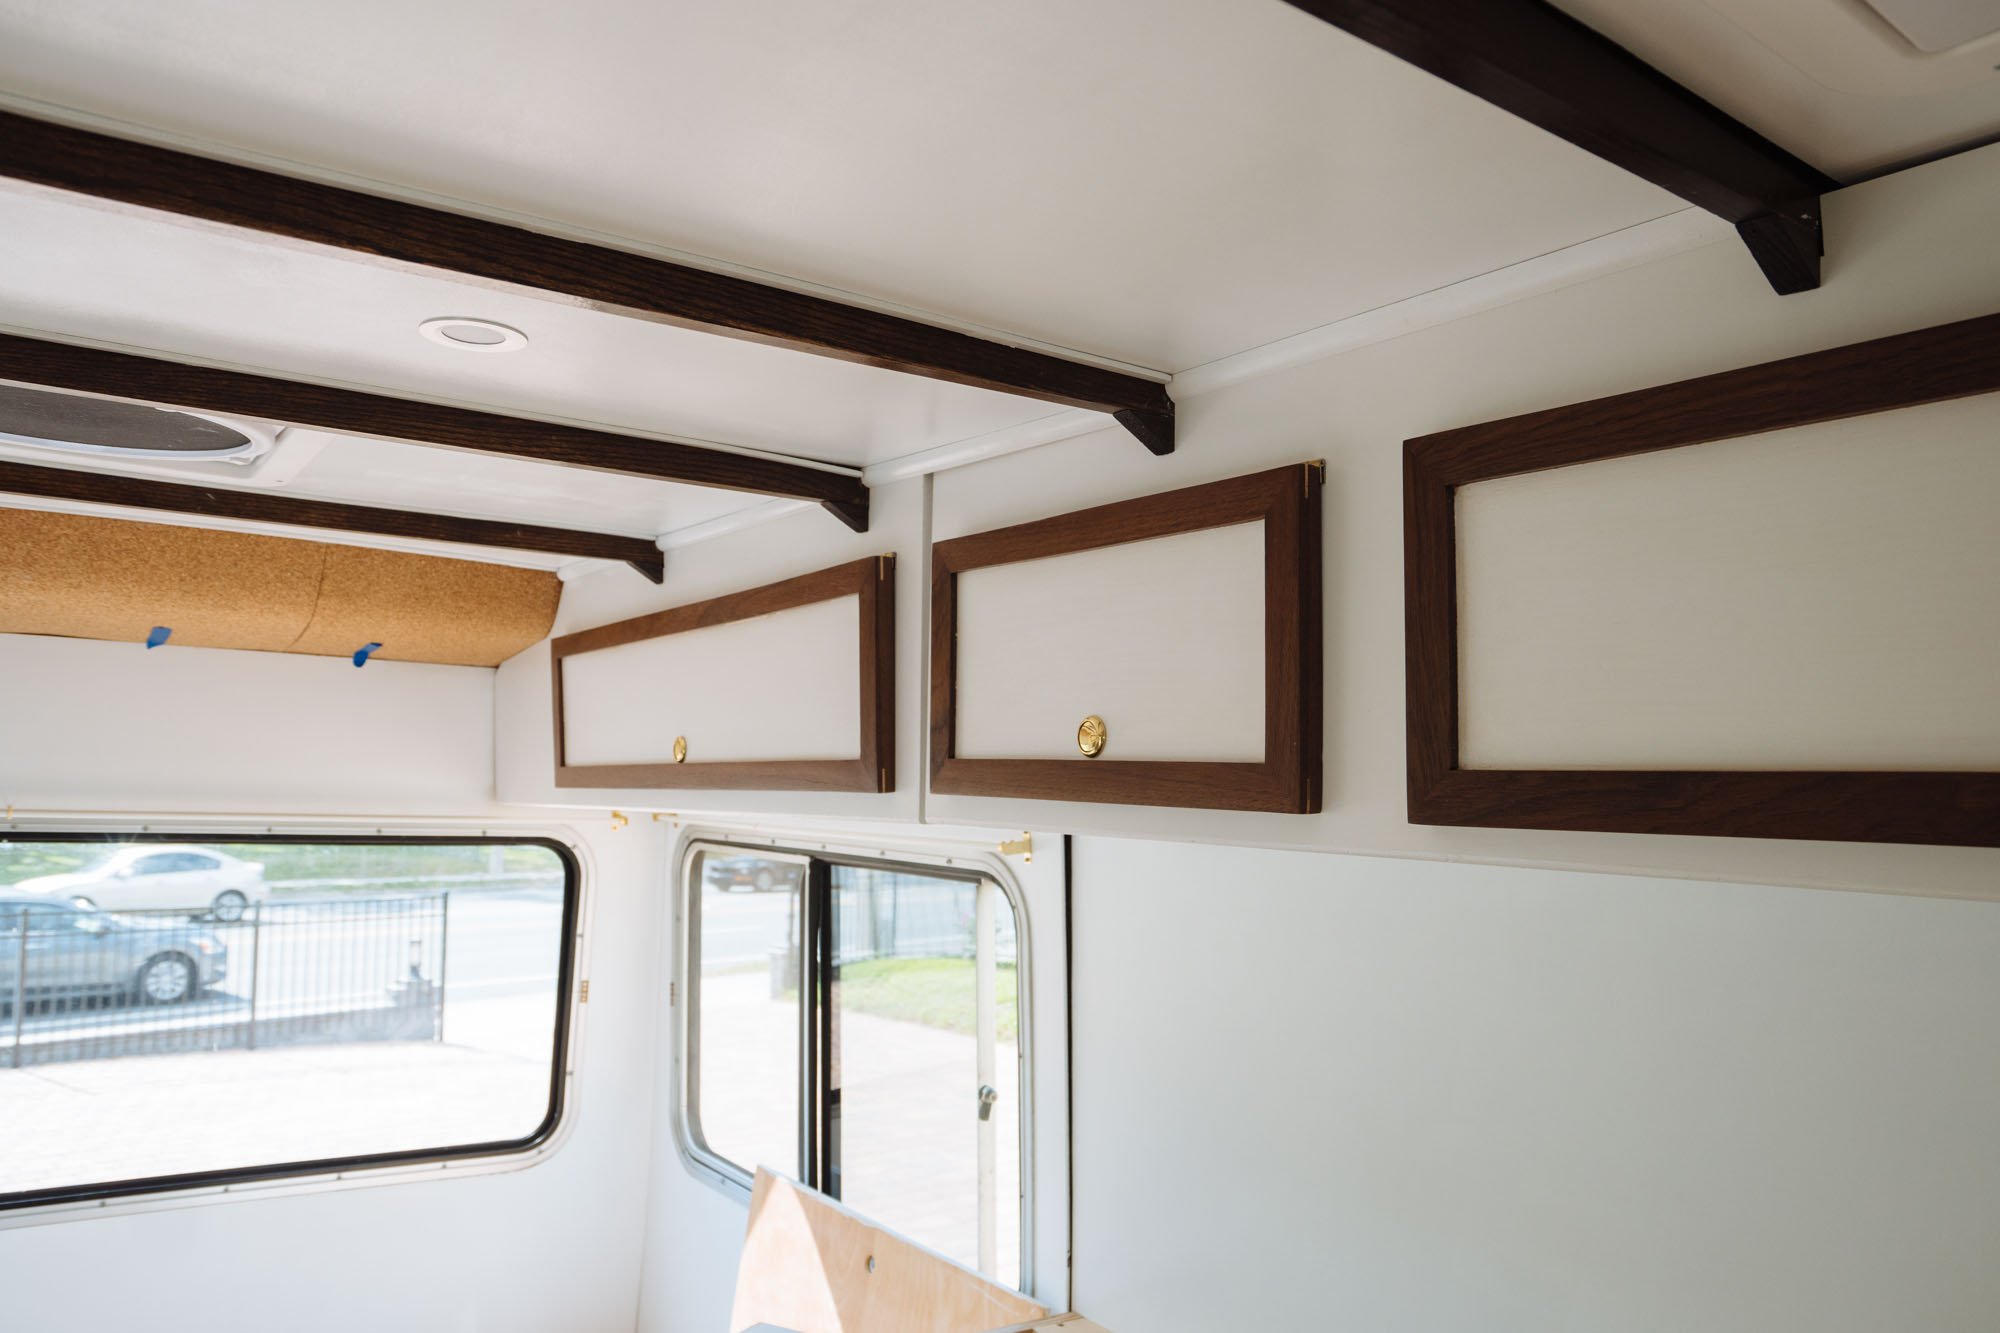
See? That looks pretty nice right!? I wish I remembered who gave us the suggestion because I want to thank them by name, but alas, I can't remember. So if you read this, and you suggested it, we're forever thankful!

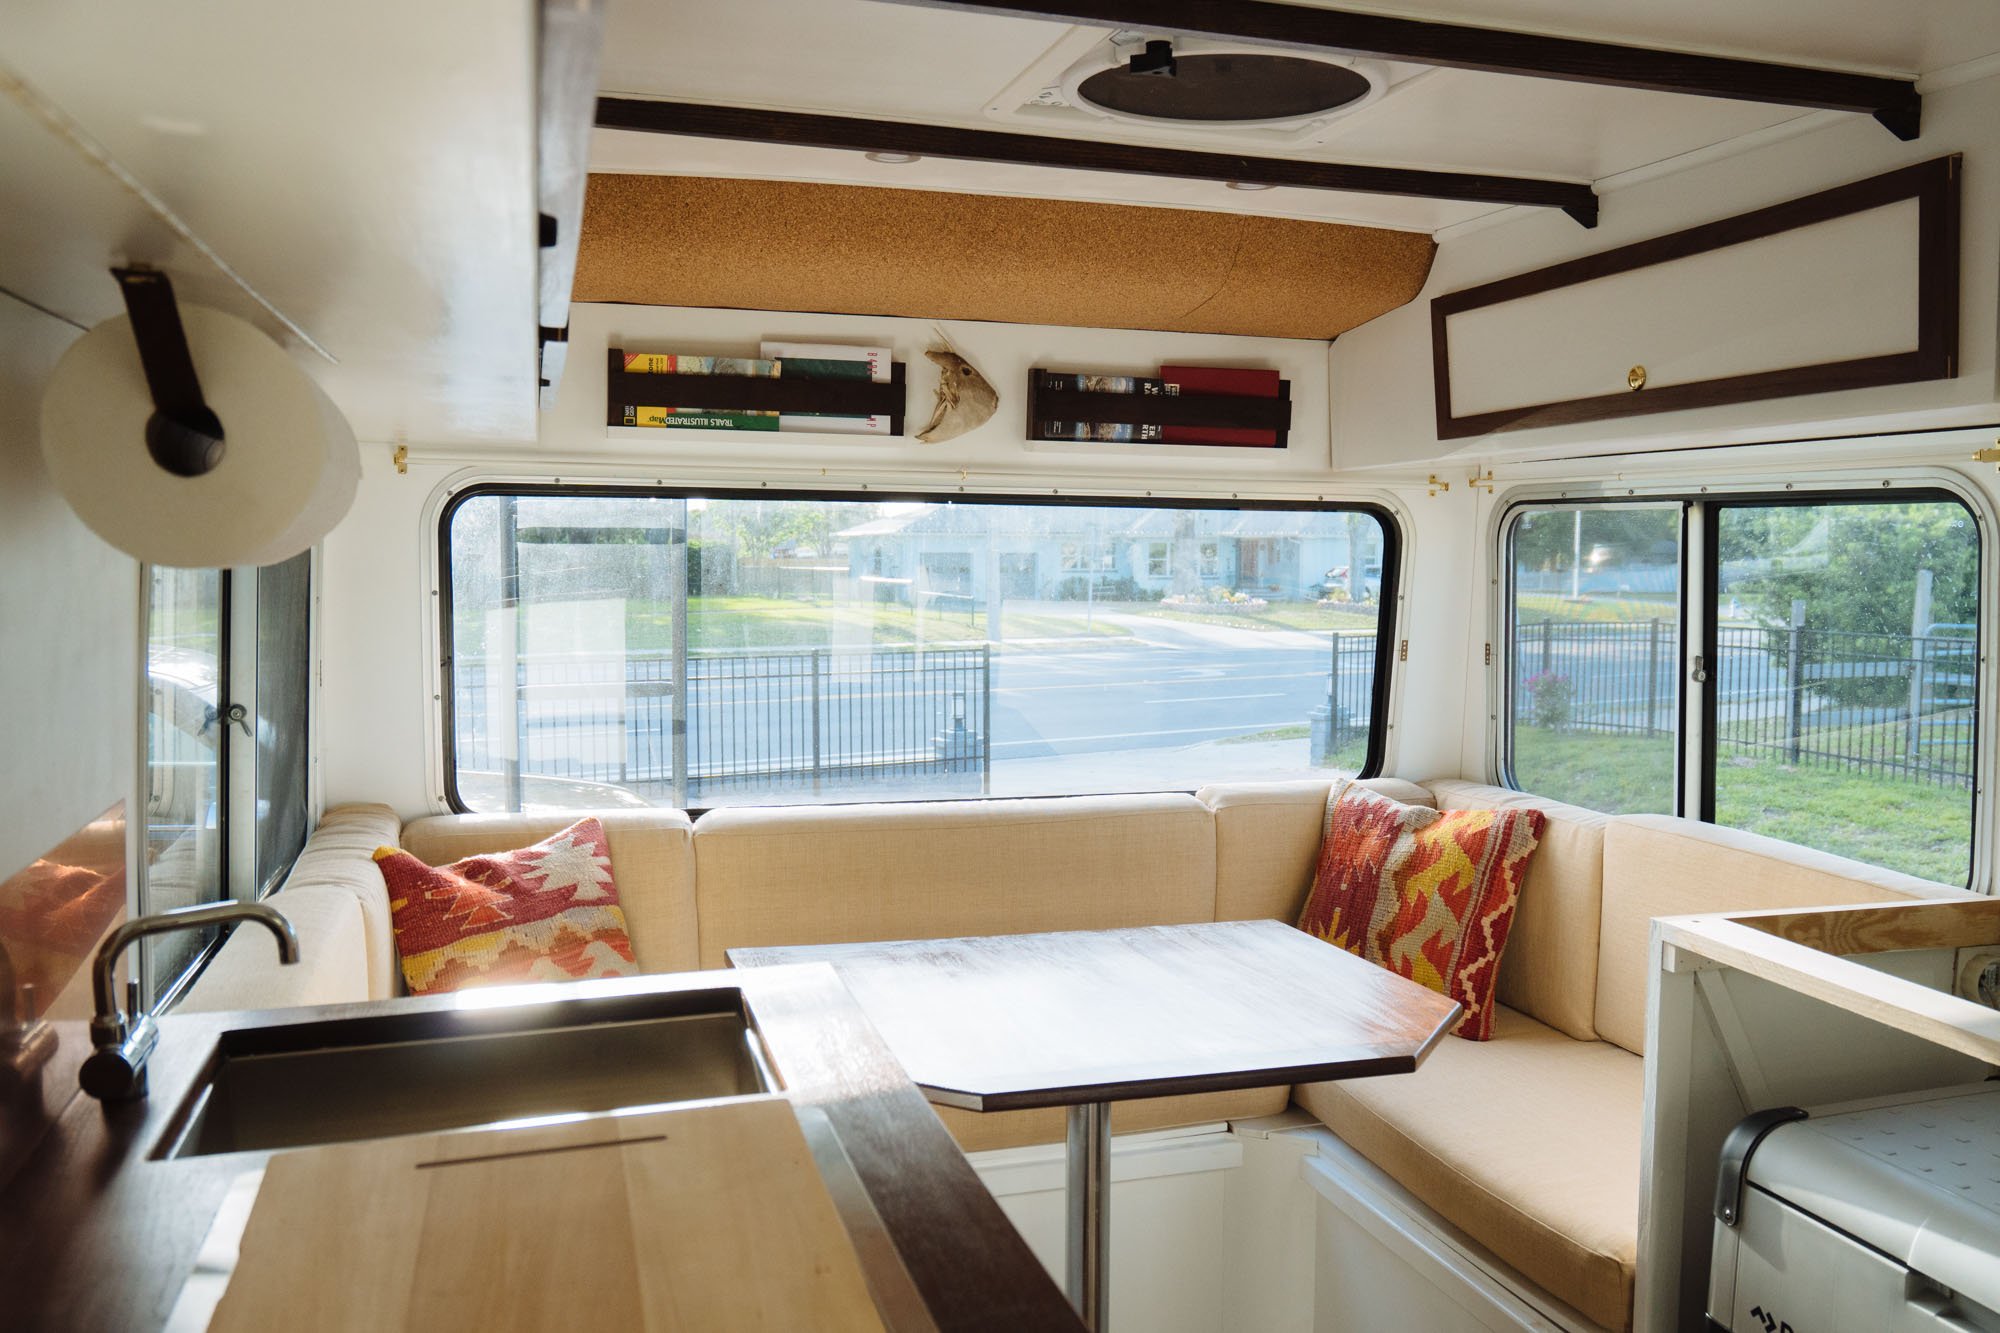
Our favorite thing that we did in Stanley was build a little bookshelf for our climbing guides and trail maps. We knew from the start that we wanted to do the same in Amelia. This week felt like the right time to make it happen!

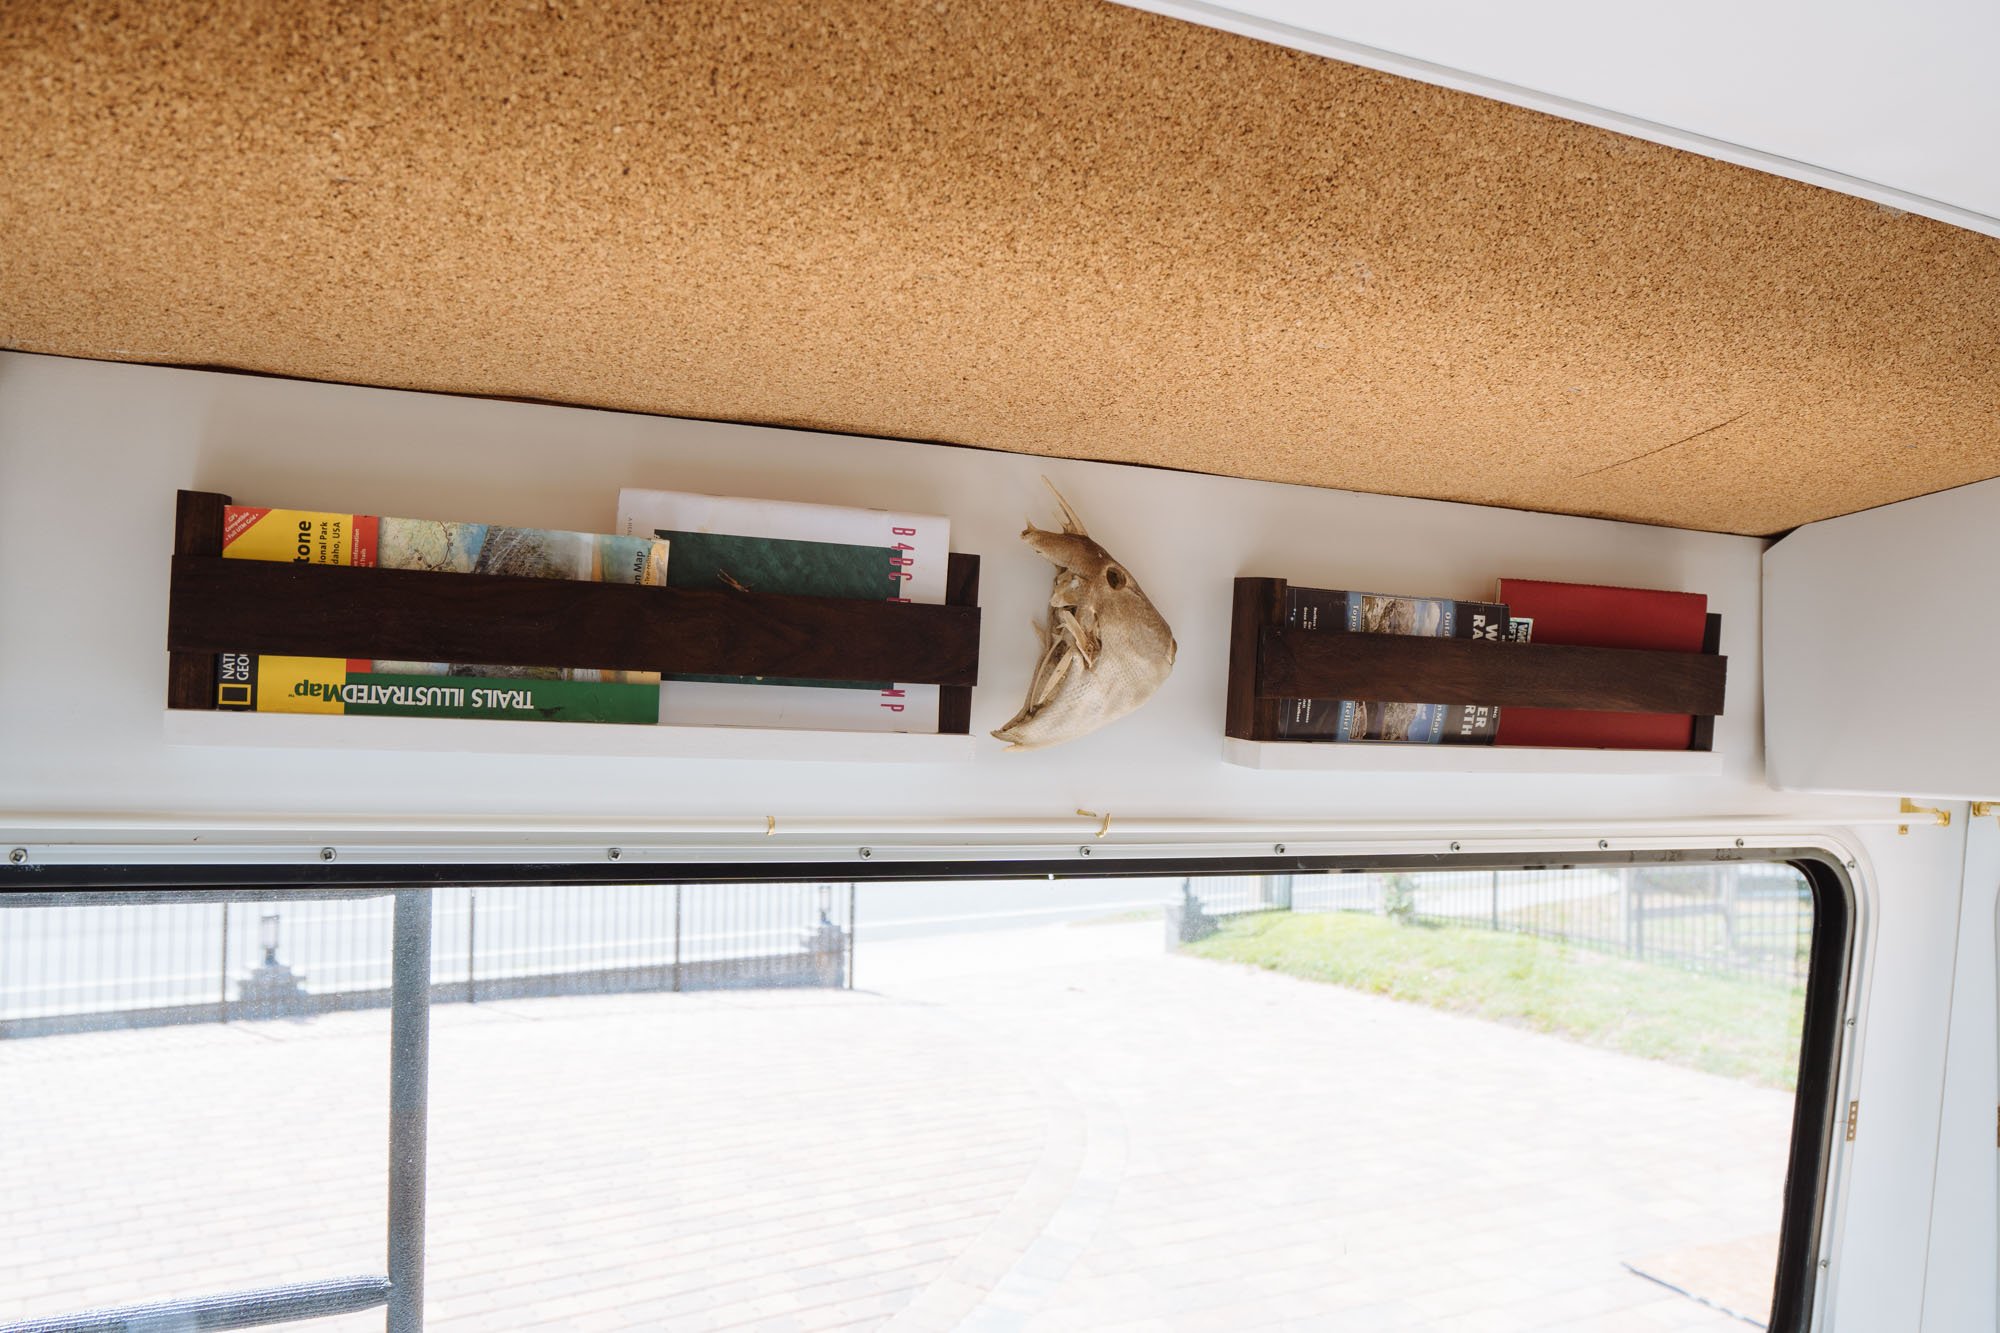

The ceiling above the book shelf was a little limiting in what we thought we'd be able to fit in the shelf, so the over all design is simple because it will not be super load bearing. We love the look of these low key shelves and they look great with our lil books in them!
On a somewhat unrelated note, I designed these key tags about a month ago. I made them because I wanted a new key chain for Amelia...but the production minimums were 100. So I ordered 99 extras and received #1-100! When I posted them up for sale here on the site they sold out in 3 days! I was completely blown away by how much people liked them!
The image above is a link to the new batch of tags that just arrived (#101-200)! It's so cool to think that there are now people all over the world with this little tag on their keys to match ours! I hope to reunite with every single tag we sell! Enjoy!
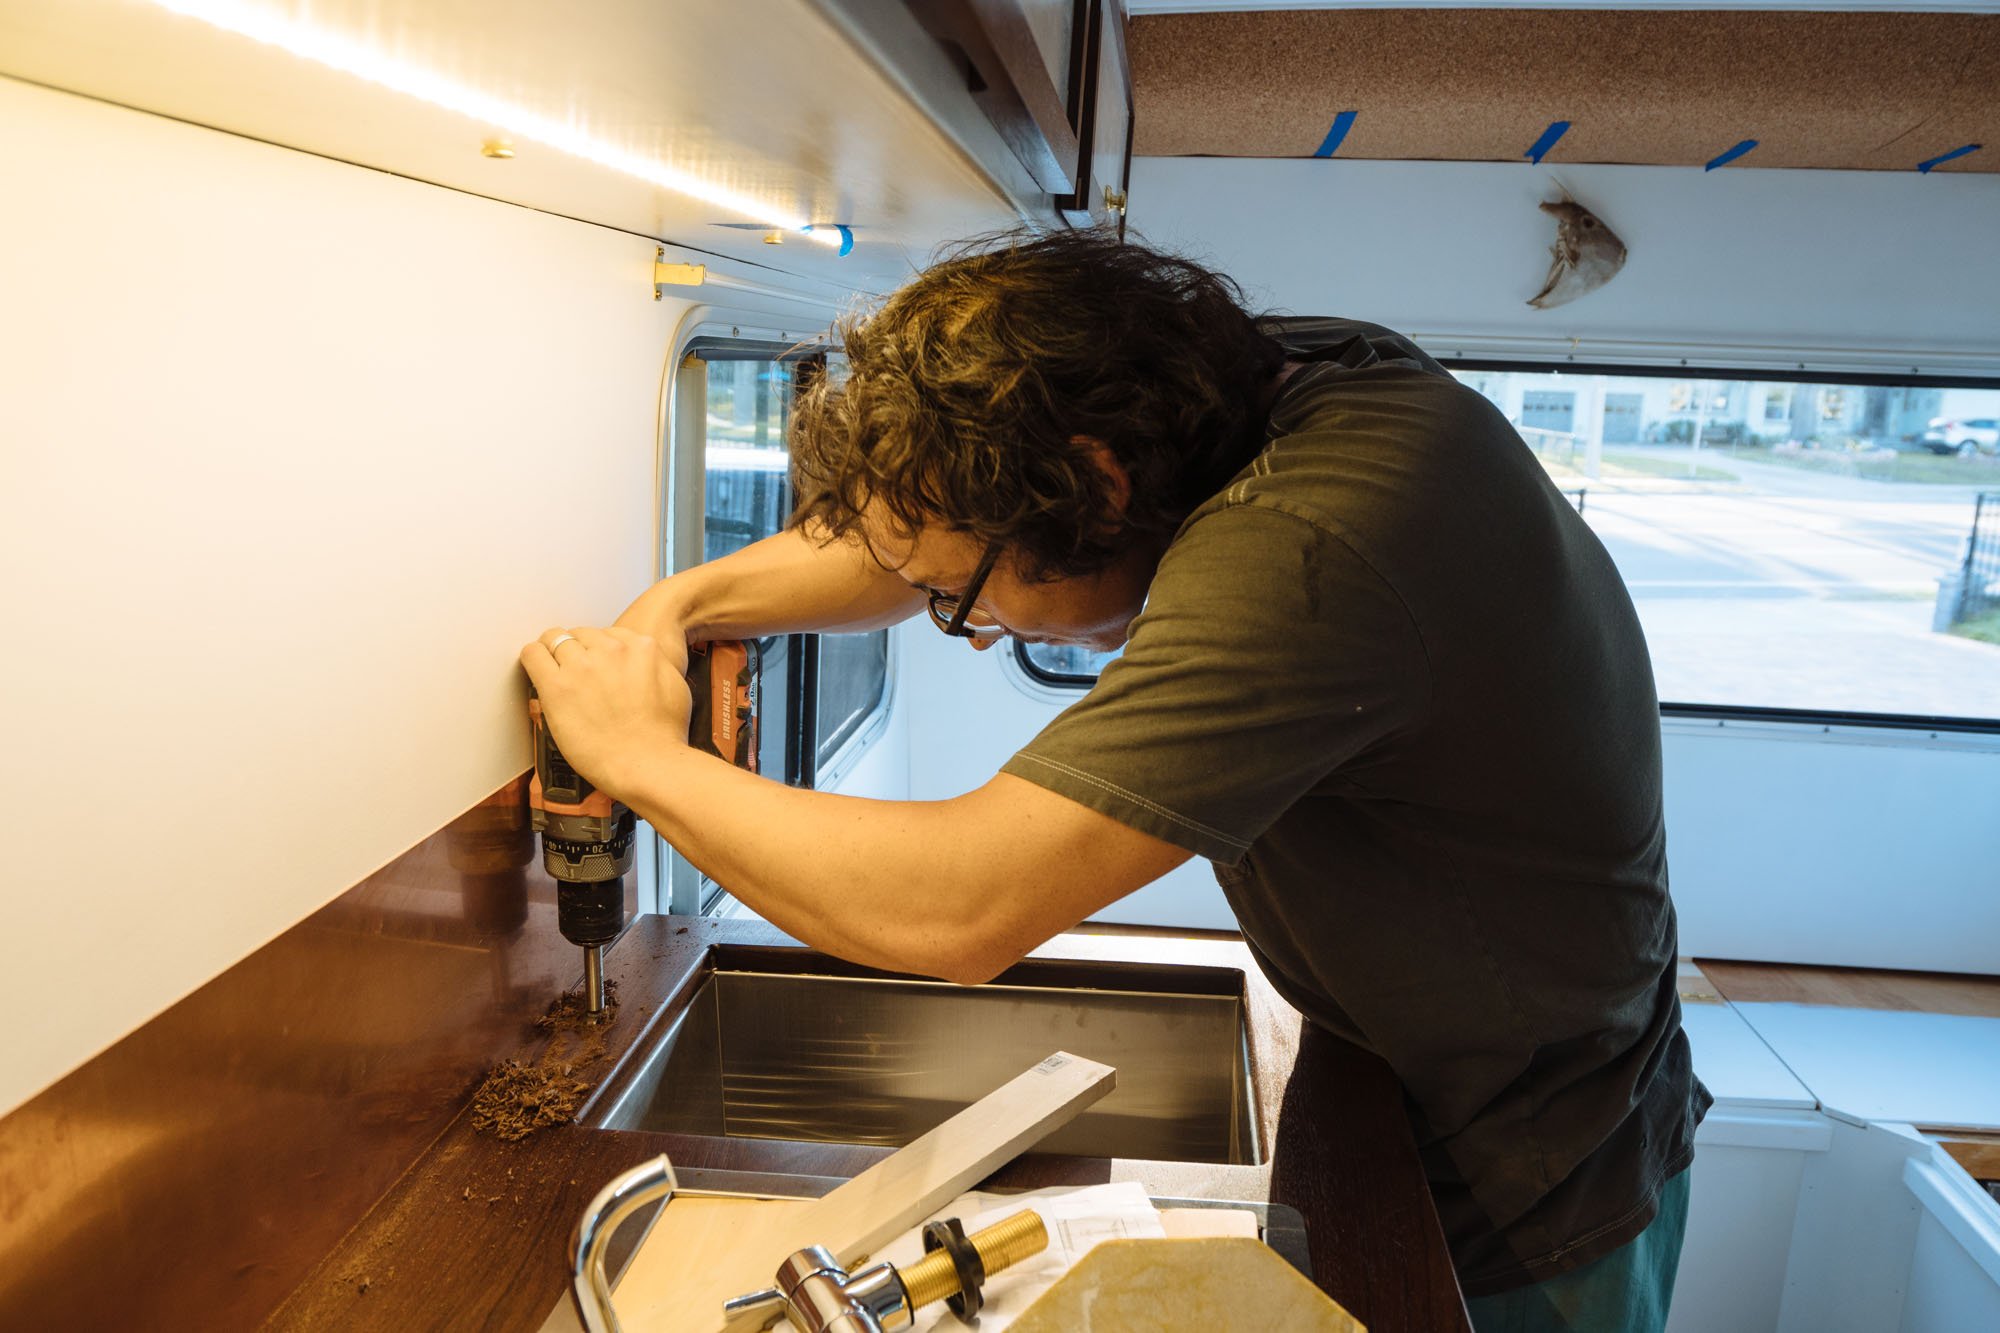
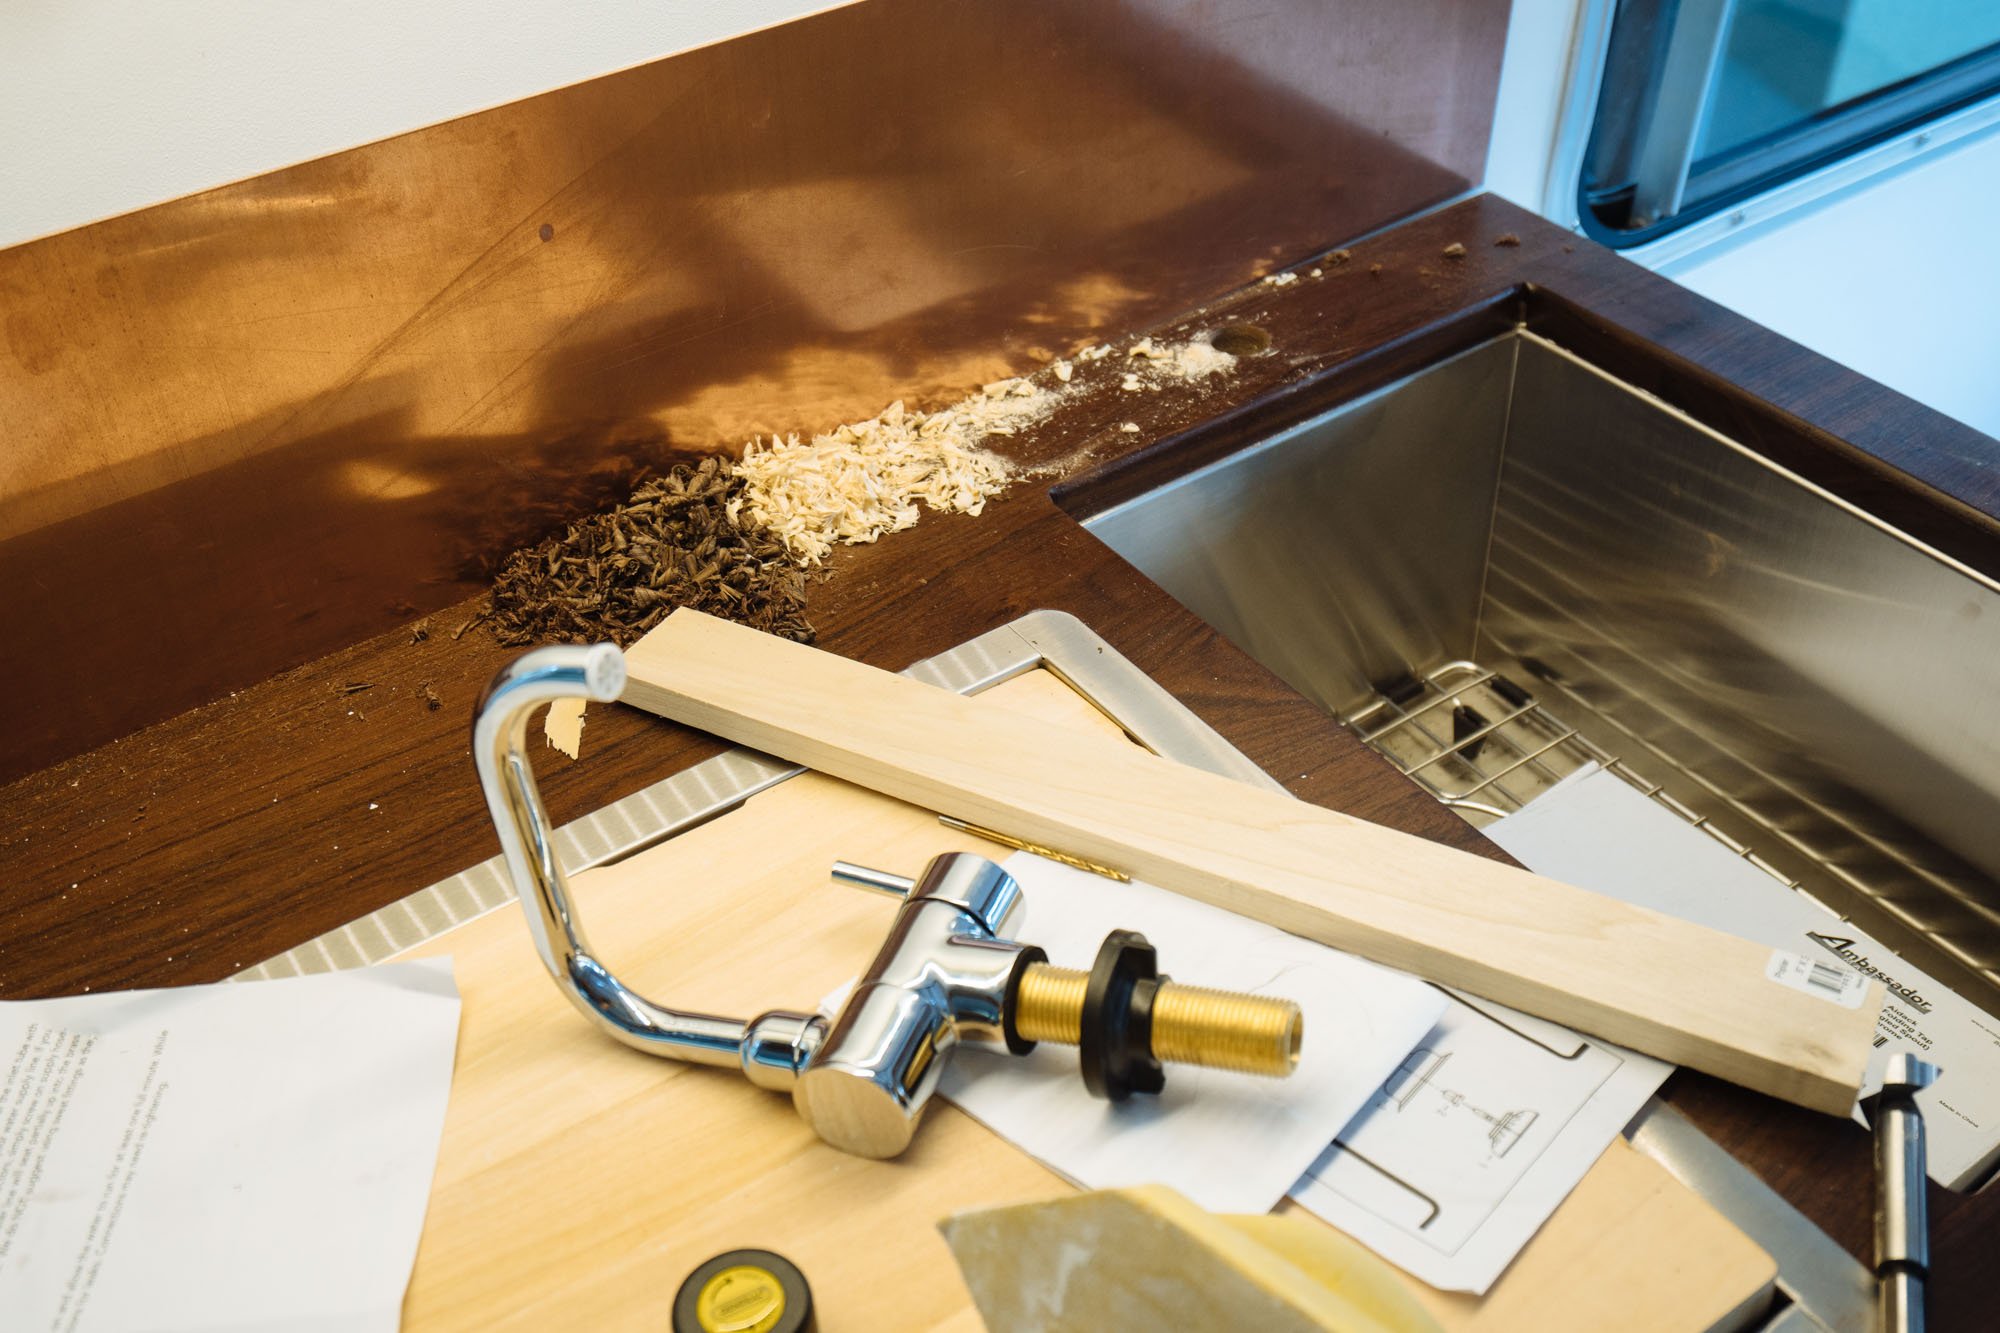
Moving back to the work in the truck, we started work on our water system. First, we got the faucet installed. We decided to wait until we had everything else installed before we chose the perfect final location of the faucet. It was quite challenging working around the wall, structure of the kitchen cabinets, and the sink. In hindsight, we probably would have install the faucet earlier.

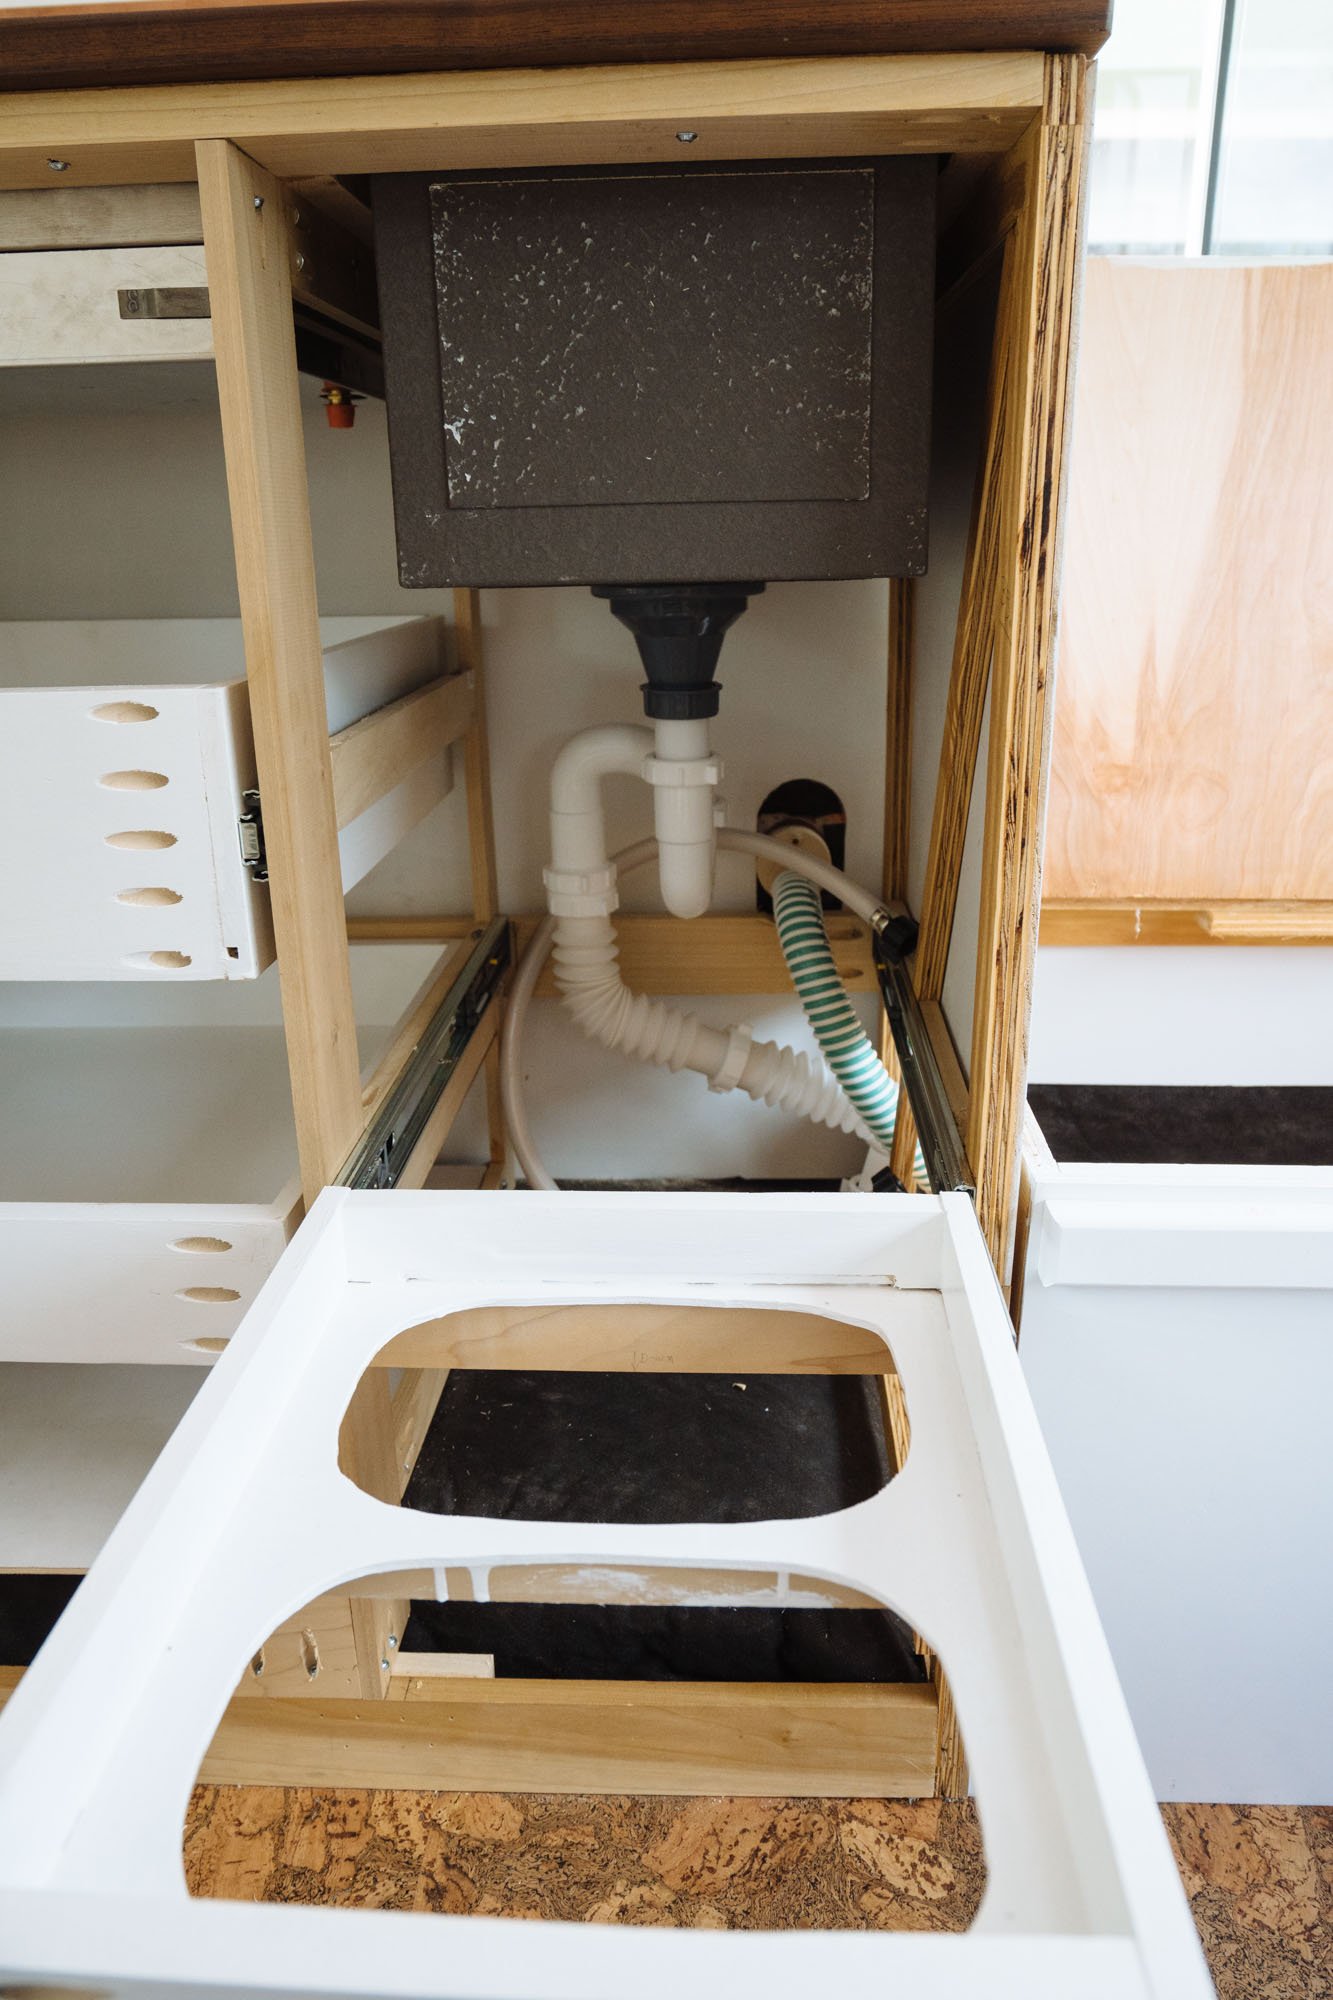
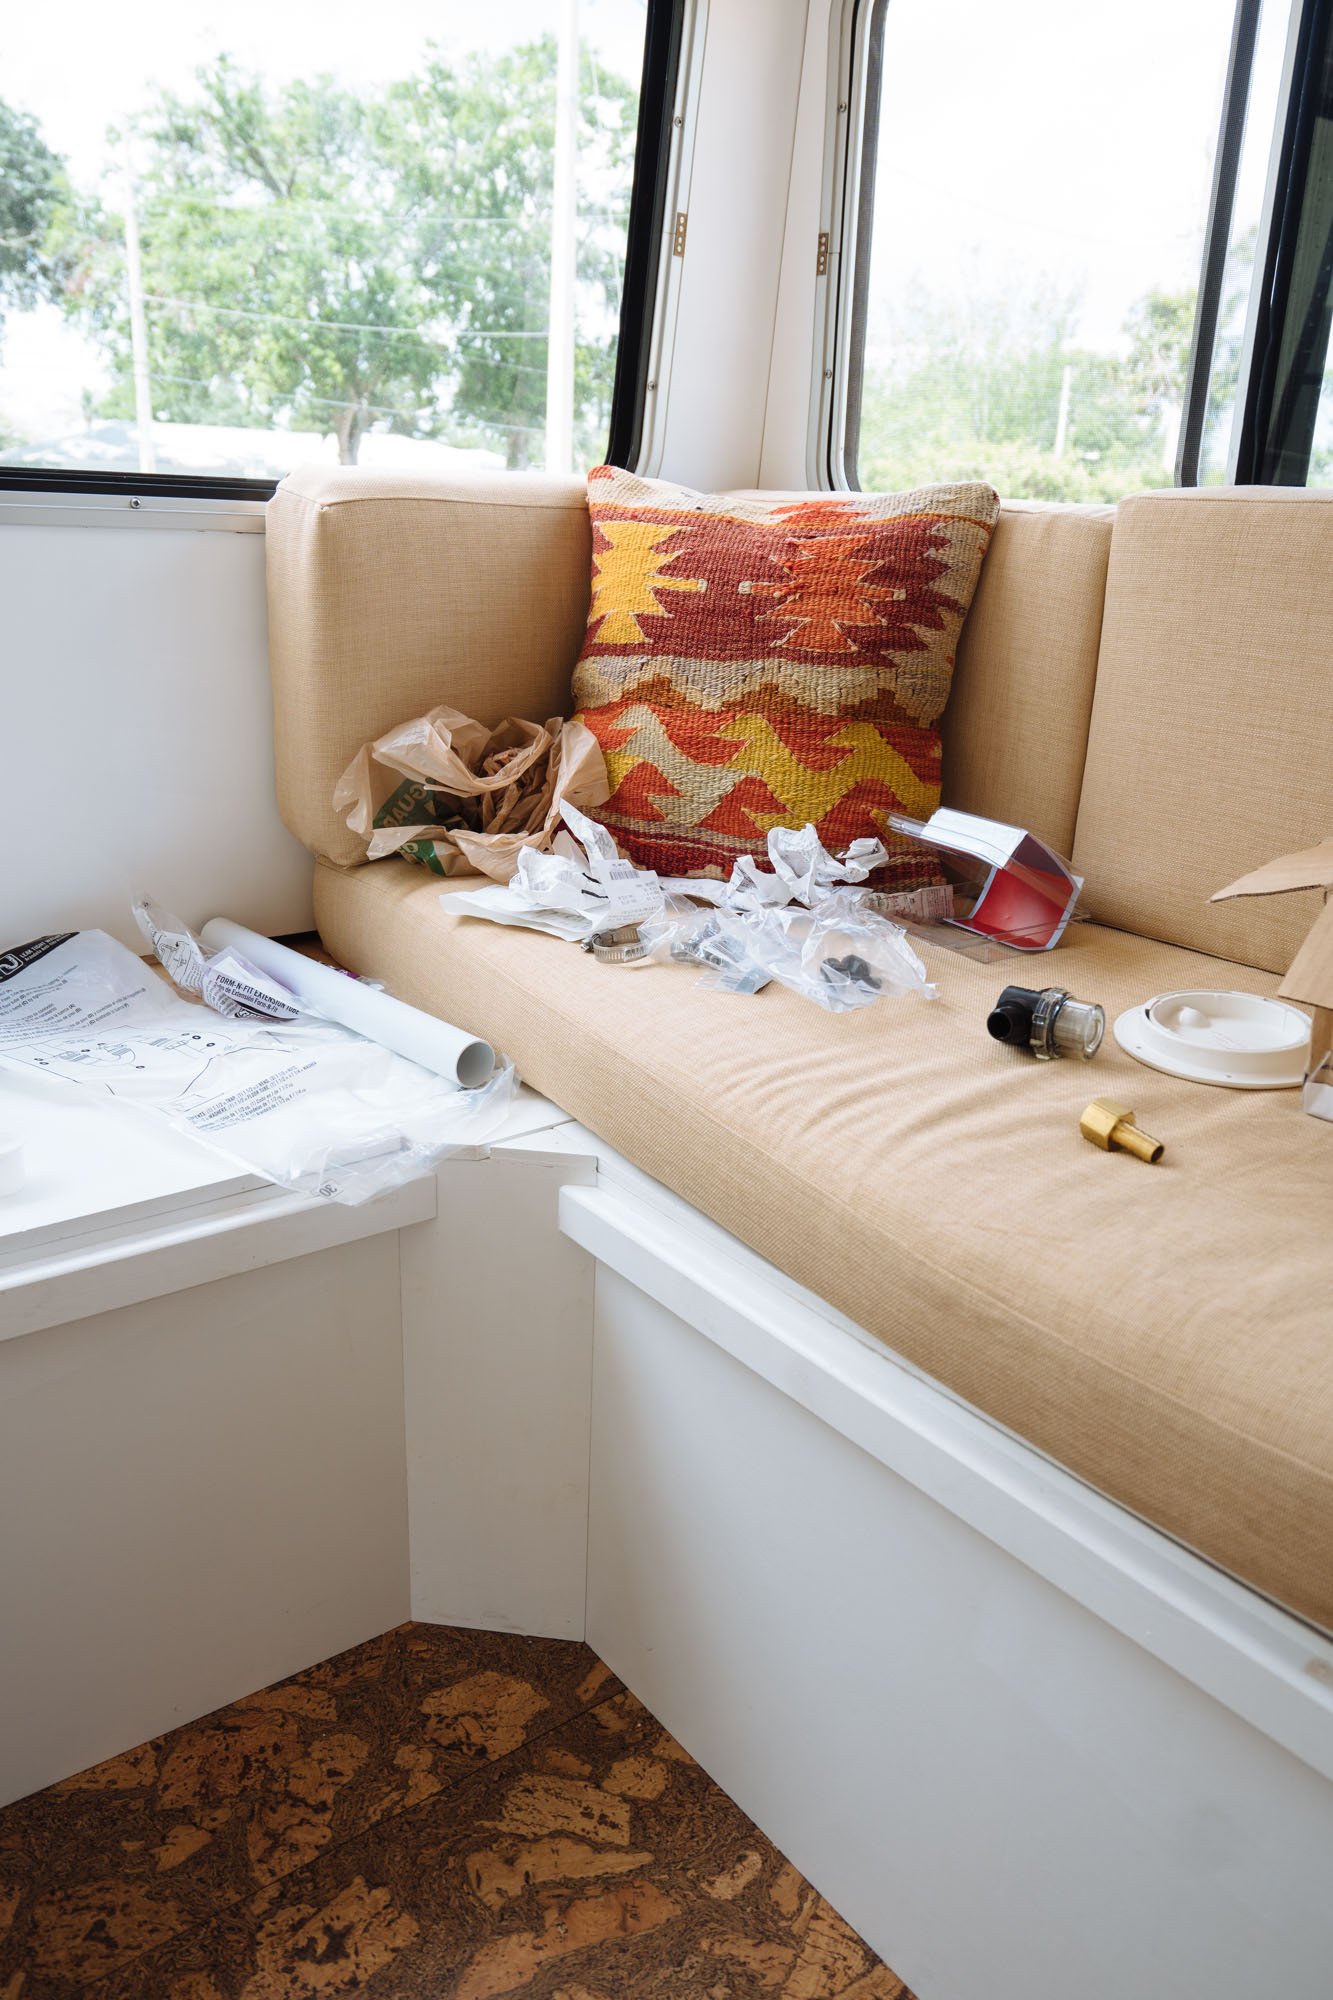
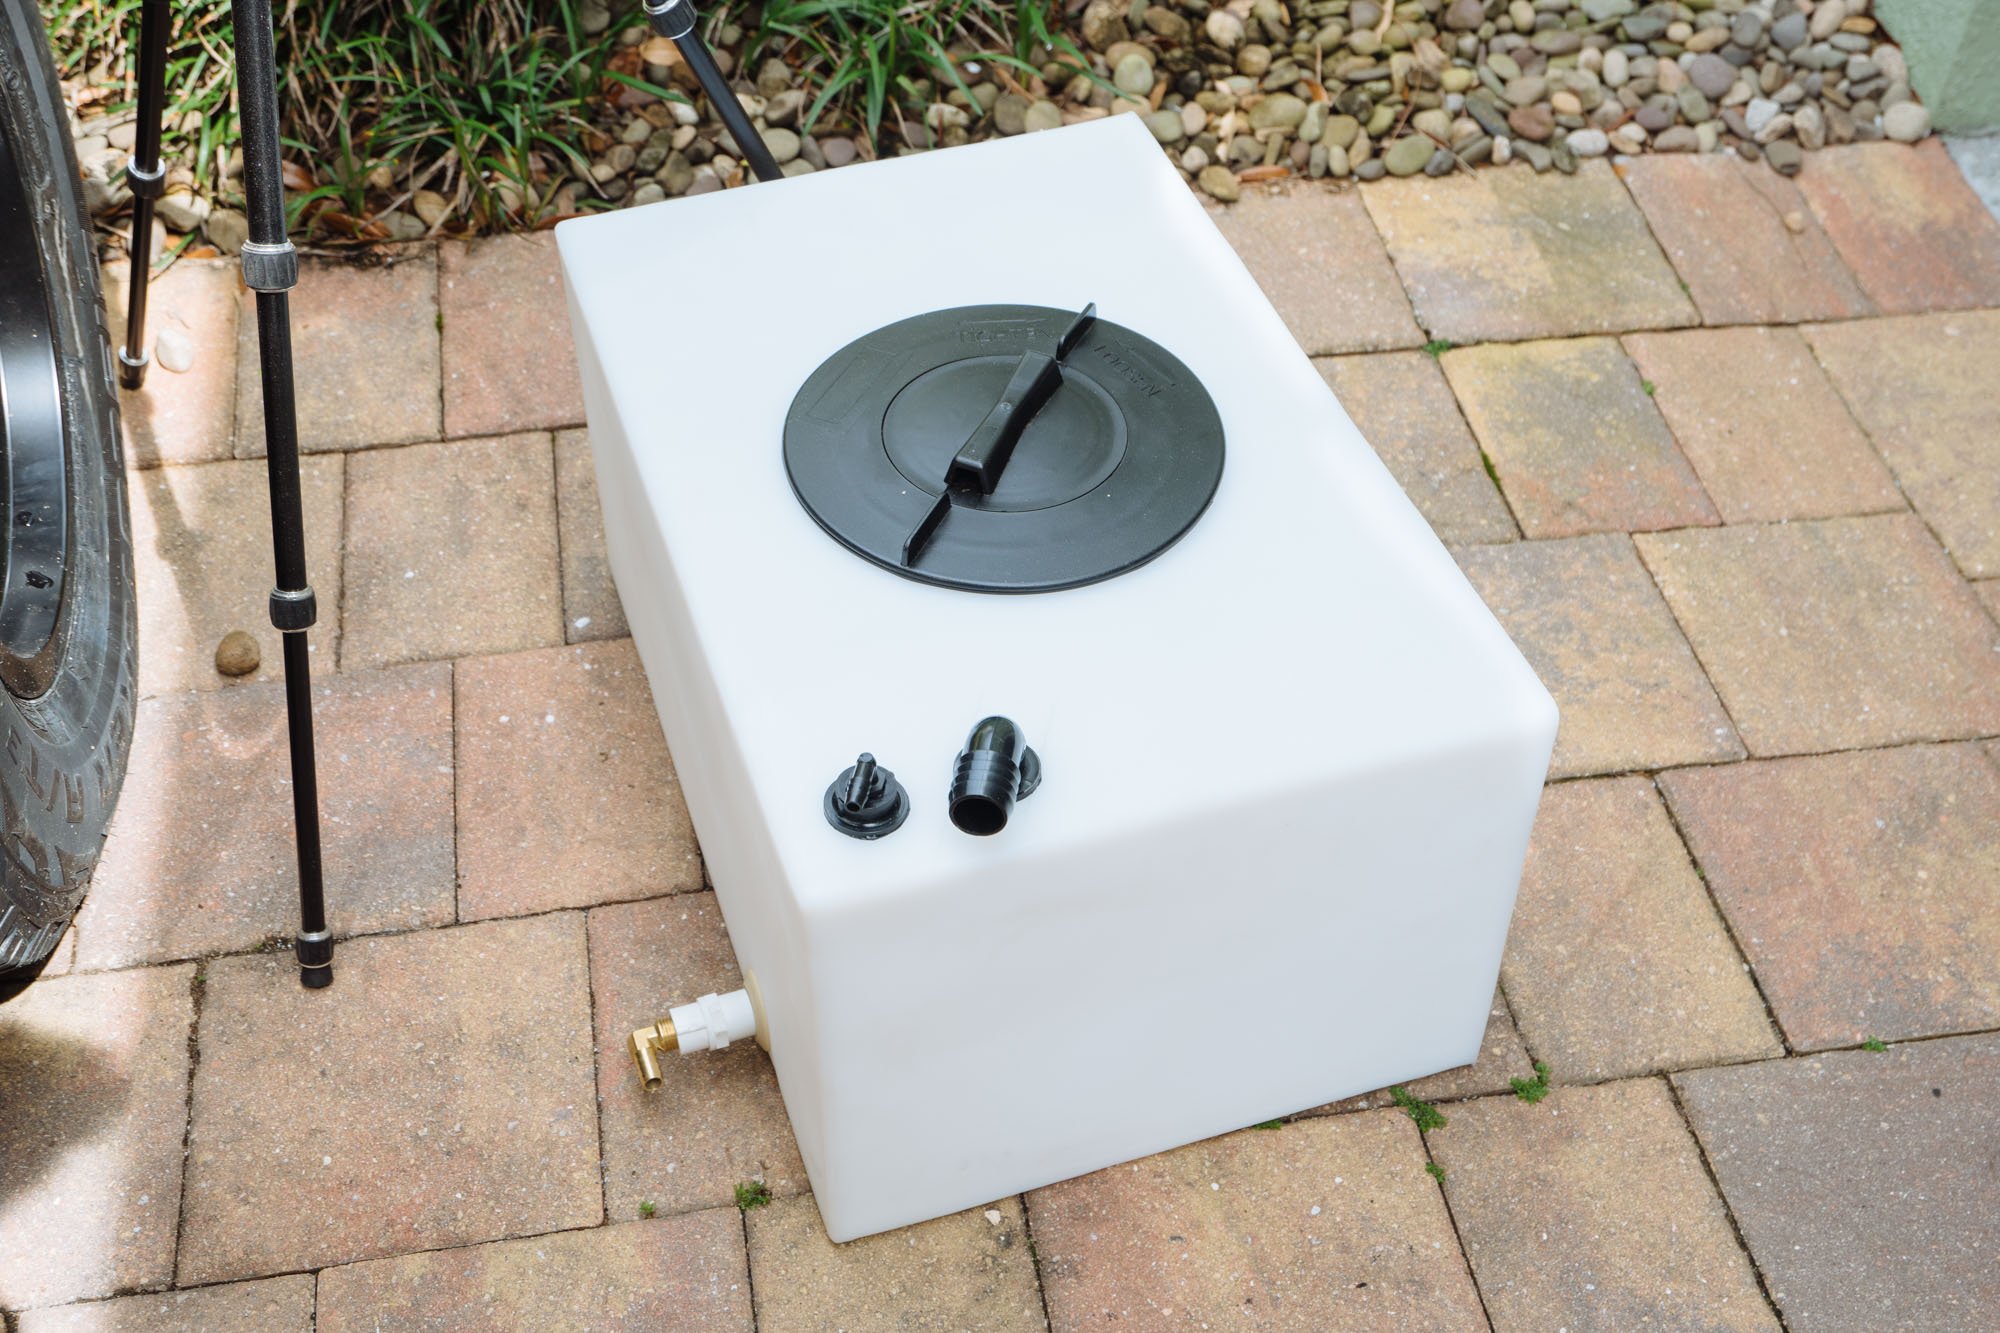
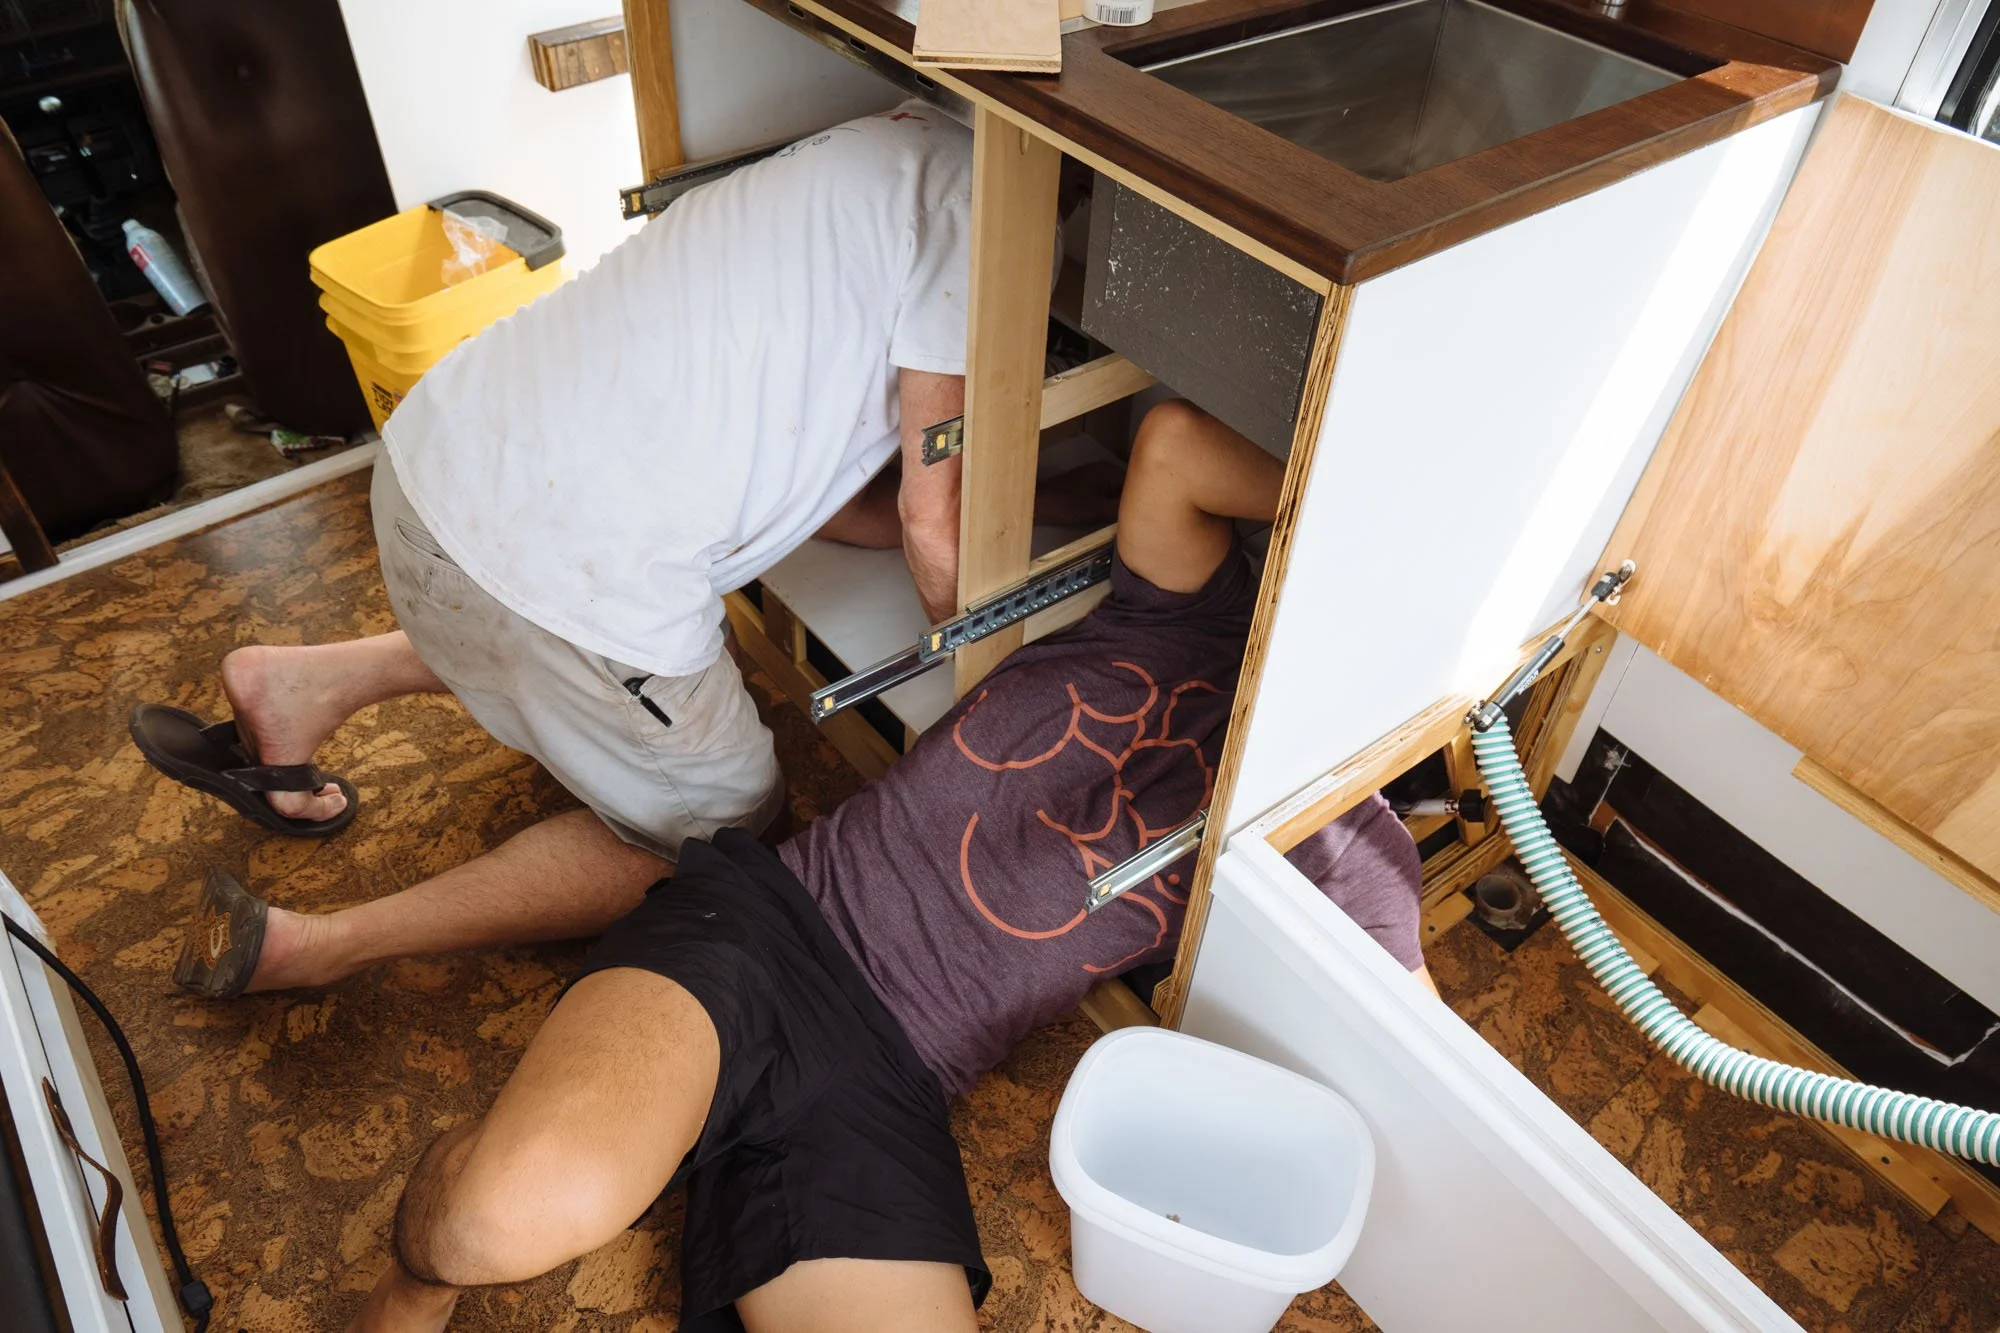
Over the past week or so Owen has been slowly collecting parts needed to make our water system. We purchased our water tank a month or two ago, but again we wanted to wait until the majority of the cabinetry was in place before we installed the system. In Amelia's old interior we had the loudest water pump on the face of the planet. It was our goal this time around to design a water system that wouldn't let the next three counties know that we were using our water pump. As the parts trickled in Owen has been building the system starting with all the hosing. We're getting pretty close to having running water in Amelia!
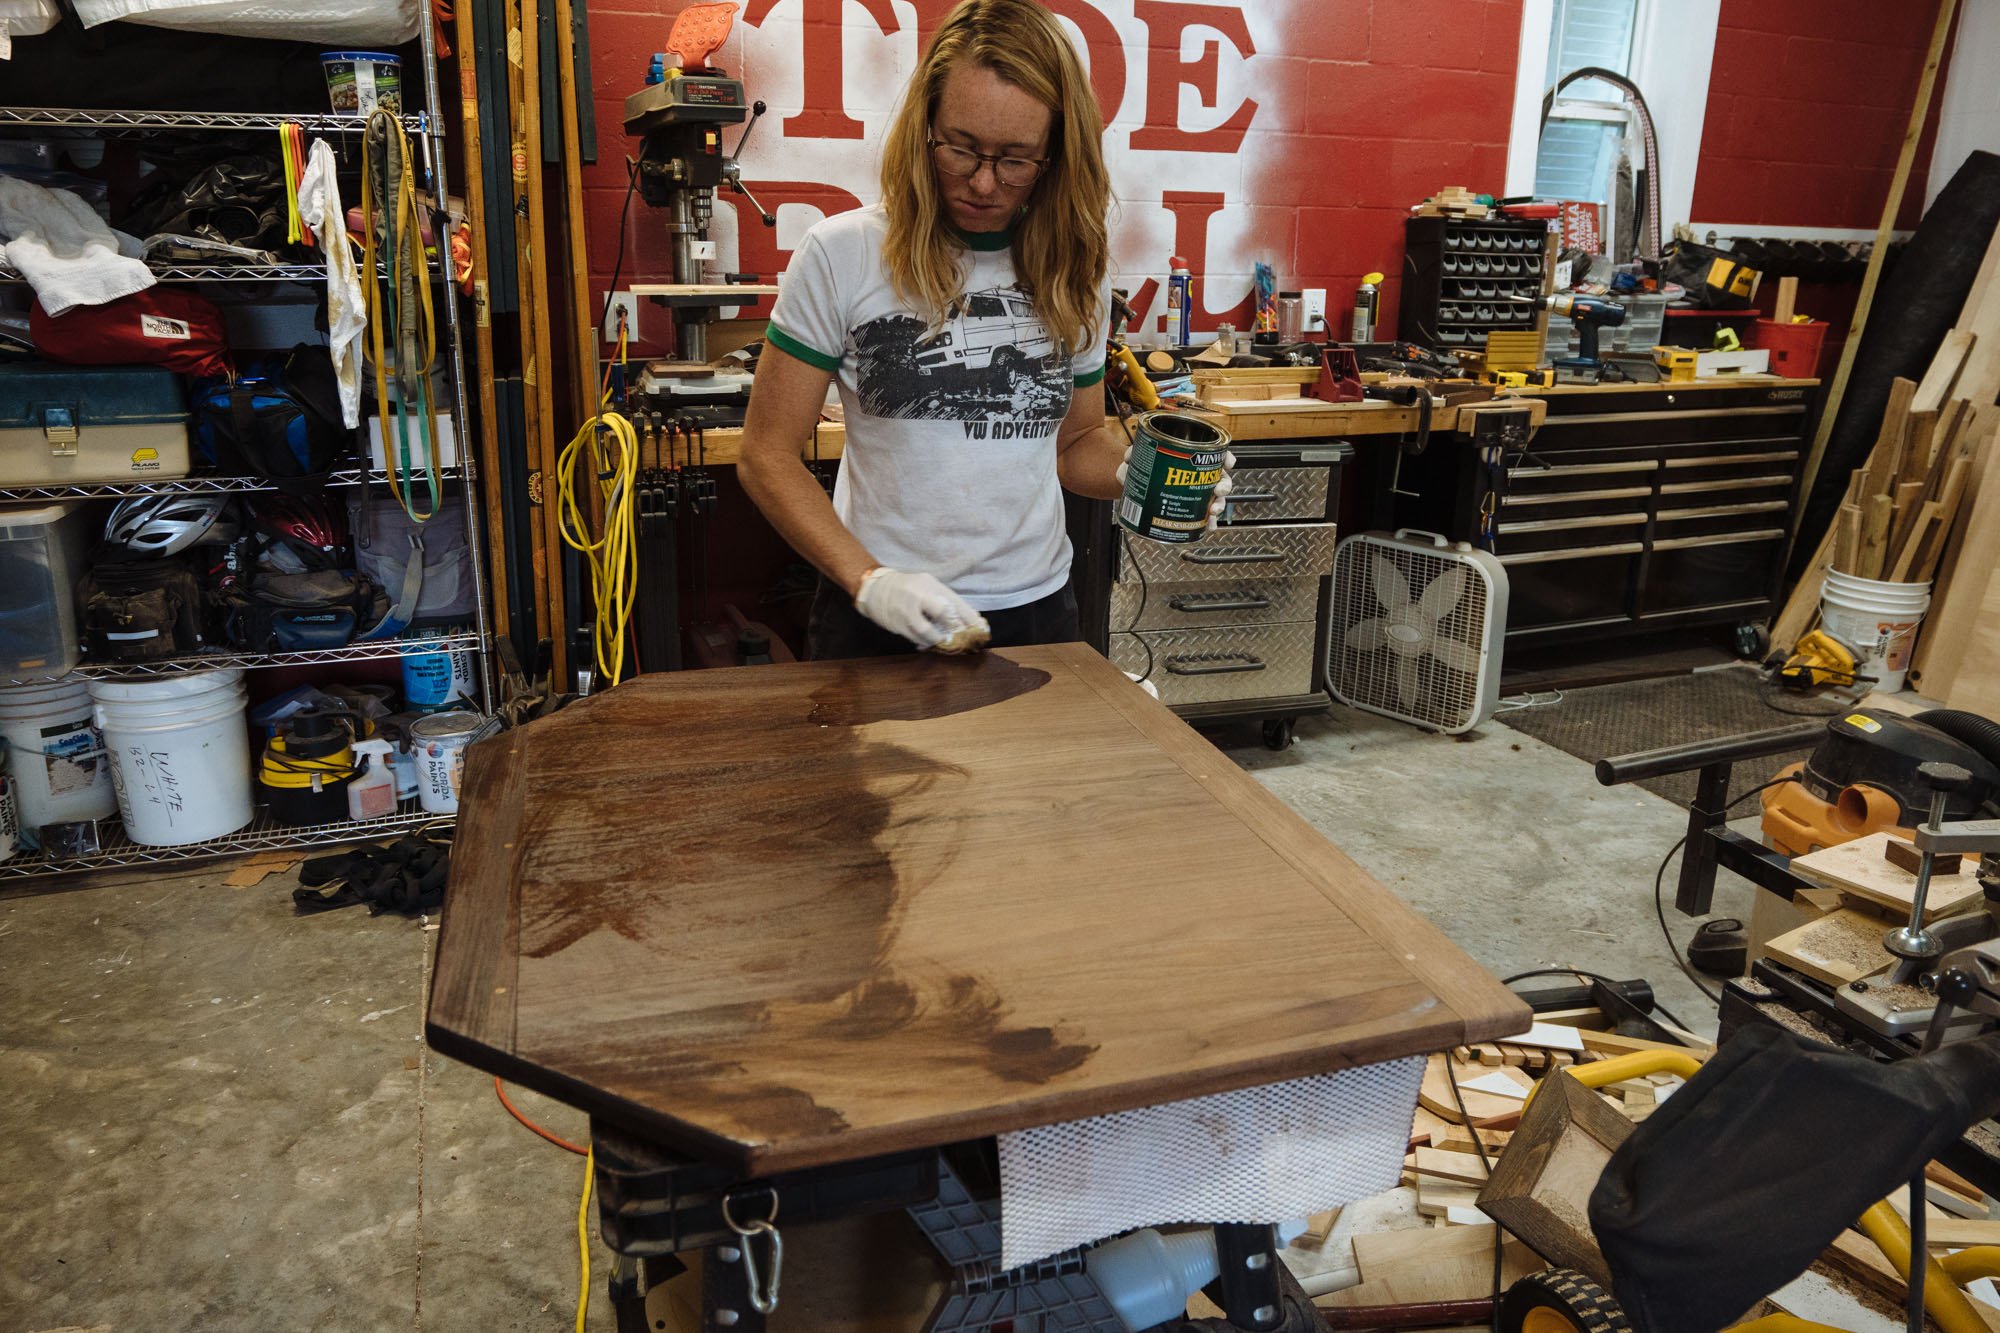
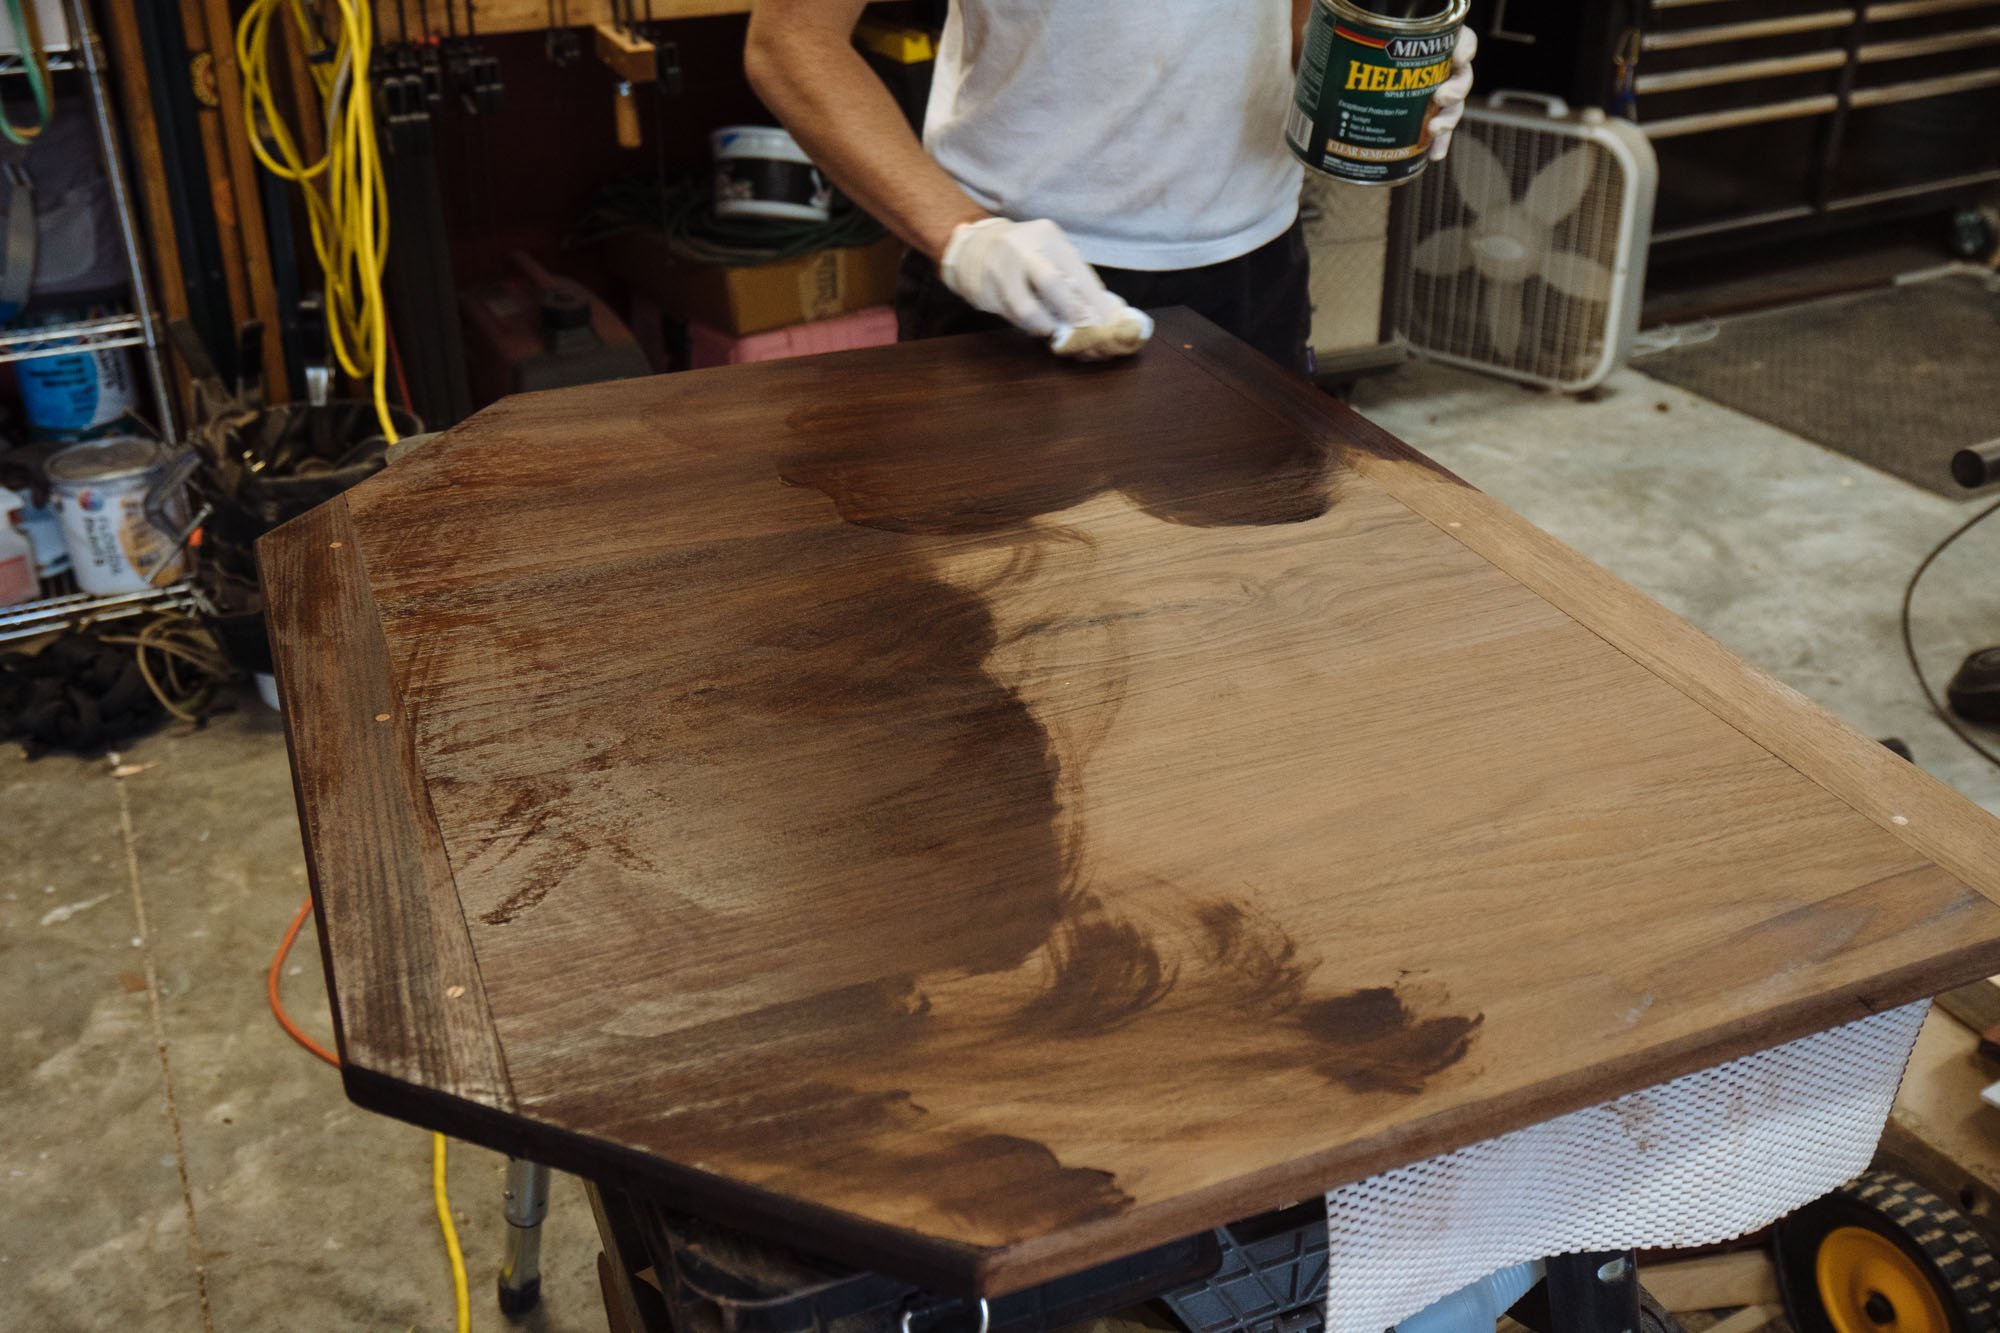
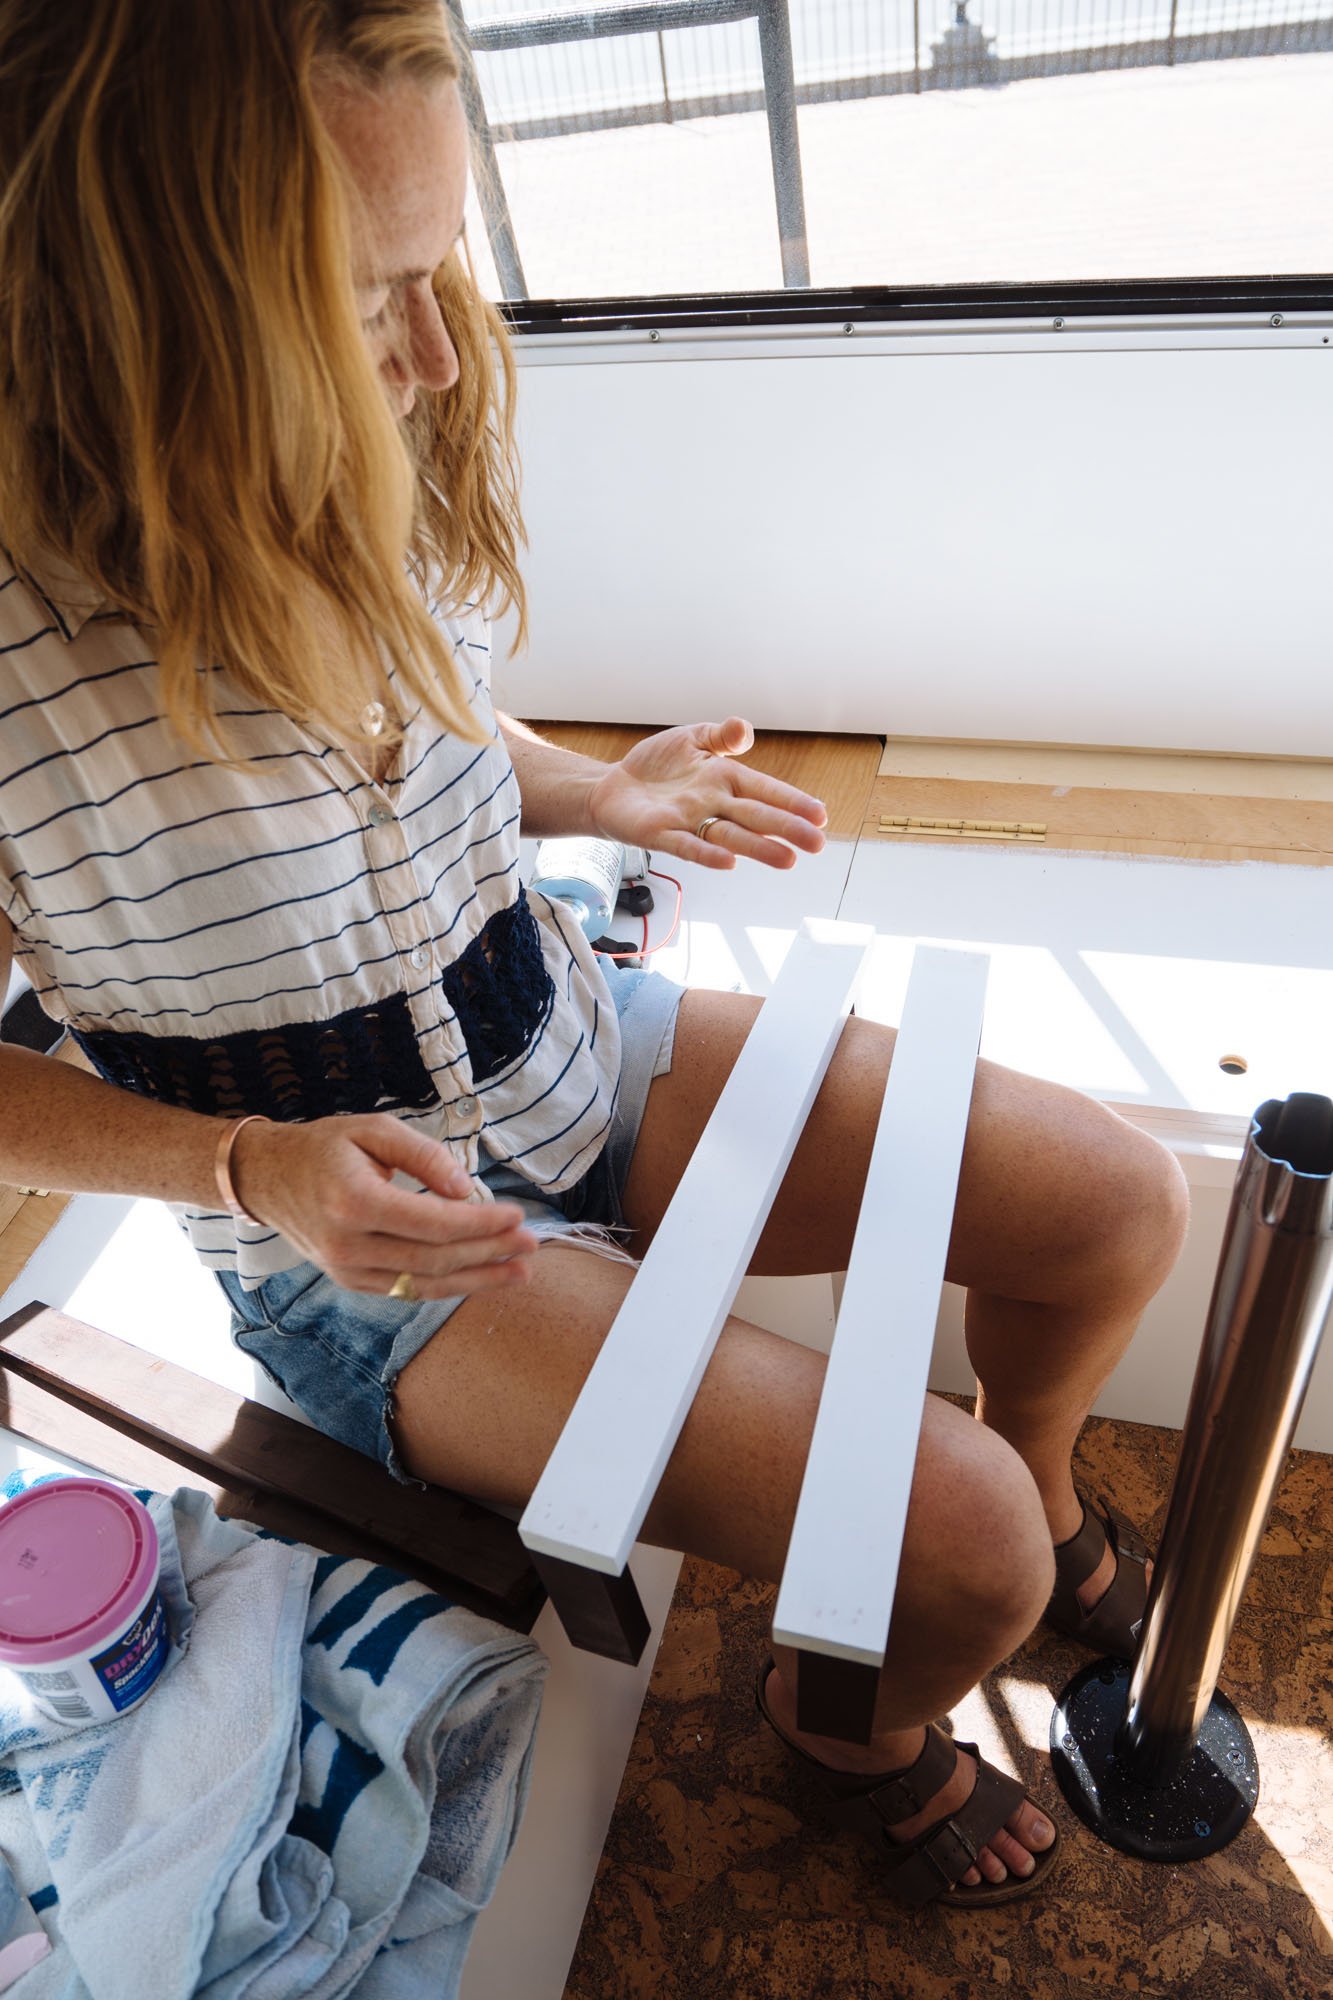
The back table got cut down this week and was ready to receive all the finishing work before the final install. I'm currently on the 6th round of sanding and poly but it's getting close!

Let's talk curtains. I spent an embarrassing amount of time looking at fabric for our curtains. Like HOURS, and still came up empty handed. I wasn't really looking for anything in particular, but I wanted the pattern to be something bold, and rich in color. Our interior was designed to be neutral with the coloring being introduced by our curtains! Since I was unable to find anything I liked, I had to take matters into my own hands.
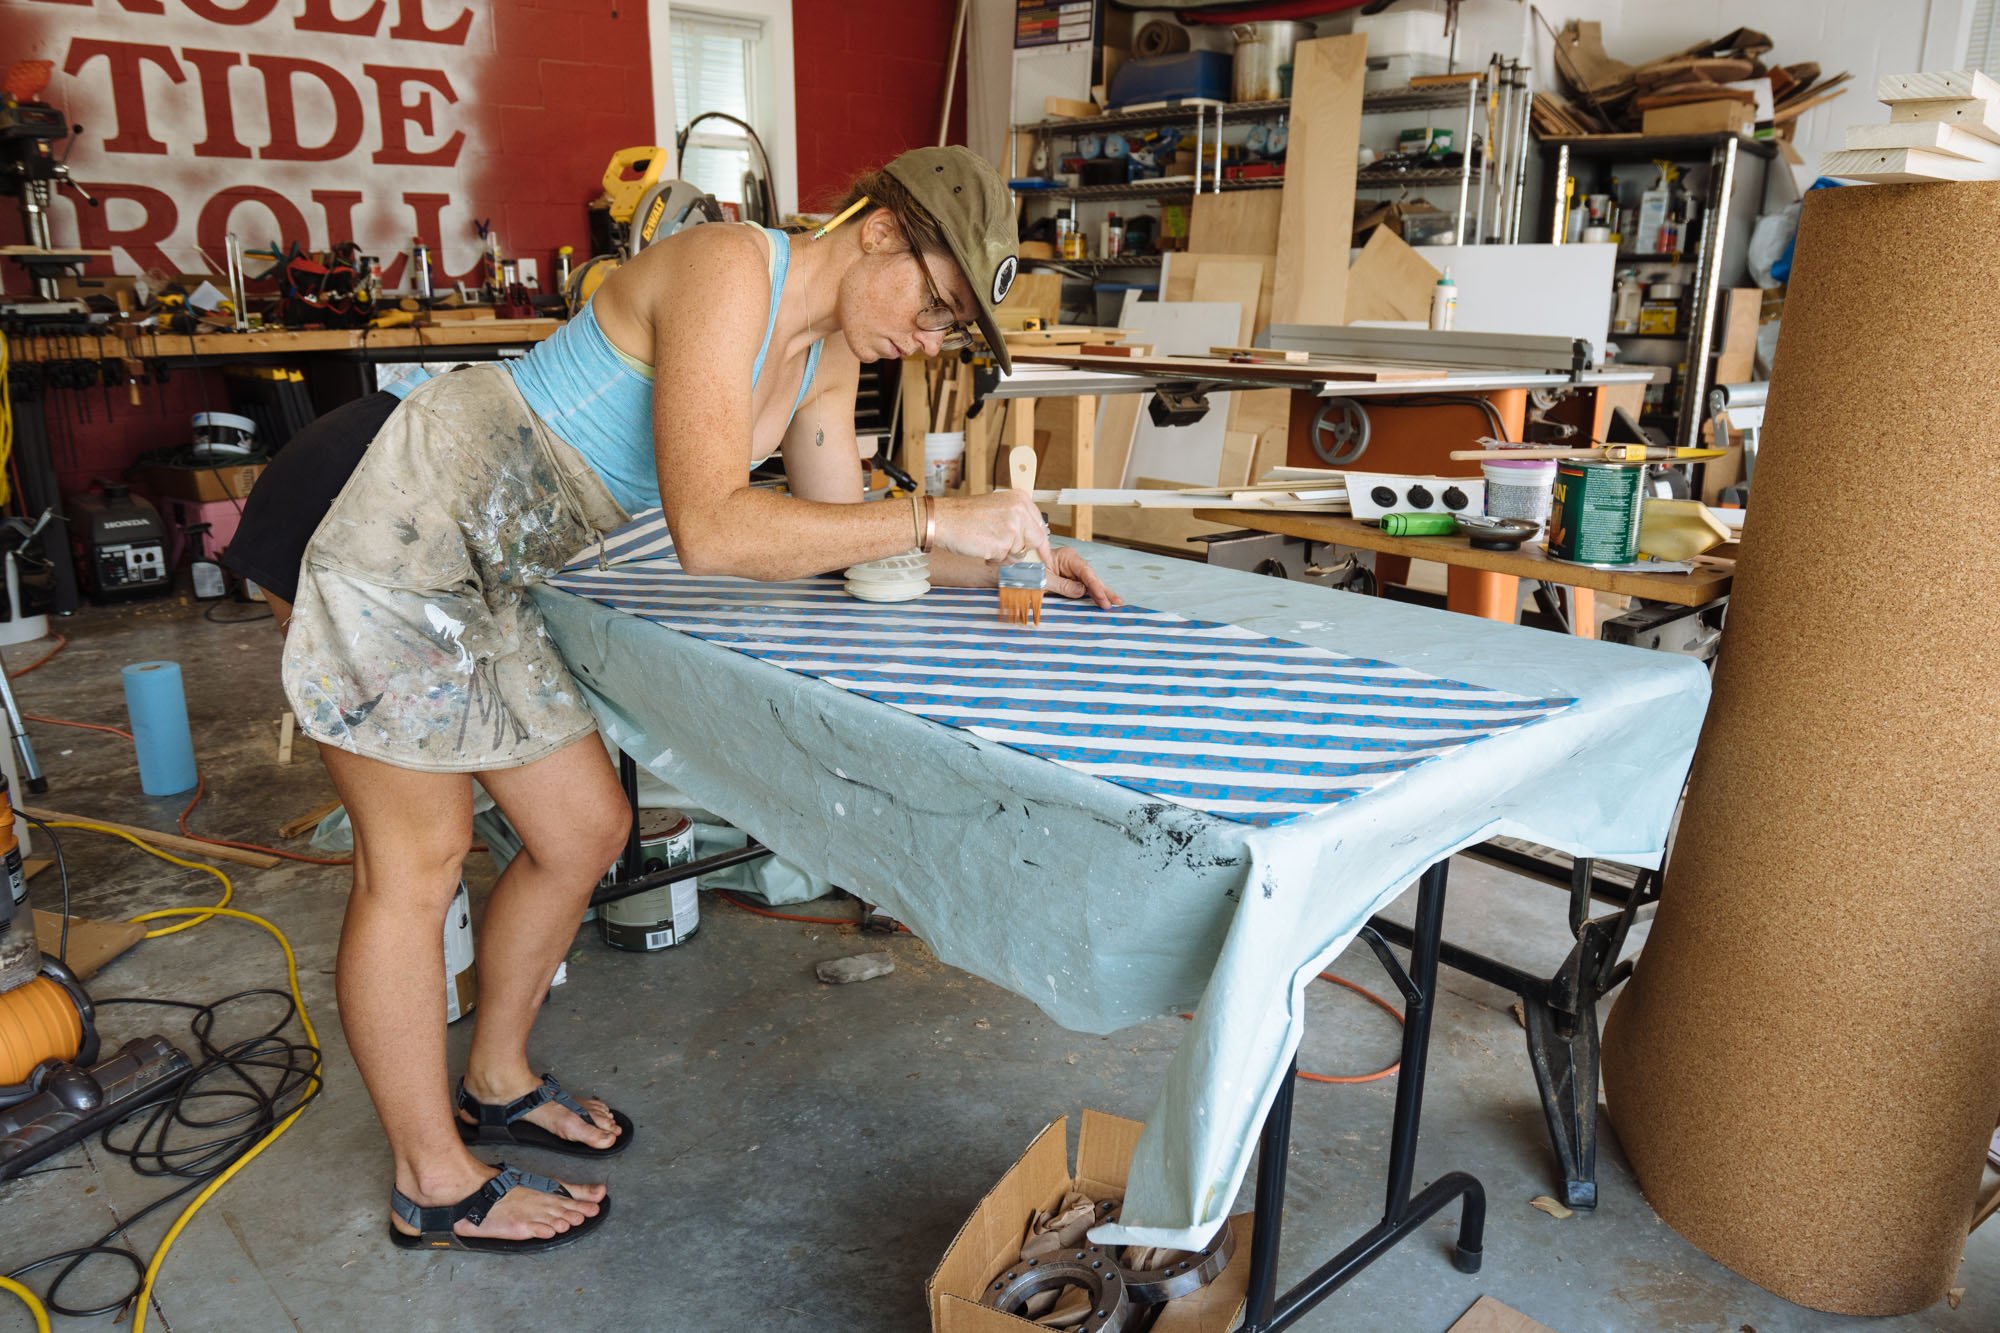
We're working with the same master seamstress that helped us with our cushions. When I told her I wanted to hand paint the curtains using fluid dyes she was immediately on board. It was her (incredibly smart) idea to wash, dry, and pre-sew the curtains before she turned them over to me to be dyed. This way all of my diagonal stripes matched up with one another when they are hung. As soon as I complete the dye process she will take them and add the loops to the top and do the last little bit of finish work!
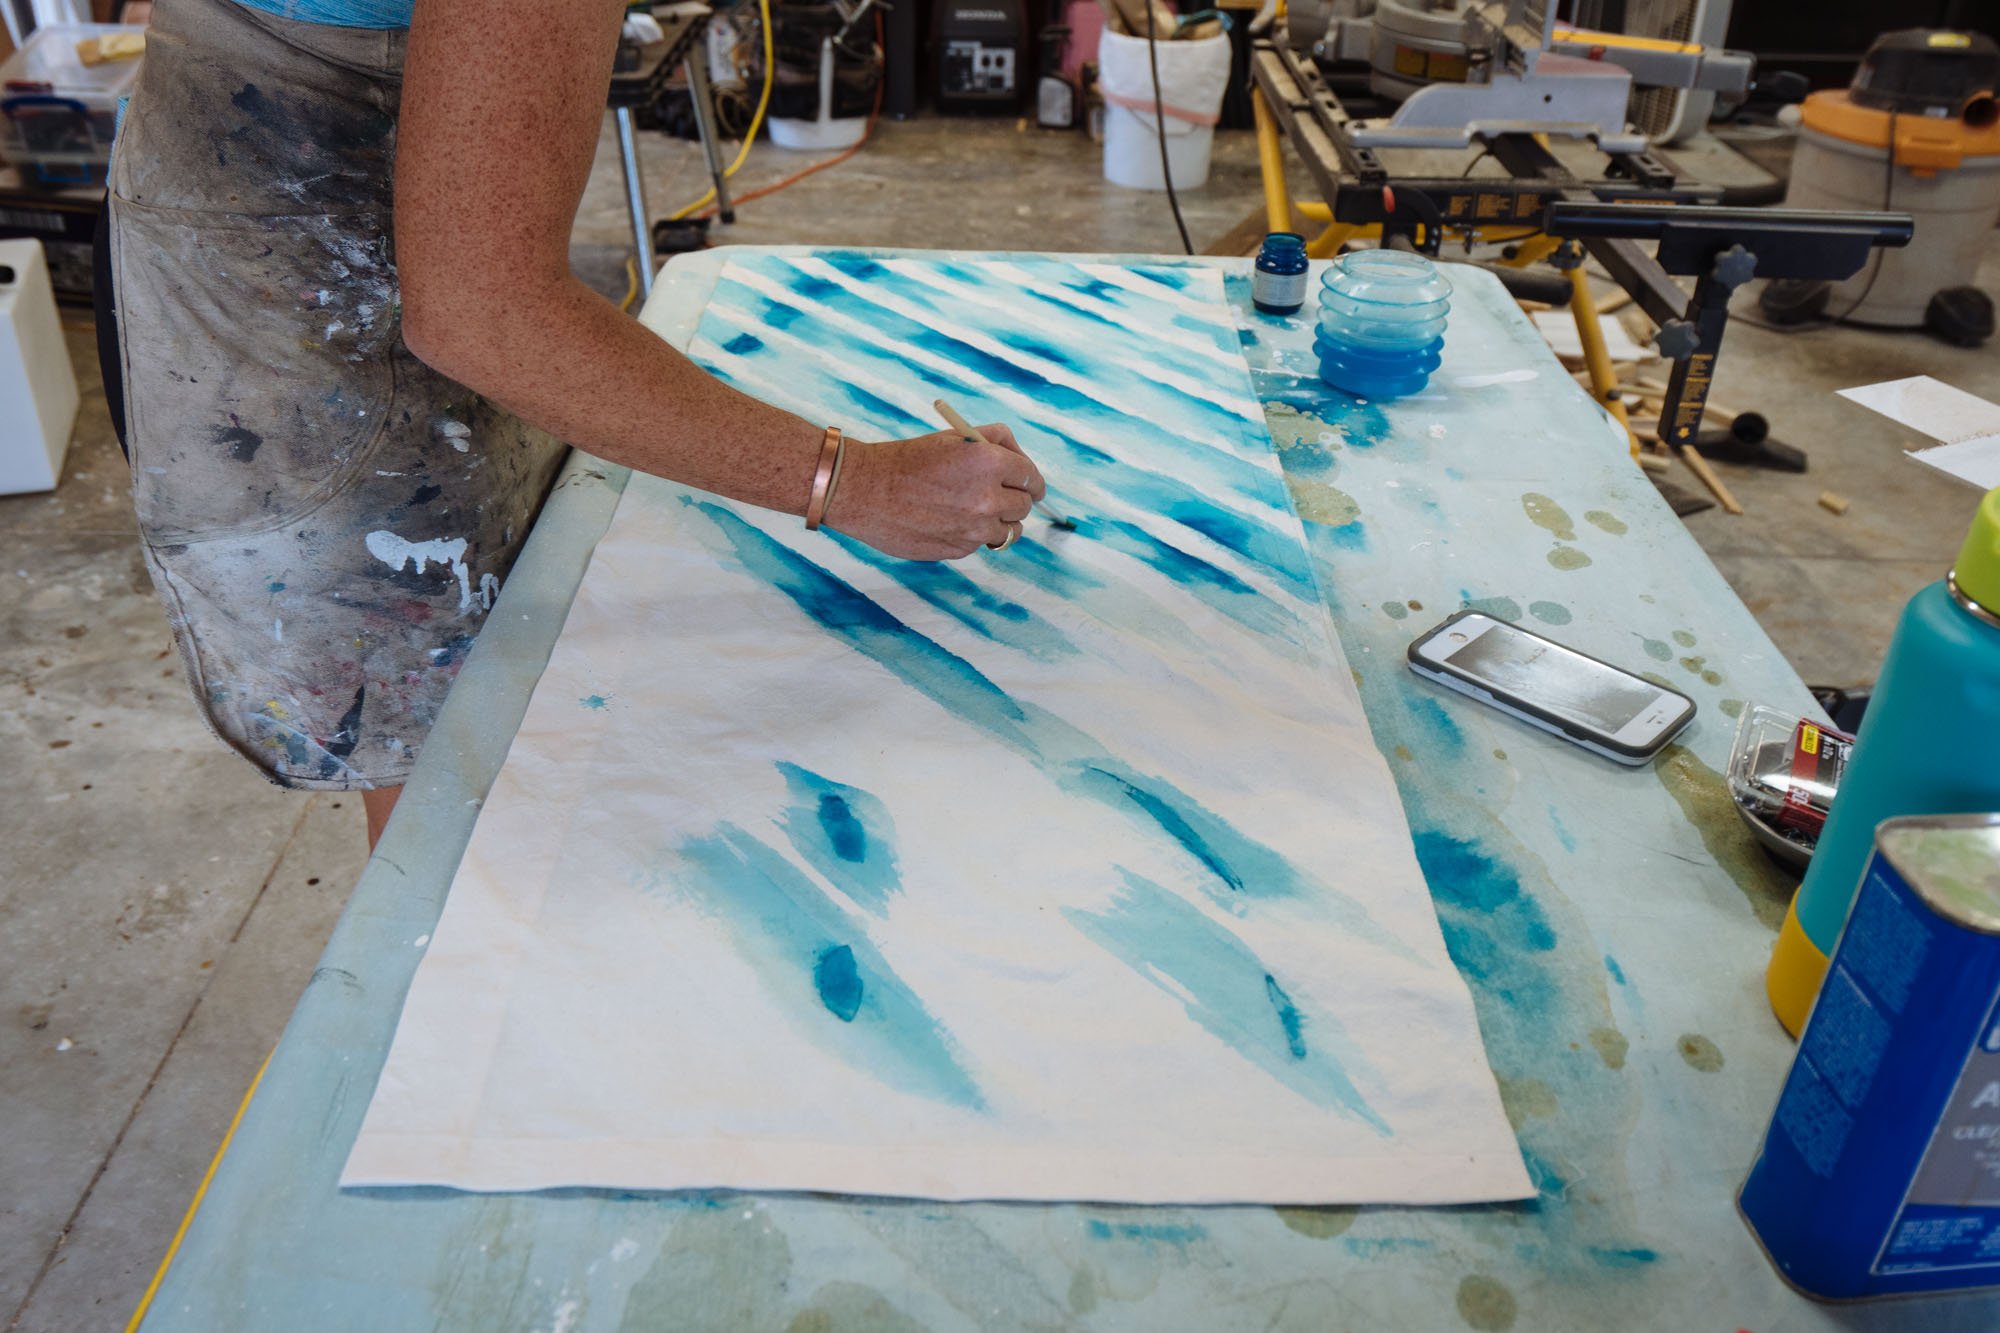
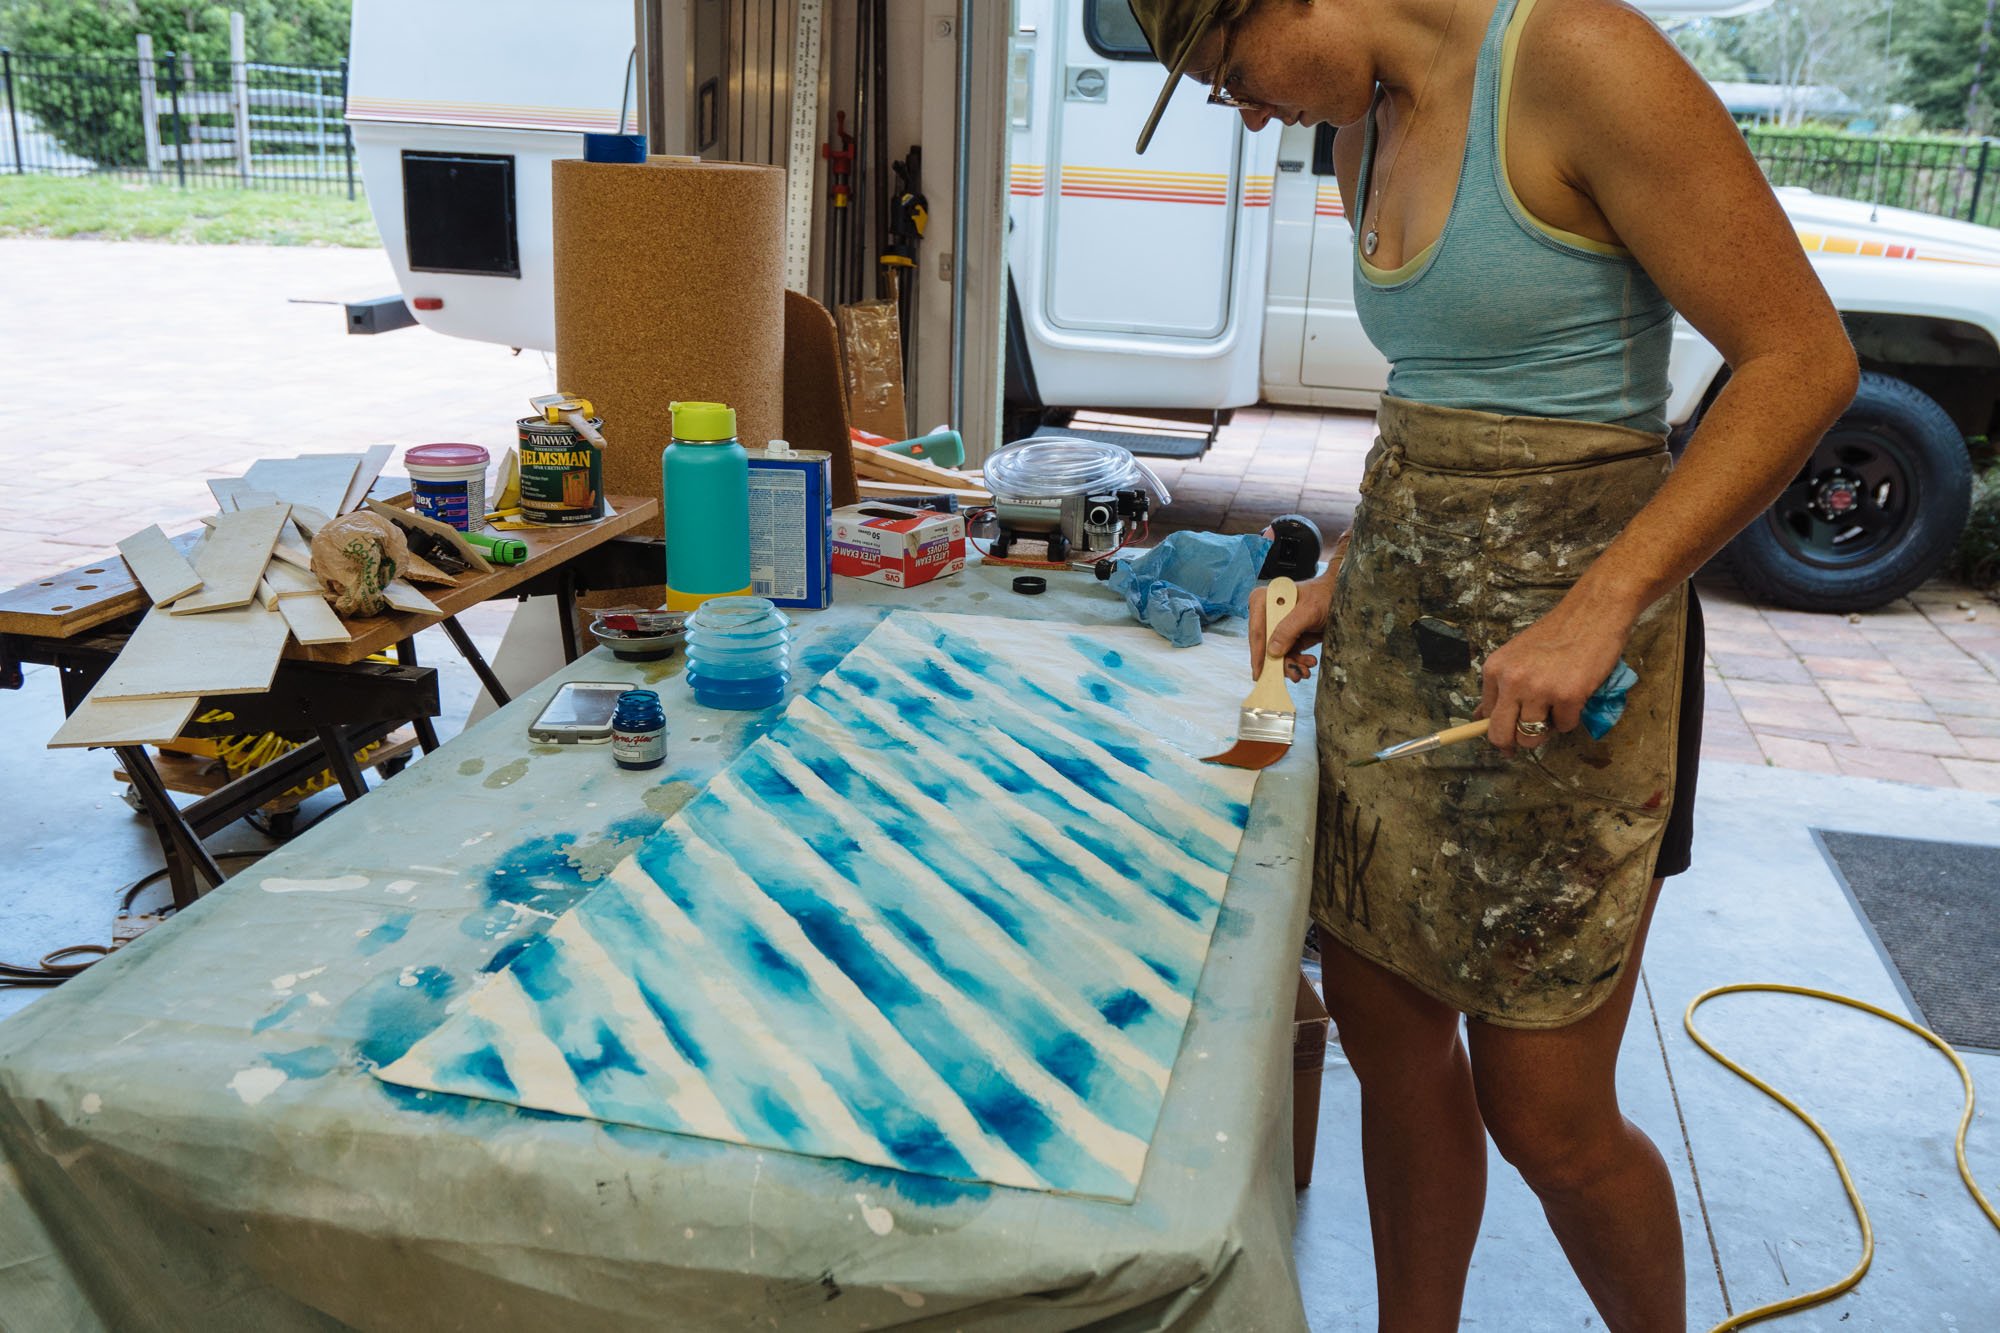
This dye process is quite different from your traditional tie-dye. In the top picture I have taped up the curtains leaving just the areas that I don't want to receive dye exposed. These areas I paint on a dye resist that resembles Elmer's glue. Once this paste dries it allows you to run dye over the top of that area without it ever coming in contact with the fabric. With the resit dry I went back in with the build dyes and painted with them much like I do water colors to add in the color into every other stripe. After all of the dye is dry I just popped them into the dryer to set the fluid dyes and then hand rinsed the curtains in warm water to remove the resist and any dye that was sitting on top of it. Next week I should have a picture of the final product for you guys to see!
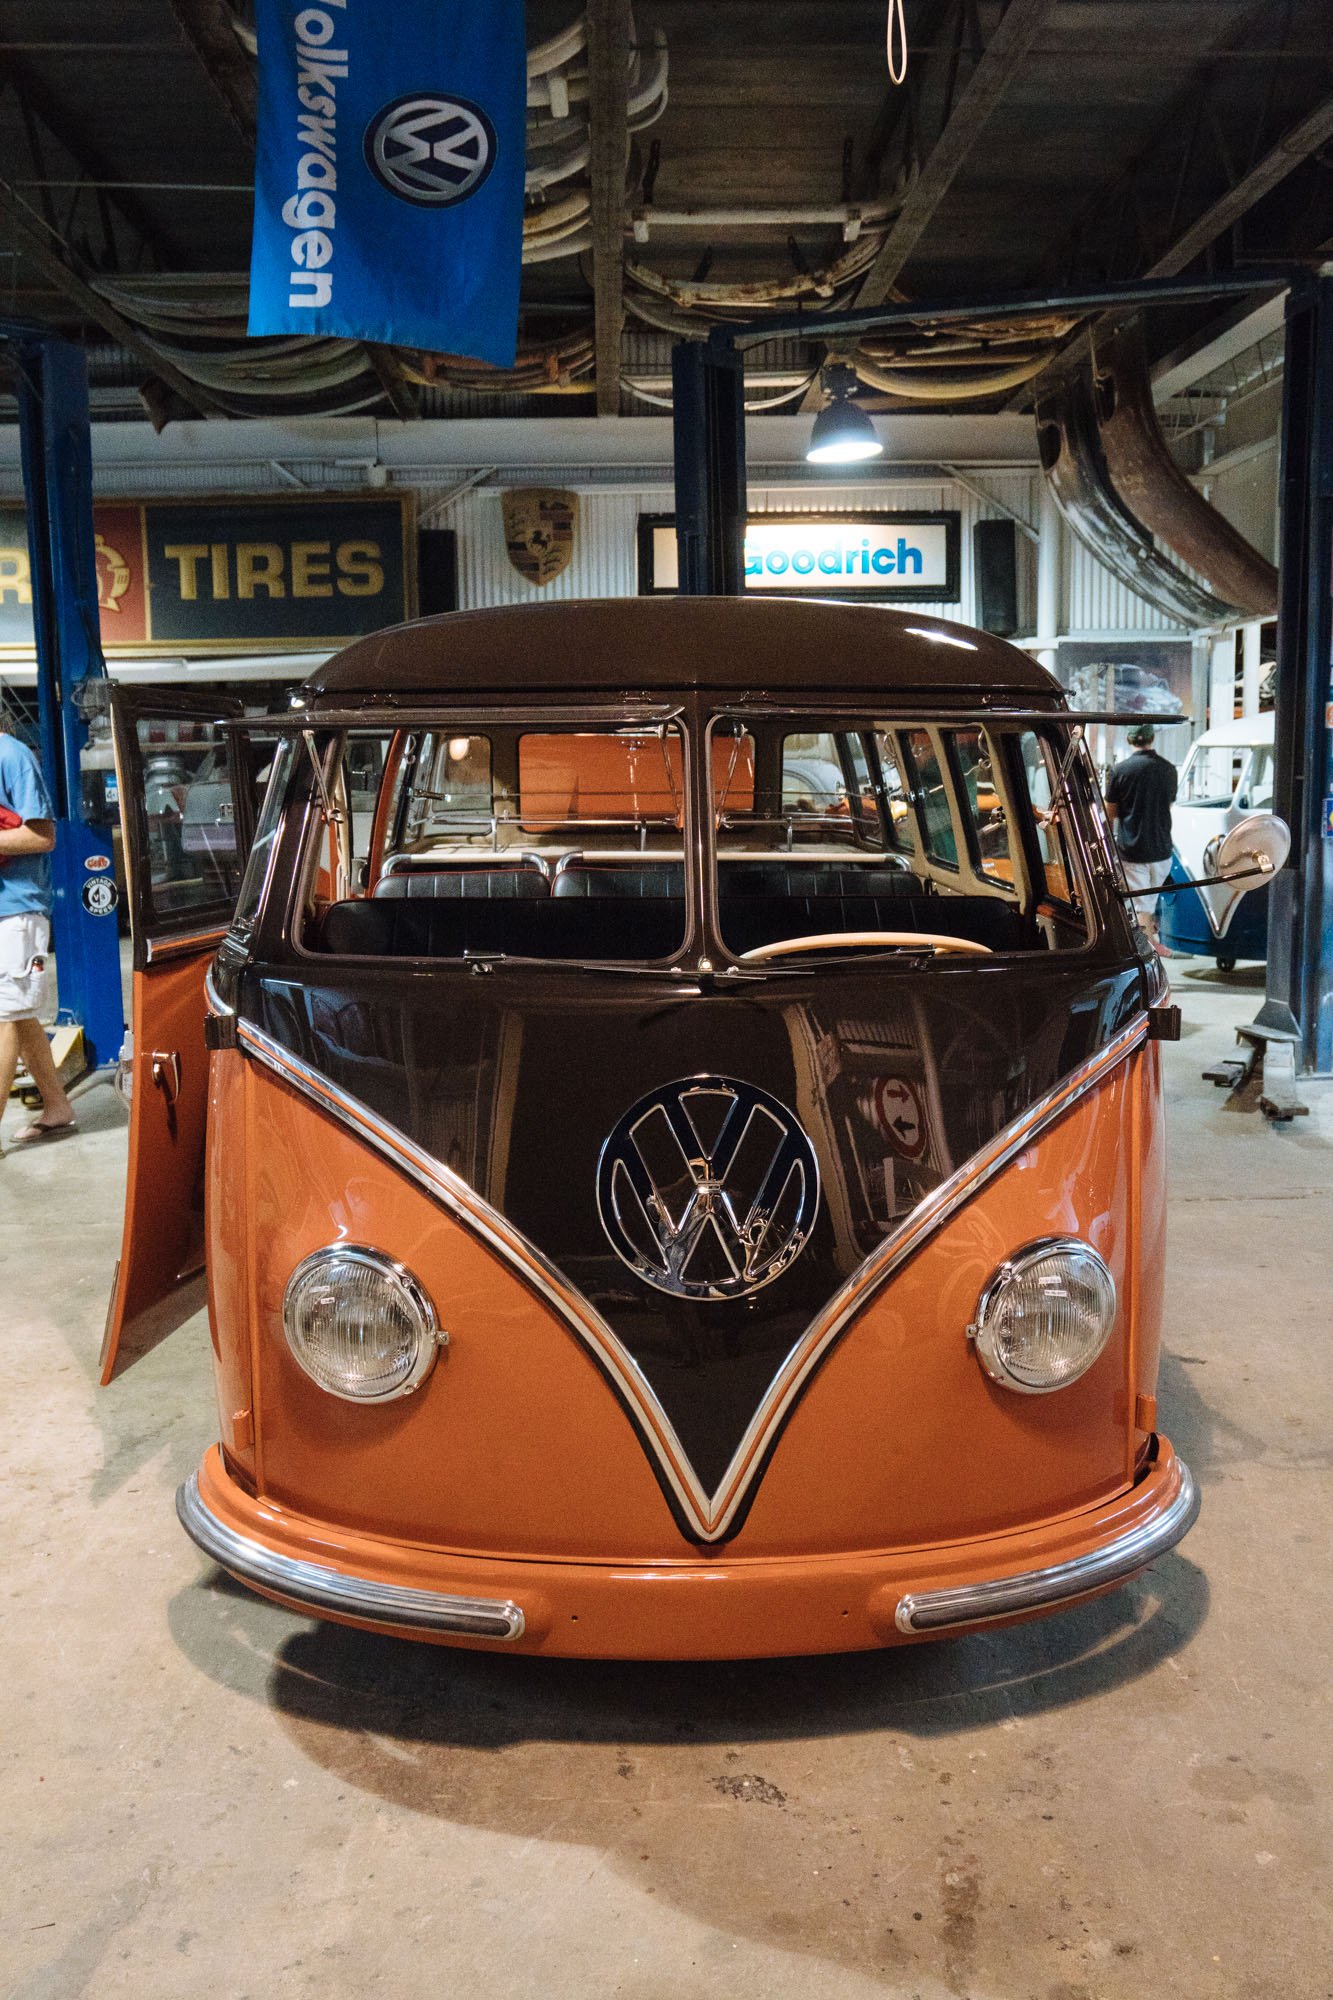
Last week we went to our first van meet up with Amelia. We finally felt that she was in a state that we were ready to start showing off! The van meet up/open house was at Stratton Motor Sports, arguably one of the best split window VW restoration shops in the world. We've come to befriend the owner/head mechanic/artist over the years when we've been hanging out in Orlando. It was their 3rd annual open house to show off a few (20+) split window and bug projects that they have going on right now. It was fun to take Amelia and hear all the the incredible feedback that we got on our handy work! She cleans up pretty nice doesn't she?!
Alright guys! More to follow next week!
MAK