Camping Coffee: Gear & Recipes
Today we’re talking camp coffee brewers. The idea here isn’t to declare one brewer as better than the others, but to figure out which of these eight brewers will be best for YOU and YOUR needs when you head out camping!
All eight brewers we tested have at least a 4-star rating on REI’s website AND we’re under $50 dollars.
Being we live in our truck, and there is no reason for us to have nine different coffee brewers we’re going to be giving them away to you all! Watch the video to the end to see how to enter for a chance to win one of the brewers we tested. After the cliff notes on each brewer, we have a section dedicated in this post to the brewing recipes we used during our weeks of testing!
If you’re interested in getting some stellar coffee for a deal check out our favorite roaster, PERC!
You can get 15% off your order at PERC with the code: BoundForNowhere15
Though this blog post was made in partnership with REI, the opinions are entirely our own.
Please note: The links provided in this blog post are affiliate links. If you end up purchasing some of these pieces of gear we get a very small portion of the sales. Thank you as always for supporting us and our life on the road, it gives us the opportunity to share so extensively with you all!
Daily Grind
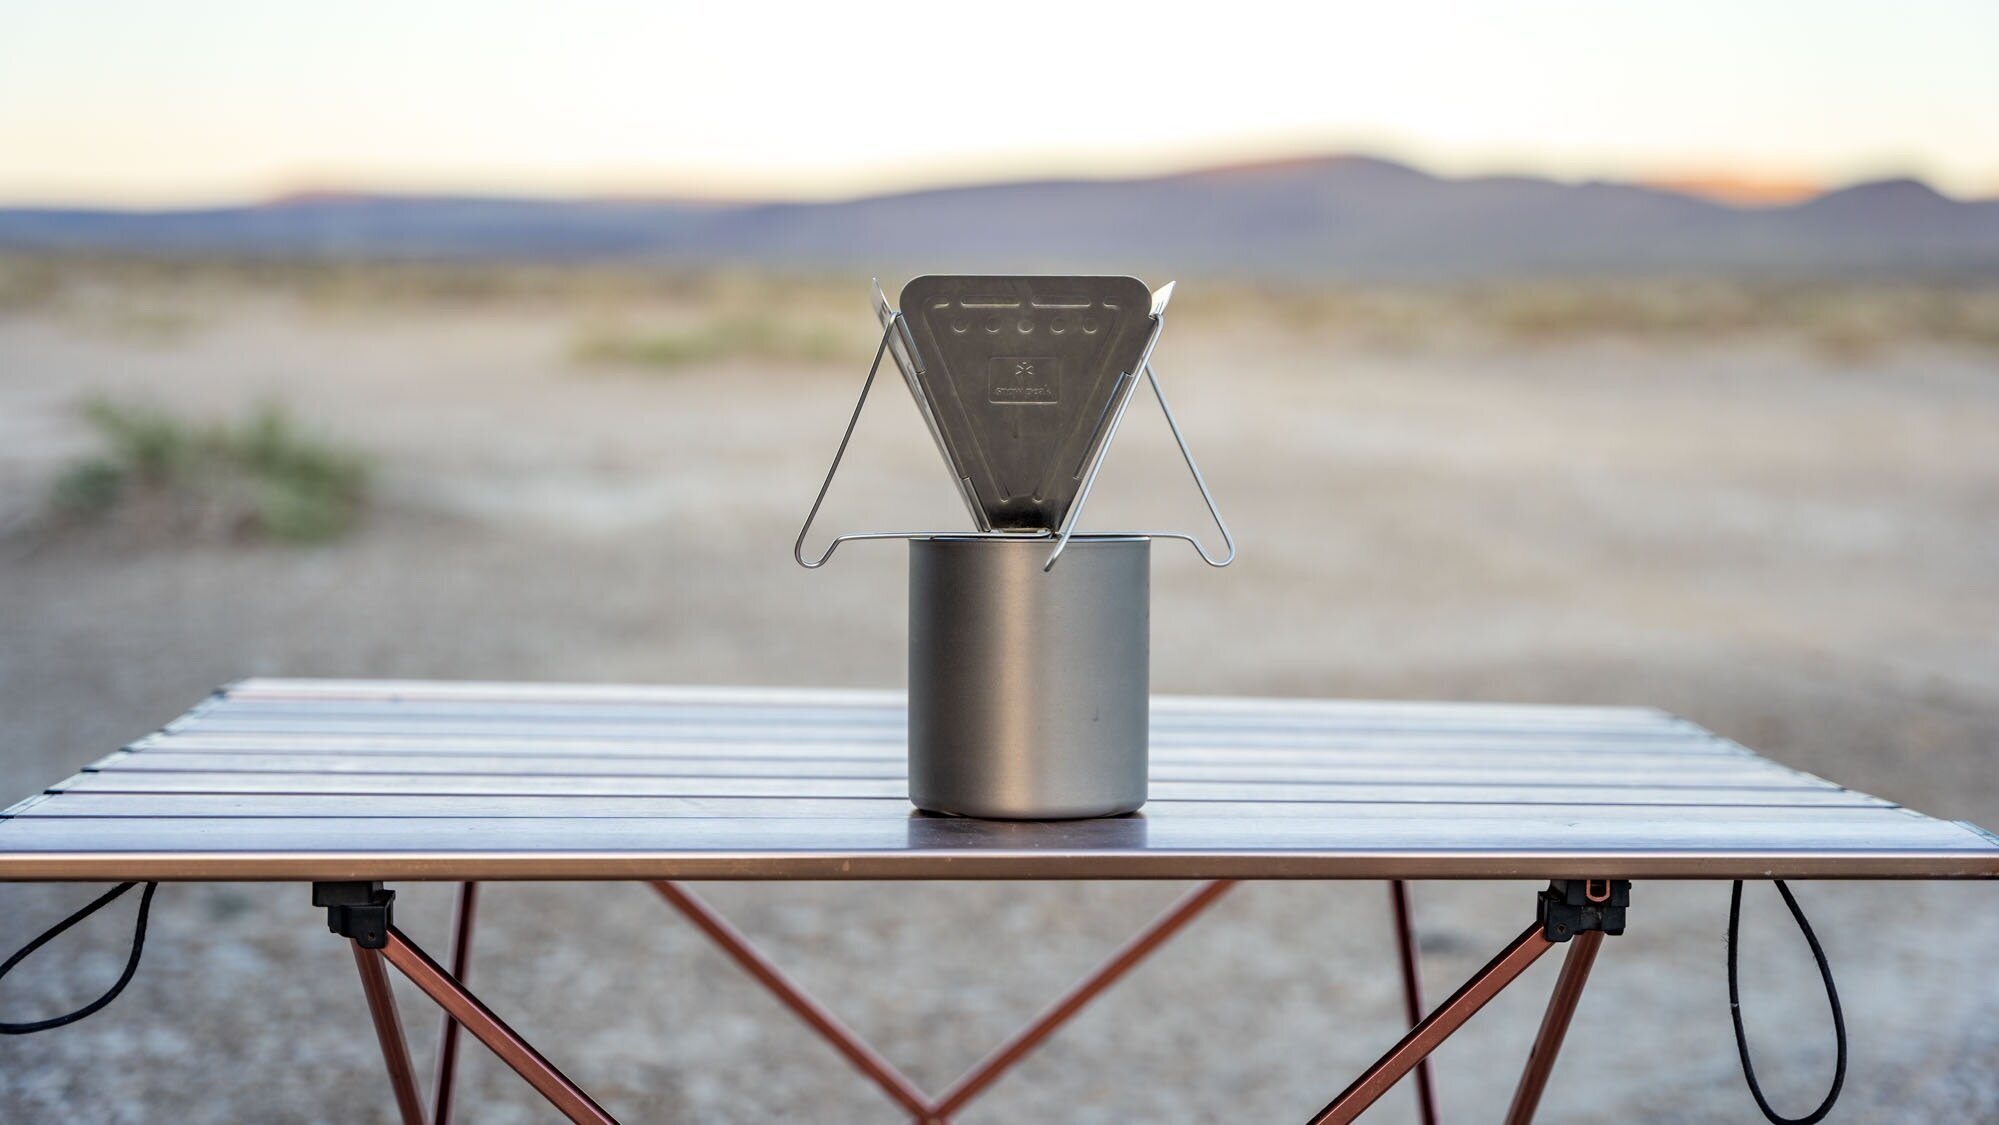
Before we talk about all the different brewers I wanted to share how we make our coffee every day. We use the Snow Peak Folding Pour-Over as our daily coffee solution. In addition to the Snow Peak, we use a Timemore scale, 1Zpresso grinder, and Hario paper filters.
For the actual brewing process, we use the “4:6 Method”, if you’re not familiar, it’s a method intended to be used with a Hario V60, but we find that it works pretty well for the Snow Peak Pour-Over too.
We ended up with this coffee setup after many different iterations. We’ve had a french press, Aeropress, a Clever Dripper, and a few different pour-overs but here we are with the Snow Peak and we LOVE it!
French Presses
Snow Peak French Press
Snow Peak French Press
4.1/5 Stars, $55.95
This french press is JUST over the $50 dollar mark, BUT it was rated well and offered a little something different so we felt it was worthy of being included.
This is a beautiful little french press that’s extremely light which makes it travel-friendly and it’s well designed. It also produced the most silt-free french press we’ve ever had. Rather than having all-metal filters, there is a white nylon mesh filter that makes the difference.
The Snow Peak French Press was smaller than I thought it would be. Its capacity is 700mL but once you add ground coffee, that number decreases. We found that 600mL of water was maxing it out with 42g of coffee.
We didn’t like that the bottom of the french press was slightly rounded, which makes it wobbly on just about any surface. This french press is the only one we tested that isn’t double-walled which means that you can heat water directly in it to simplify the process, but it also means that it won’t retain heat for as long. Luckily, since it doesn’t have a huge capacity that shouldn’t be too much of an issue.
Of all the french presses, we found ourselves grabbing this one the most. For one or two people, I think it’s a nice french press that’s enjoyable and easy to use. Plus, it makes a good cup of coffee.

GSI French Press
GSI French Press
5/5 Stars, $49.95
The GSI French Press is the largest of the brewers we tested, with a capacity of 1 liter. It’s double-walled, so for larger batches, it’ll keep your coffee warm if you don’t serve it all right away.
It’s just like a normal french press, which means it’s simple to use and makes a good cup of coffee. However, just like with a normal french press, you’ll end up with a lot of silt in the bottom of your cup.
We did find the lid can be confusing. The device will only pour if the lid is pointed in the right direction. The first time I used it I pointed the word “pour” to the spout and spilled coffee everywhere. Turns out, the word “pour” needs to be on the opposite side of the spout.
Overall, it’s a solid french press and I think its biggest strength is its ability to brew large batches. When MAK’s parents were visiting this was the brewer of choice so that we could make enough coffee for everyone quickly and easily.
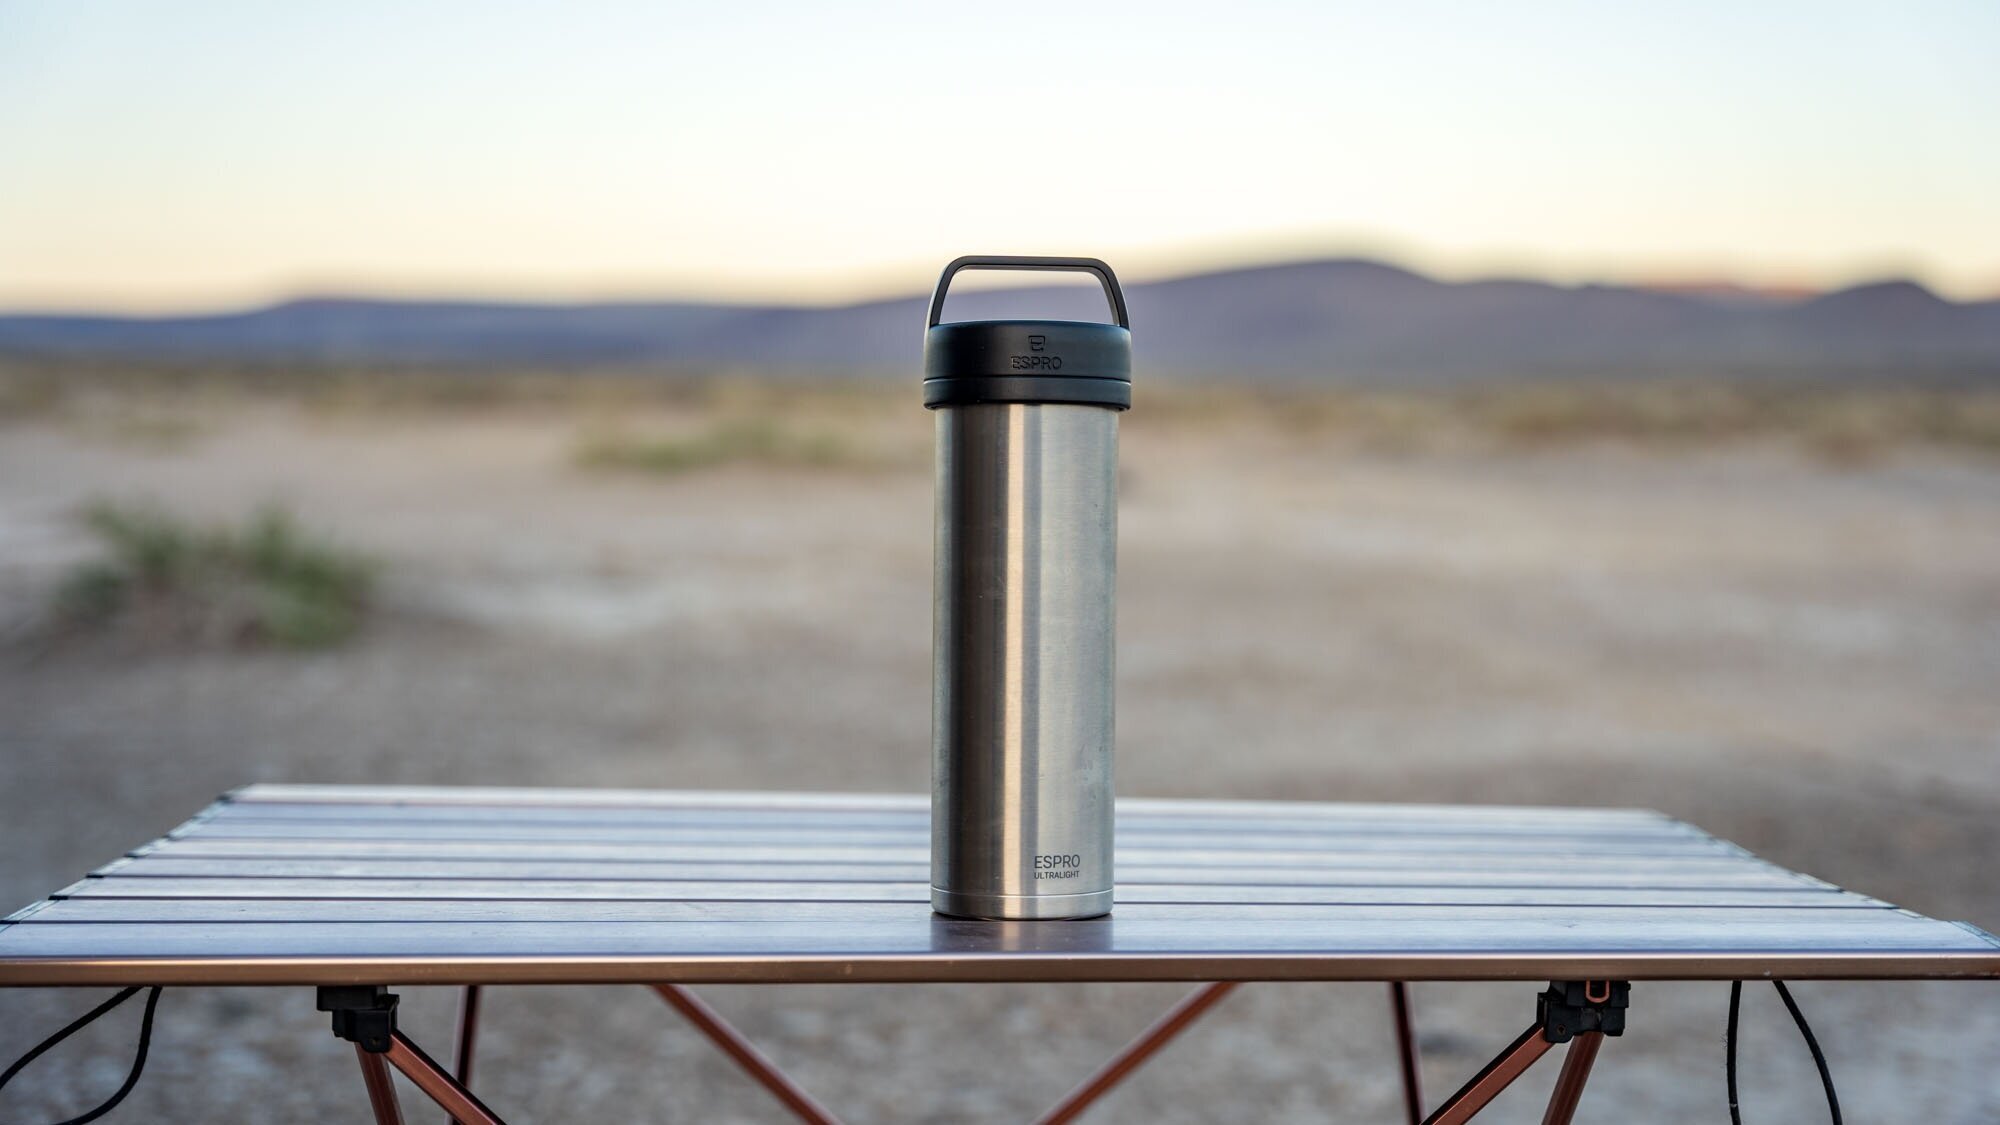
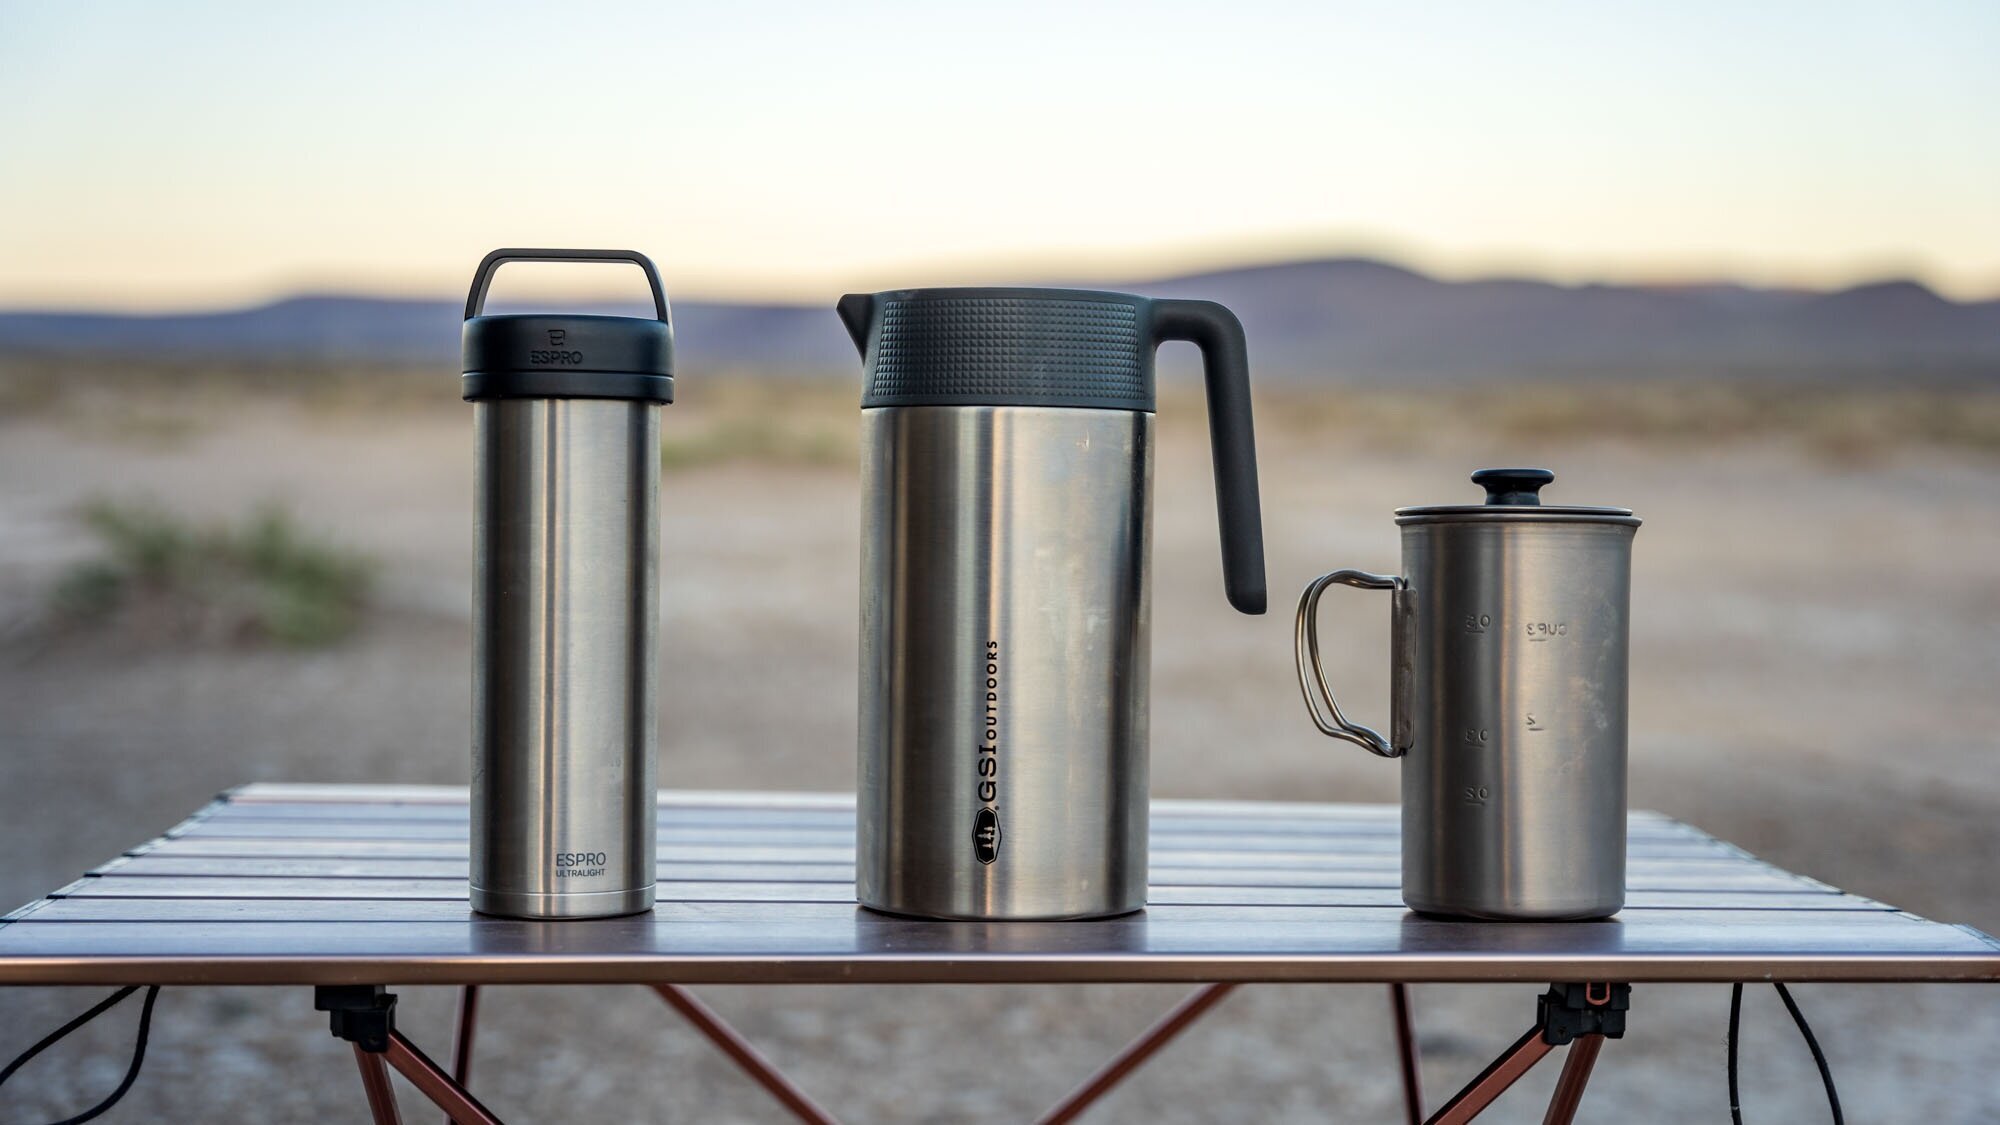
ESPRO Travel Press
ESPRO Ultralight Travel Press Bottle
4.8/5 Stars, $44.95
The ESPRO Travel Press is a really interesting design that has some unique features when compared to the other french presses we tested. First, it’s the only press that also doubles as a drinking vessel. Second, the filters themselves are in the shape of a basket, rather than a disc.
In practice, this press works very well and delivers a pretty clean cup of coffee. We found much less silt in our cup when compared to the GSI French Press.
We did find the drinking lid to be a bit awkward to use because the plunger is right in the center and blocks where your nose would naturally go. This wasn’t a big deal for us because we had cups to pour the coffee into, but if you like the idea of using it as a mug, then it’s something to consider.
This press is only 16oz (~475mL), making it the smallest of the french presses we tested, so we wouldn’t recommend it if brewing for more than one person.
If you’re taking your coffee to go, then this is absolutely the best french press option. It comes with a lid so you don’t have to worry about spills and it’s double-walled to keep your coffee nice and hot.

Aeropress
Aeropress
5/5 Stars, $31.95
This little brewer has a cult following and rightfully so, it does make a great cup of coffee! What I find to be so interesting about the Aeropress is its versatility. You can make hot coffee, iced coffee, and even cold brew.
While the Aeropress itself is small, all the items it comes with make the whole package a bit bulky compared to other devices. This can be mitigated by just bringing the necessary items and storing the filters in a bag.
The Aeropress is enjoyable to use and is the fastest of all the brewers we tried. When you’re done you just press out the filter and coffee right into the trash, making clean up quick and easy.
The Aeropress also produced my favorite cup of coffee during several weeks of testing. We brewed inverted and upright and I found that I preferred brewing upright. We also made a few cups of cold brew that were surprisingly tasty.
One drawback for the Aeropress is that it just doesn’t make a ton of coffee. You can of course brew concentrate and dilute it to make multiple cups, but we preferred the taste of the normally brewed coffee. Since brewing and cleaning is quick, it’s not too much trouble to brew for each cup. Admittedly, I’m going to be sad to say goodbye to this one.

Pour Overs
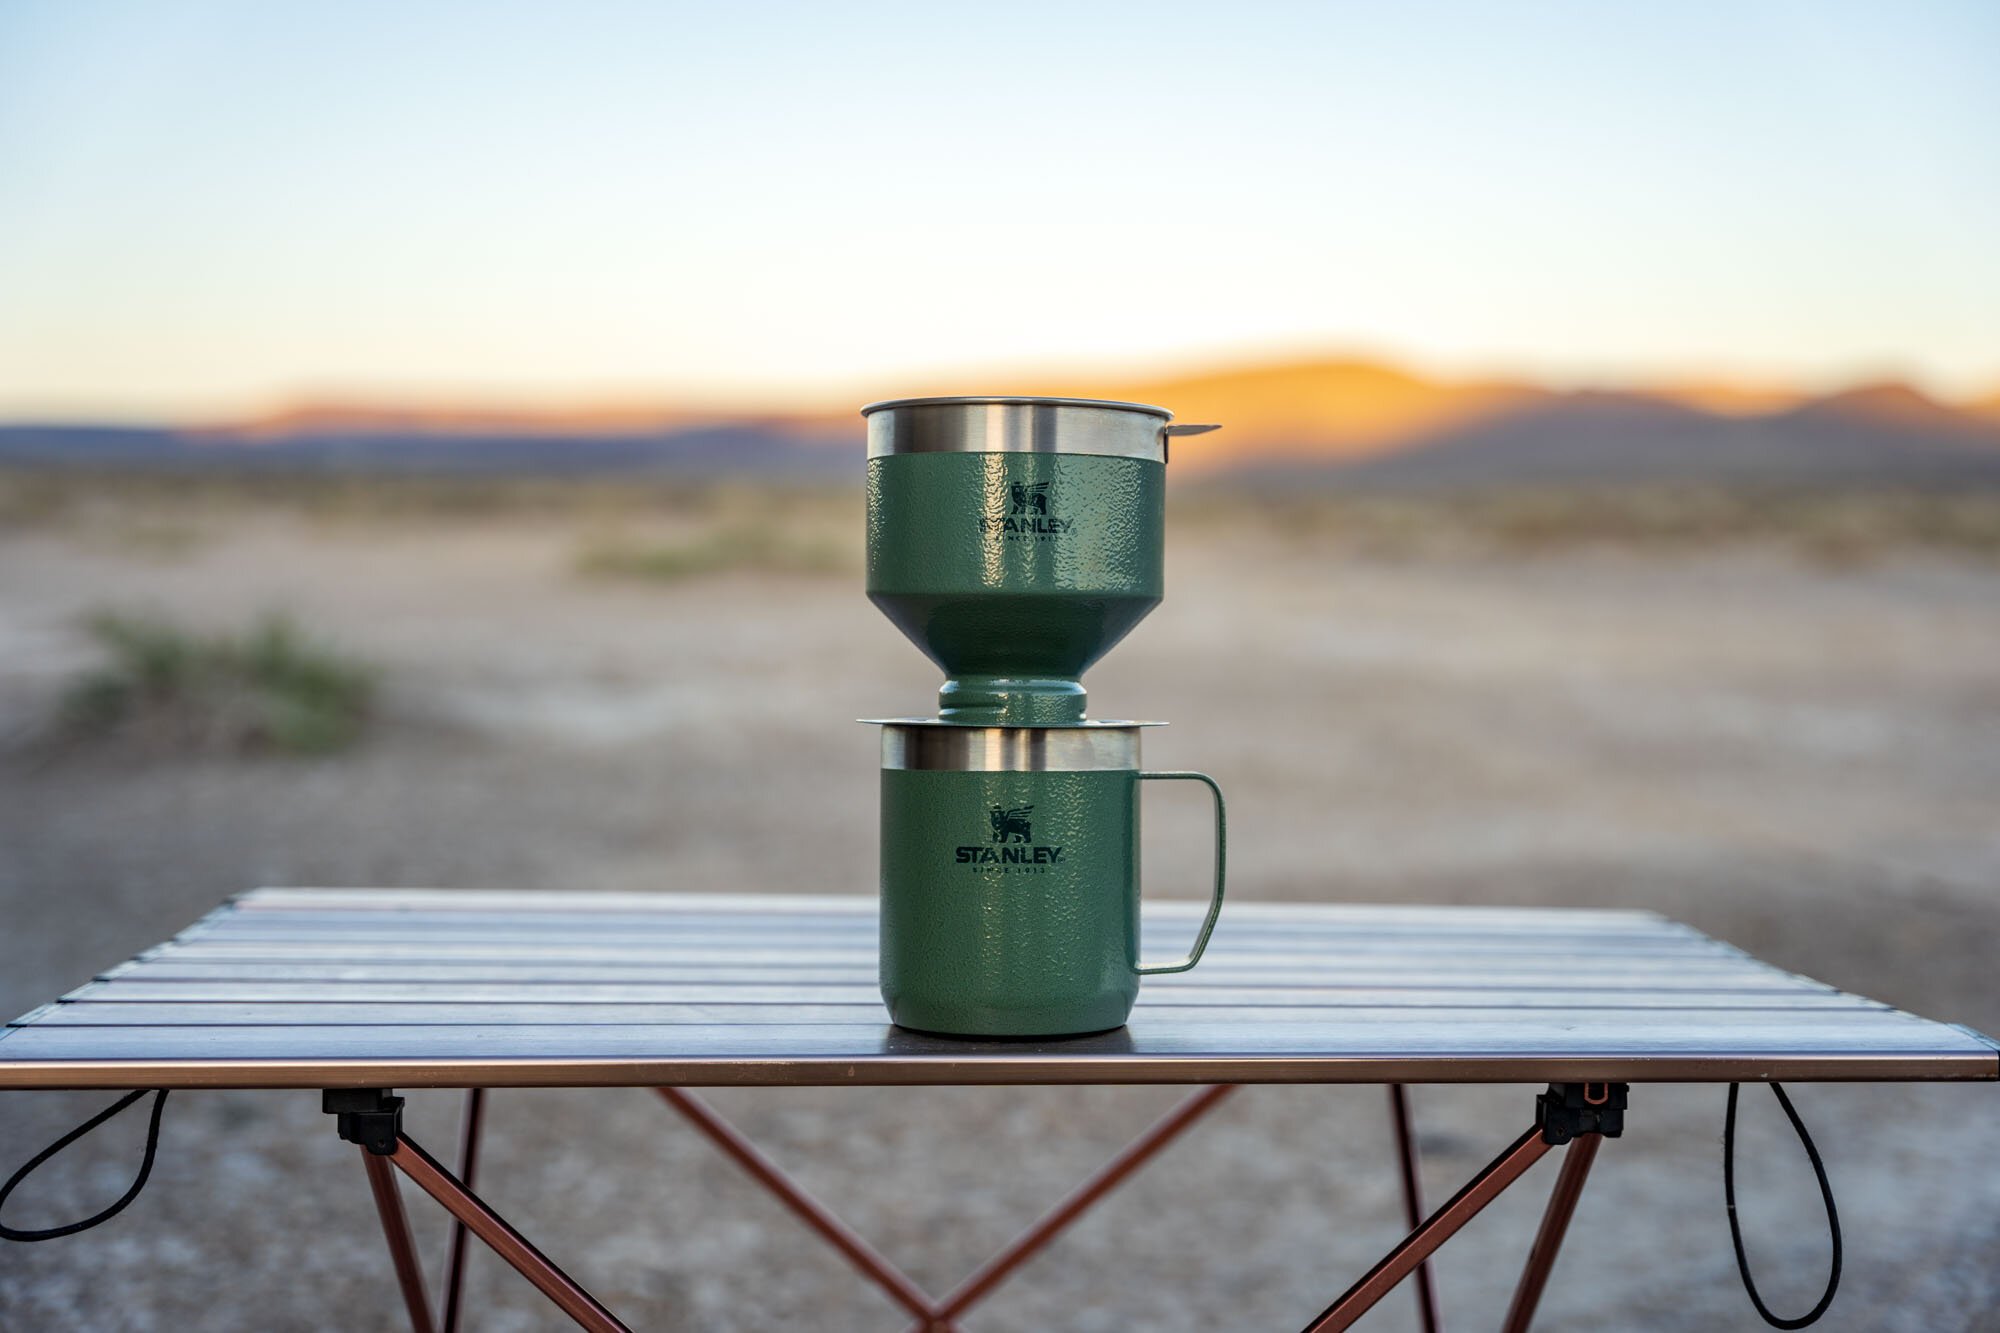
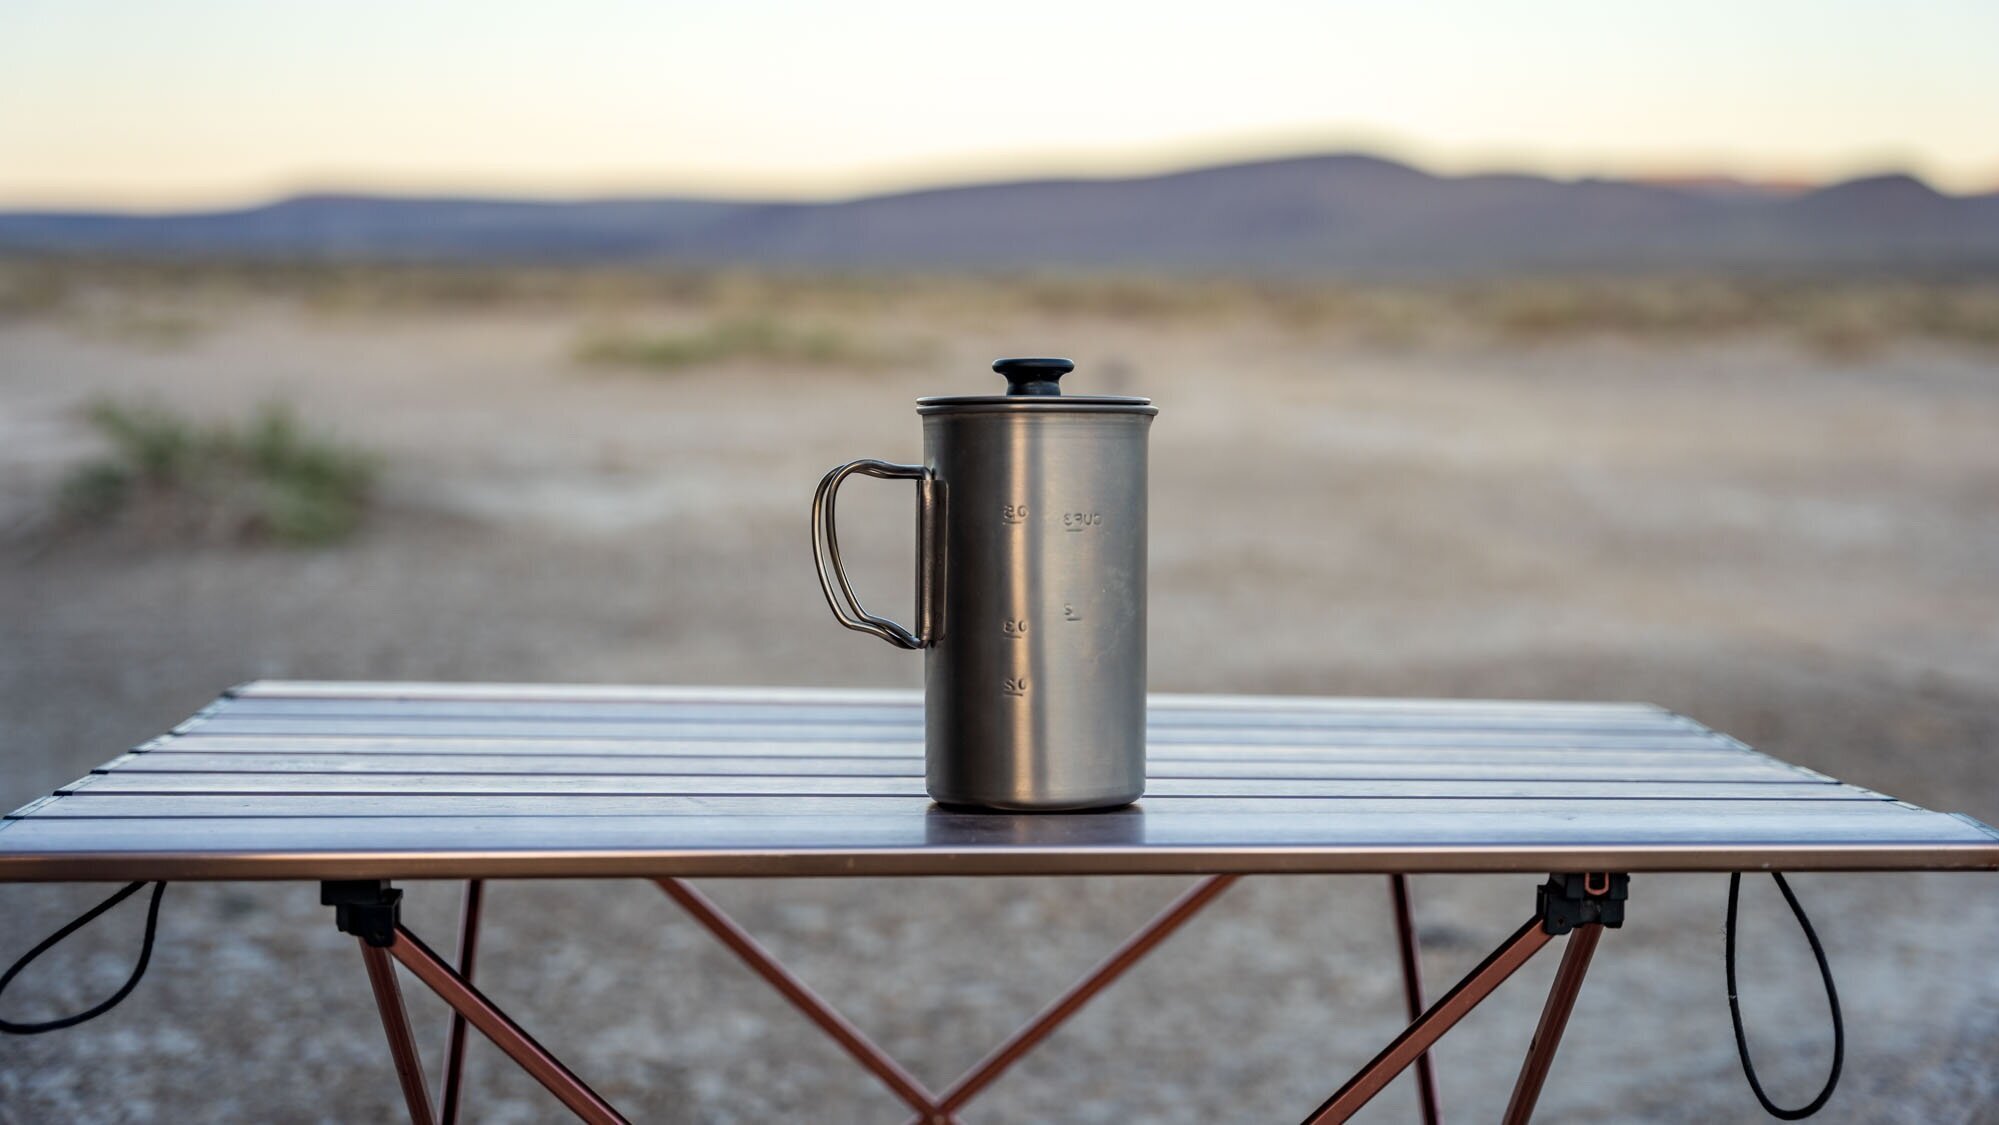
Stanley Pour Over
Stanley Pour Over Set
4.1/5 Stars, $35.00
The Stanley Pour Over Set is a different take on pour overs. It has a cylindrical metal filter in the middle of the brewer and the grounds sit around it. The brewer has a large capacity so you can even brew multiple cups of coffee at once. It also comes with a matching mug, which is a nice touch.
When brewing you want to be sure the water hits the grounds and not the filter as the water could potentially bypass the coffee altogether. During our testing, we brewed single cups, larger batches, and experimented with Stanley’s recommended brewing method and the 4:6 method.
We found that the pour over worked well in all scenarios but we preferred the single cups and the 4:6. Since it uses a reusable metal filter, the coffee is more oily than a paper filter and the coffee does have silt in it.
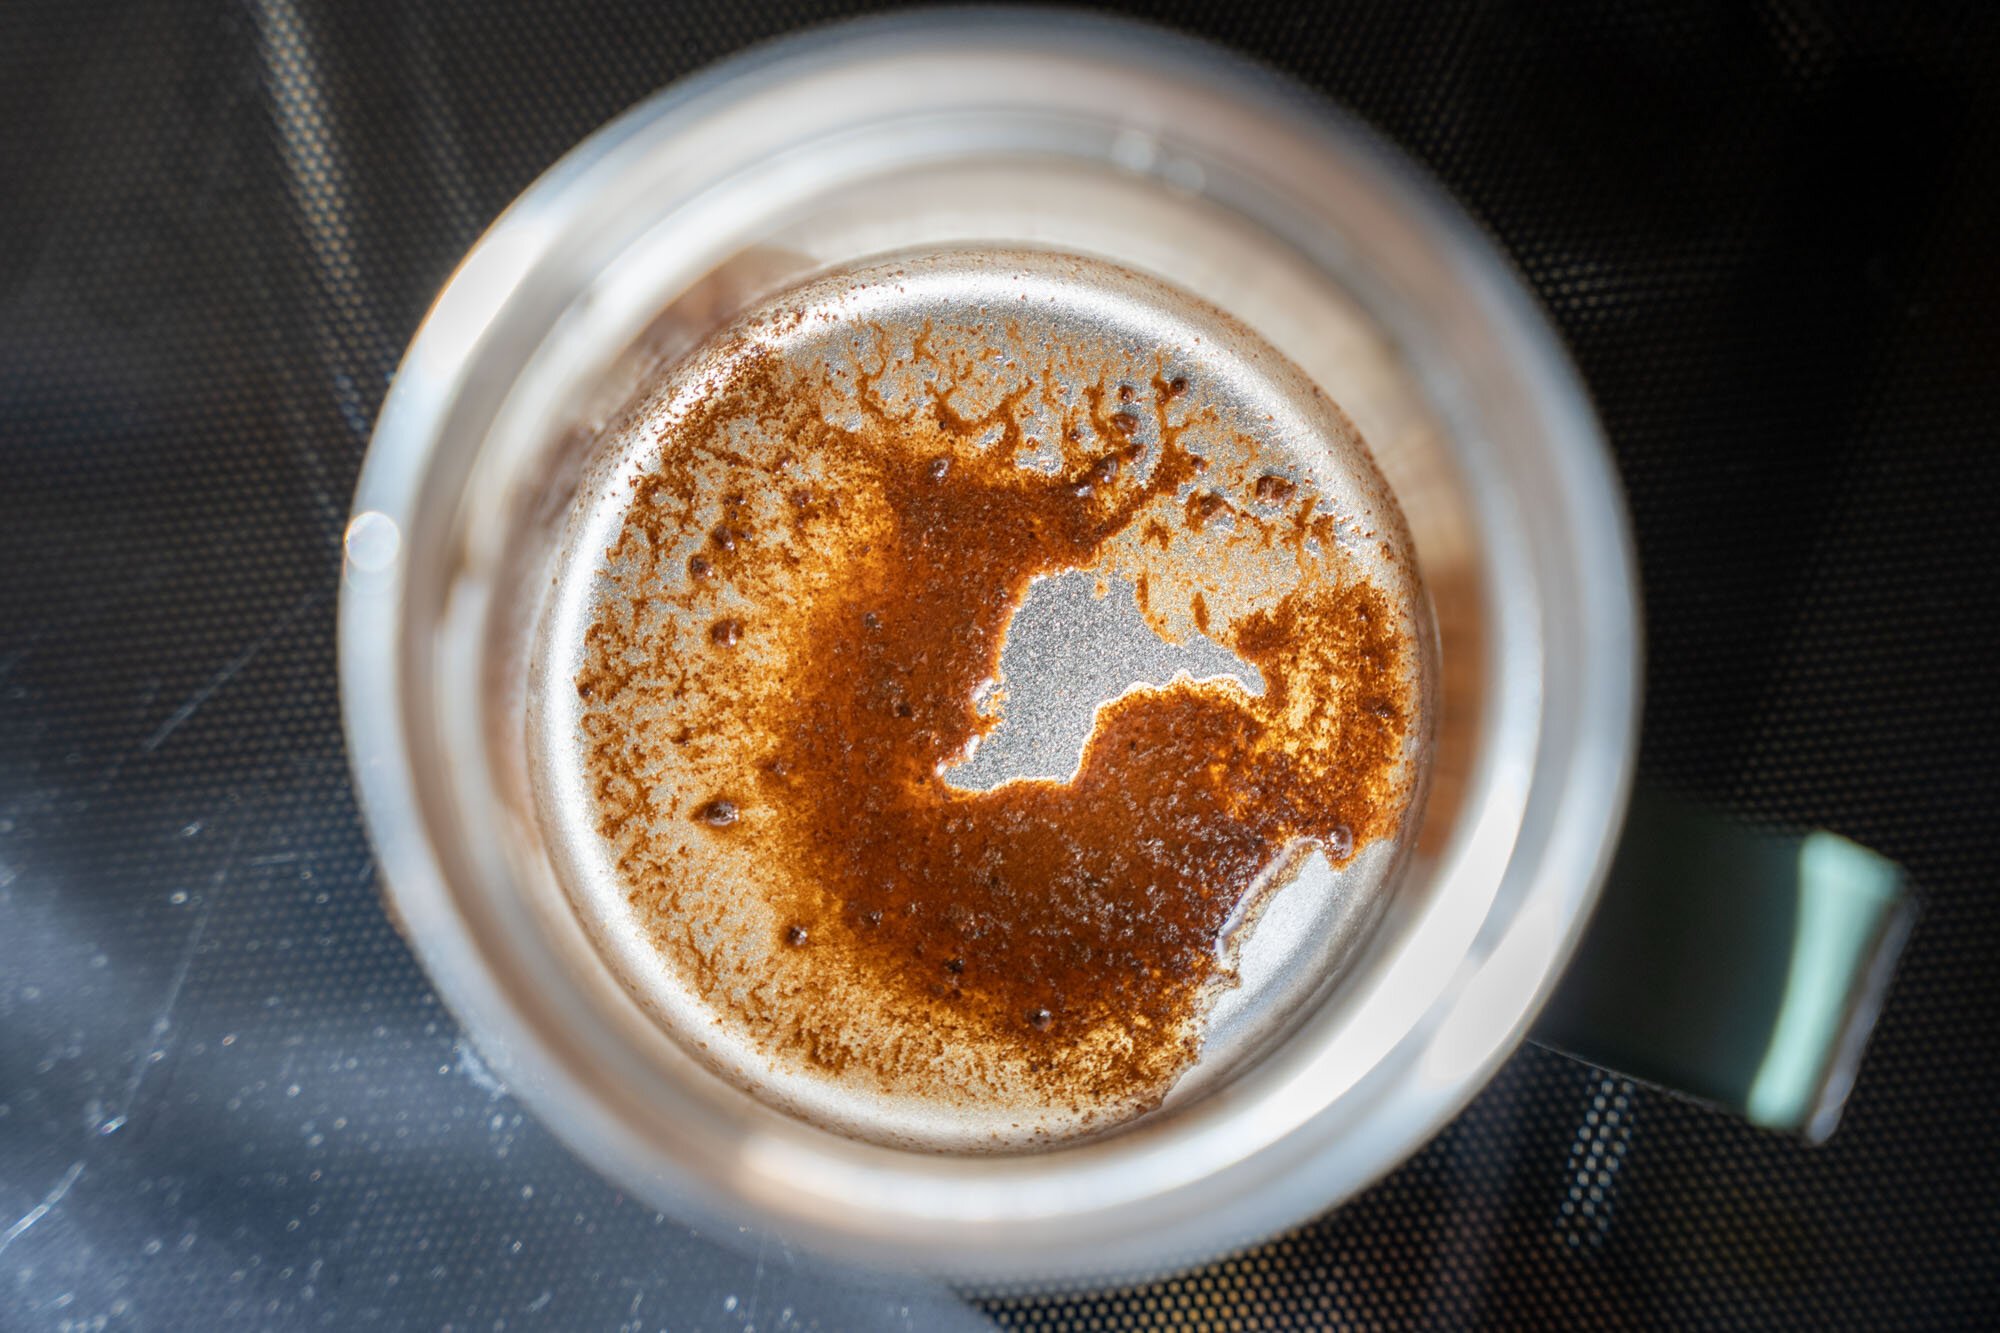
Silty bottom of the cup to give you an idea what it was like after we drank the coffee
Part of what I love about pour overs is that they’re easy to clean. I just pull the filter out, rinse the brewer, and I’m done. Unfortunately, cleaning the Stanley Pour Over is more of a chore. It’s much more like cleaning a french press where you have to get the coffee out and then rinse. It’s a little more work and uses more water. Not a deal-breaker, but something to think about.
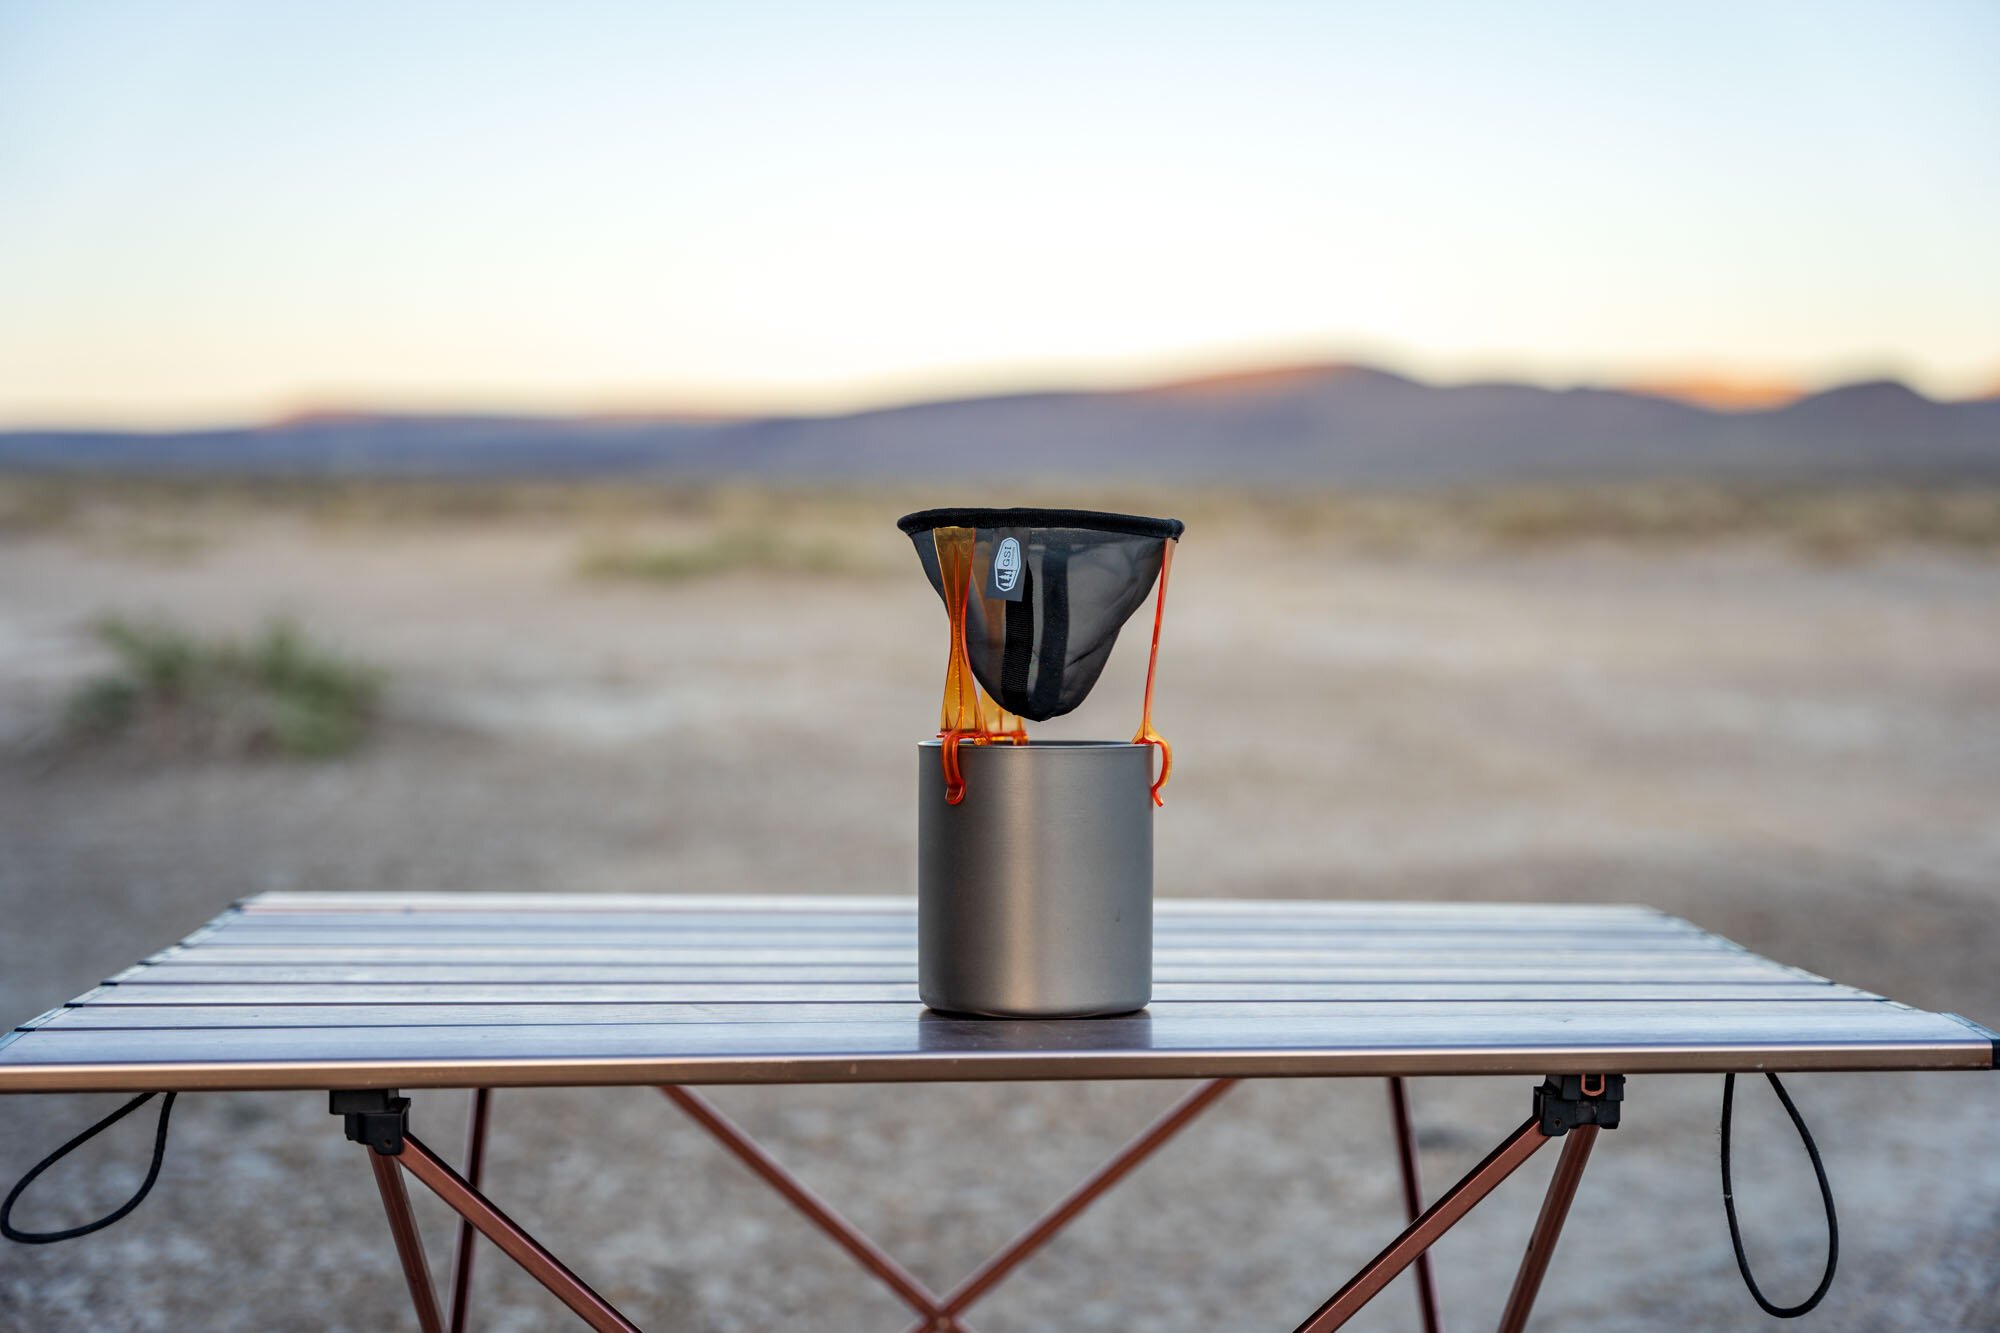
GSI Java Drip
GSI Ultralight Java Drip
4.6/5 Stars, $10.95
We know a lot of people that use the GSI Java Drip and swear by it so we were excited to give it a try. It’s extremely light, it collapses down, and it doesn’t require filters so it’s ultra-portable.
Despite all those things, this was my least favorite brewer to use. I found it to be pretty finicky with the way water is poured in. You have to be careful not to get too close to the edges because it will spill right through the filter and into your cup without making contact with the grounds.
The filter isn’t as fine as the other pour overs which resulted in even more silt than the Snow Peak and ESPRO French presses. In testing, the water drained through this brewer significantly faster than any of the other pour-overs. This resulted in weaker and worse tasting cups of coffee. Overall, it was our least favorite coffee to drink.

Oily surface on the coffee
I know that’s a lot of negative things to say, but hear me out. In hindsight, I don’t know that this brewer belongs in the same category as all the rest. To me, it serves more of the backpacking world than the car camping world.
If we were out for a week or more backpacking, I think that’s where this brewer would shine. It’ll be better than instant and produce less trash than a pour over kit. So just keep that in mind. It’s not that we hate it, I just think we put it in the wrong category.
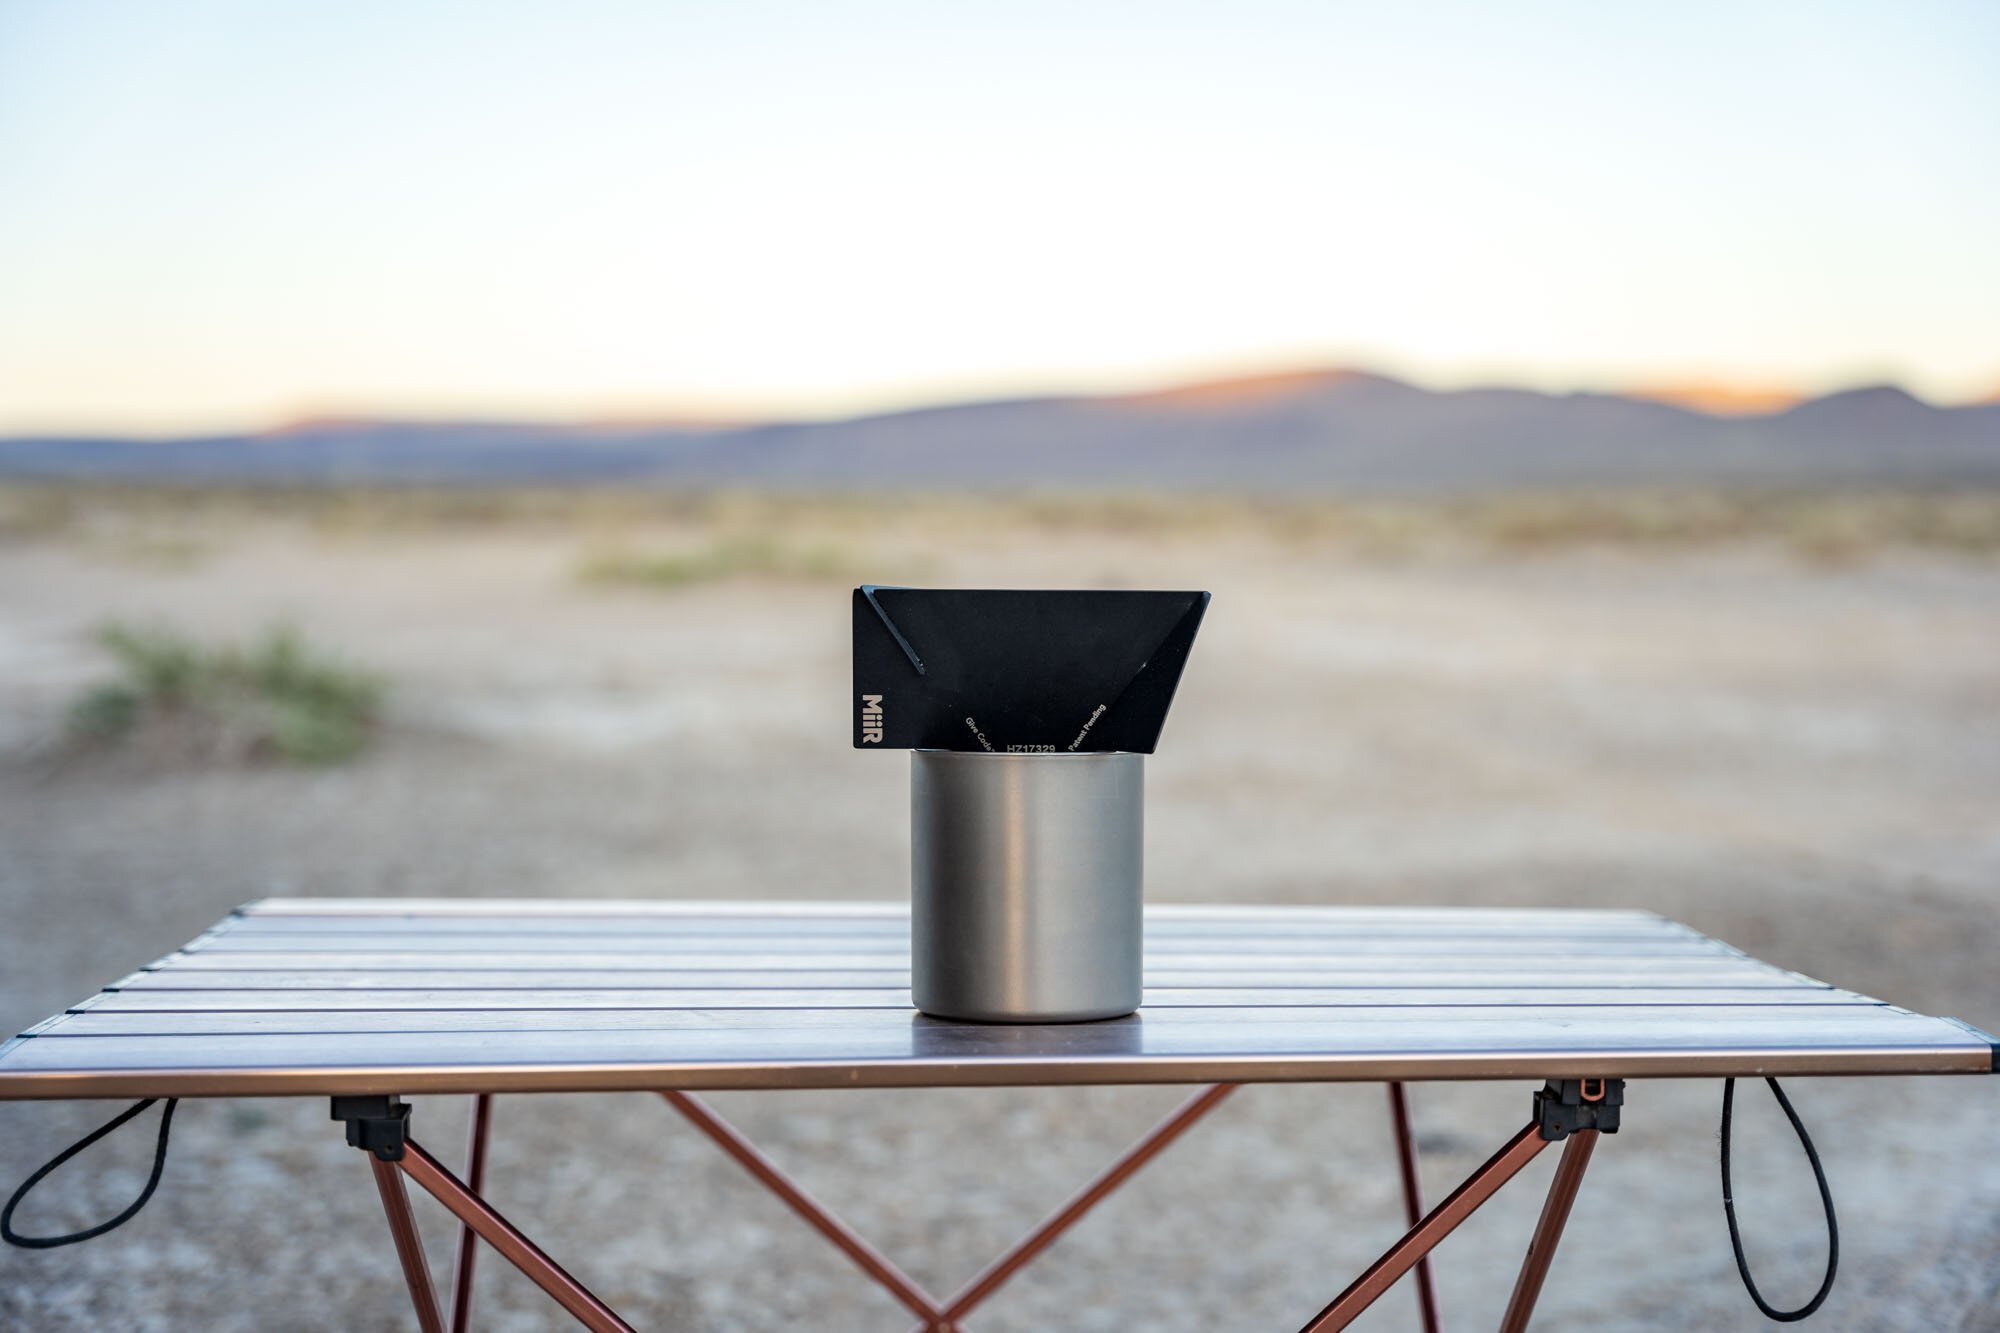
Miir Pourigami
MiiR Pourigami
4.7/5 Stars, $29.95
The MiiR Pourigami is very cleverly designed. It comes in three separate pieces that nest together to become your pour over. When not in use they lie flat and fit in a handy storage pouch that can hold two Pourigamis.
The Pouragami brews like a normal pour over and we found it worked well with #1 and #2 filters. (MiiR also makes their own filters) Even though it can hold a #2 filter, I wouldn’t use it for making large batches of coffee since the walls of the Pourigami aren’t very tall. I think that’s fine since storing two Pourigamis takes up almost the same amount of space as one.
The Pourigami produces tasty coffee and is easy to clean since all you do is remove the filter. I really enjoyed using the Pourigami and this will be another one that I’m sad to see go. In fact, if we didn’t already own the Snow Peak Pour Over, we’d probably get two of these.

Snow Peak Pour Over
Snow Peak Folding Pour Over
4/5 Stars, $29.95
Yes, the Snow Peak Folding Pour Over again! As mentioned, this is our own personal pour over but it meets the criteria so we thought it’d be good to compare it. We like that it folds to be nearly flat for easy storage, and cleaning is a breeze by just pulling the filter out.
It makes a great cup of coffee and is easy to use for anyone familiar with brewing with pour overs. The Snow Peak can accommodate #2 filters and is larger than the Pourigami so if you’re brewing large amounts of coffee it can handle that. I’ve noticed many people in reviews complain about it collapsing while brewing or sliding off the cup but in the hundreds of cups of coffee I’ve brewed with it, that’s never happened to me. It’s also important to use the right filters for both the Snow Peak and the MiiR pour overs. They have large openings just like a Hario V60 and I’ve found that the Hario filters work very well.
I’d be hard-pressed (I feel like there might be a coffee pun in there) to pick a favorite between the Pourigami and this Folding Pour Over. I prefer the design of the Pourigami, but I do like the extra capacity of the Folding Pour Over. In the end, I think it comes down to personal needs.

Brewing recipes
Our Everyday Coffee
4:6 Method (350mL/11.83oz)
23g coffee
Grind setting 27 on 1Zpresso Jx (Medium Coarse)
Presoak Hario paper filter with hot water and dump that water from your cup
Add ground coffee into the filter/brewer
At 0:00 - 50g water (bloom)
At 0:45 - 90g water (140g total)
At 1:30 - 70g water (210g total)
At 2:15 - 70g water (280g total)
At 3:00 - 70g water (350g total)
*I like to swirl or stir the coffee after some pours to help level out the bed of coffee
Other Recipes
Aeropress (300mL/10.14oz)
19g coffee
Grind setting 15 on 1Zpresso Jx (Medium Fine)
Add ground coffee to upright Aeropress (no need to presoak filter)
Add 300g of water to Aeropress. This pushes it to the limit of its capacity so you may need to stir it to bring down some foam before adding more water.
Stir grounds and water briefly
Seal with the plunger for 2 minutes (do not press!)
At 2:00 give it a swirl and then let it sit for 30 more seconds
After 30 seconds, press the Aeropress plunger
Cold Brew Aeropress (250mL/8.45oz)
24g coffee
Grind setting 12 on 1Zpresso Jx (Fine)
Add ground coffee to Aeropress (no need to presoak filter)
Add 100g of room temperature water to upright Aeropress
Stir grounds and water vigorously for 60 seconds
Press the Aeropress
Add 150g of water to dilute
Add ice as desired

The end
That covers all eight brewers! It was certainly an enlightening experience for us and we had a blast trying out all the different possibilities.
We hope you found this video & blog post helpful in your journey to find the perfect camping coffee maker for you. If you already have one that you know and love, we’d love to hear what it is in the comments! Thank you so much, and we’ll see YOU down the road! - Owen